
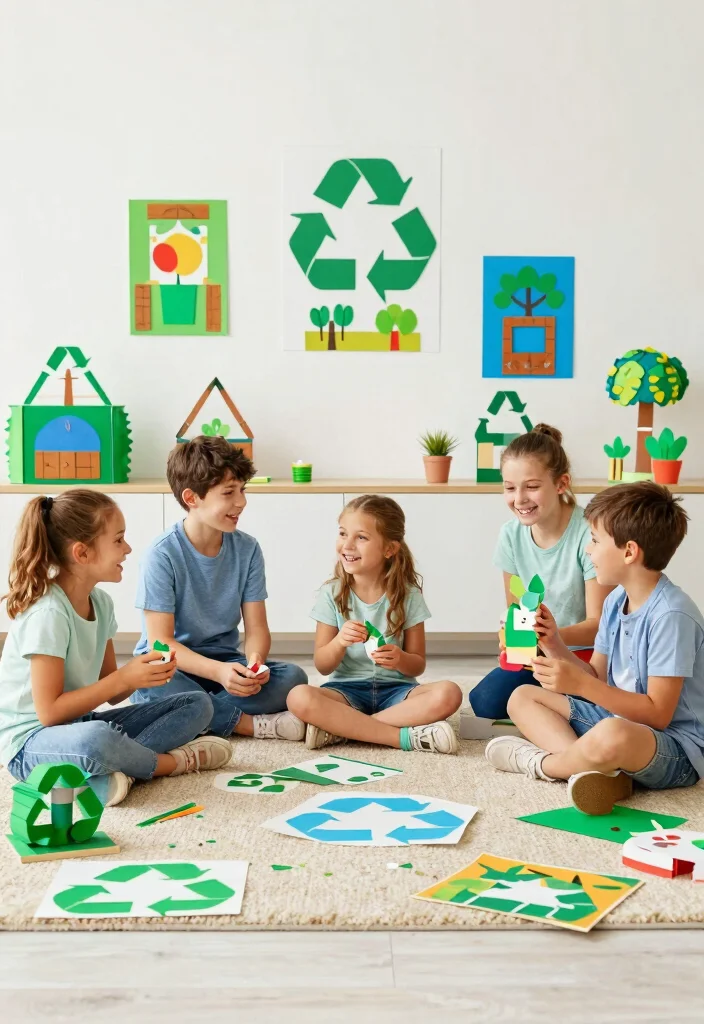
In a world where waste is a growing concern, getting kids involved in eco-friendly projects can be a game changer. With the rise of environmental awareness, many parents are looking for creative ways to teach their children about recycling and sustainability. That’s why I put together this post on 15 simple kids recycling ideas DIY using everyday waste materials. It’s all about turning trash into treasure and sparking creativity in the hearts of our little ones.
If you’re a parent, teacher, or caregiver looking for fun and engaging activities, you’ll find this guide invaluable. Kids love to create, and there’s nothing more rewarding than making art from items that would otherwise end up in the landfill. These projects not only promote creativity but also instill a sense of responsibility towards the environment. The 15 ideas you’ll discover here are easy to follow, require minimal materials, and — best of all — can be done at home or in the classroom.
Get ready to dive into a world of imaginative possibilities as we explore how to transform everyday waste into delightful crafts. You’ll have fun, bond with your kids, and contribute to a greener planet at the same time. Let’s get started on these inspiring kids recycling ideas DIY!
Key Takeaways
– These 15 DIY projects are perfect for engaging kids in eco-friendly crafts, turning waste into art and teaching them about recycling.
– Each project uses common household materials, making it easy and cost-effective to get started right away.
– These creative recycling ideas help develop children’s fine motor skills and encourage their artistic expression.
– The projects can be done individually or as a group, making them ideal for family activities or classroom settings.
– Completing these crafts not only results in beautiful creations but also promotes environmental awareness among young minds.
How To Choose The Best Kids Recycling Ideas DIY
To make your crafting journey smooth and enjoyable, here are some key points to consider when selecting the best recycling ideas for kids:
1. Age Appropriateness
Choose projects that match the age and skill level of the children involved. Younger kids may need simpler tasks, while older children can tackle more complex creations.
2. Available Materials
Check what materials you have on hand before selecting a project. This will help minimize the need for extra shopping and keep costs low.
3. Time Commitment
Be mindful of the time you have available. Some projects might take just a few minutes, while others may require more time. Plan accordingly!
4. Interest and Engagement
Pick projects that capture the interests of the kids. Whether they like animals, nature, or abstract art, ensuring the craft aligns with their passions will keep them engaged and excited.
5. Educational Value
Focus on projects that teach kids about recycling and sustainability. This adds an educational element to the fun and helps them learn valuable lessons.
Pro Tip: Always have a few extra supplies on hand for spontaneous creative bursts! Kids can surprise you with their ideas, and having materials ready encourages their imagination.
Recommended Products

ALL INCLUSIVE CRAFT KIT: Looking for a fun one-stop, ready-for-anything craft supply bundle that covers all the basics? You found it!

♻️【3 Eco Crafts in 1 Kit】Explore sustainability through hands-on fun with our flower press & paper making kit, make your own recycled paper, create pressed flower art, and craft unique paper beads using eco-conscious techniques.

Package Includes: 18 pack learn to recycle trash can crafts including 18 cardboard bins in six distinct colors corresponding to different waste categories, 18 sheets stickers representing specific items for each category,fun learn to recycling lesson kit
How Do Kids Recycling Projects Work?
Kids recycling projects work by transforming everyday items into fun and functional art pieces. The process is simple and encourages creativity, resourcefulness, and teamwork. Here’s a quick overview of how these projects come together:
1. Gather Materials
Start by collecting waste materials such as cardboard boxes, plastic bottles, or old magazines. This step is great for kids to learn about what can be reused.
2. Choose a Project
Select one of the recycling ideas from this guide based on the materials you have and the interests of the kids.
3. Plan and Design
Encourage kids to sketch their ideas or discuss what they want to create. This part fosters brainstorming and critical thinking.
4. Create
Let the kids get hands-on! Provide them with glue, scissors, and any additional tools needed. Supervise as they bring their designs to life.
5. Showcase Their Work
Once completed, encourage kids to display their crafts. This adds a sense of accomplishment and pride in their efforts.
Best for: Ideal for classrooms, home activities, or community events focused on teaching sustainability.
Recommended Products

Package Included 6 Creative Craft Scissors; Each Pair Of Scissors Has A Unique Pattern.
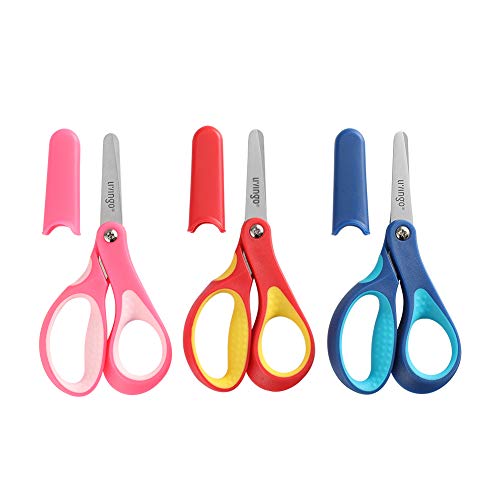
Safety Blunt Blades with Protective Cover: These kids scissors made of extra strong, durable, anti-rust and wear-resistant stainless steel flat-ground blades. Smooth blades offer good performance for cutting paper. And blunt design, includes a plastic sheath to keep the blade covered for safe storage and transportation.

Extra strong and durable stainless steel safety blades with rounded safety tips.
How To Use Everyday Waste Materials for Kids Crafts
Using everyday waste materials for kids’ crafts is not only fun but also a fantastic way to promote creativity and environmental consciousness. Here’s how to get started:
Tools You’ll Need:
– Scissors
– Glue or tape
– Paints or markers
– Old newspapers or magazines
– Any other craft supplies like yarn or beads
Step 1: Collect Waste Materials
Gather a variety of materials such as cardboard, plastic containers, and fabric scraps. Make it a family activity by letting the kids help collect items.
Step 2: Choose Your Project
Select from any of the 15 ideas provided in this guide. Tailor the selection based on the materials you have and the age of the kids involved.
Step 3: Prepare Your Workspace
Set up a designated crafting area with all tools and materials neatly organized. This helps keep things tidy and makes it easier for kids to focus.
Step 4: Follow Instructions
Guide the kids through the steps of their chosen project. Encourage them to express their ideas and make adjustments as they work.
Step 5: Clean Up Together
Once the projects are complete, involve the kids in cleaning up. This teaches responsibility and the importance of keeping our environment clean.
⏱ Time: Most projects take about 30 minutes to an hour to complete.
💡 Tip: Have snacks ready for a little break! A small treat can keep the energy high during crafting time.
Engaging kids in recycling crafts is a wonderful way to teach them environmental stewardship while fostering creativity. With these ideas, you’re not only crafting but also building a better future for our planet. Get started today and make a positive impact!
Recommended Products

Package Includes: 18 pack learn to recycle trash can crafts including 18 cardboard bins in six distinct colors corresponding to different waste categories, 18 sheets stickers representing specific items for each category,fun learn to recycling lesson kit


1. Bottle Cap Magnets
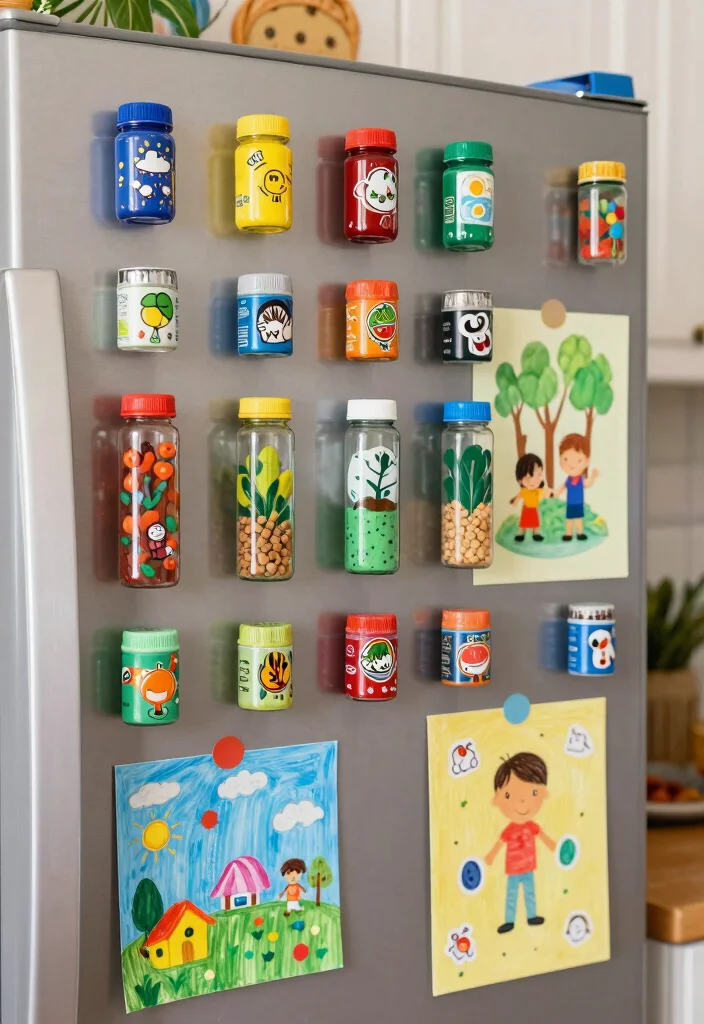
Have some bottle caps lying around? Turn them into vibrant magnets that add a splash of fun to your fridge! This craft is a fantastic way to engage younger kids, teaching them about recycling while they create something useful. Just gather colorful bottle caps, some magnets, and a bit of glue to get started. Let the kids unleash their creativity by decorating the caps with paint, stickers, or even images cut from old magazines.
Begin by cleaning the bottle caps to prepare them for decoration. After the caps are ready, let the kids paint or embellish them as they like. Once the decorations dry, glue a magnet inside each cap, and allow everything to set. Finally, stick them on the fridge or a magnetic board for a cheerful display!
Key materials for your craft:
– Colorful bottle caps
– Small round magnets
– Glue for secure attachment
– Paint or fun stickers for decoration
These playful magnets not only brighten your kitchen but also give kids a sense of pride in their creative recycling project.
Recommended Products

【10 Assorted Colors Included】 This package includes 100 flattened metal bottle caps in 10 vibrant colors: black, white, gold, silver, yellow, blue, green, pink, purple, and red. You will receive 10 bottle caps of each color, providing plenty of options for your creative projects.

The package comes in 200pcs plastic bottle caps, whose inner diameter about 30mm, outer diameter about 32mm and height about 17mm, with mixed color

Size: 1 inch. Quantity: 100pcs Bottle Caps. No include Stickers.
2. Toilet Paper Roll Animals

Empty toilet paper rolls can be transformed into adorable animal crafts! Kids can get creative and turn these simple tubes into lions, elephants, and more. This fun activity not only sparks their imagination but also teaches them about repurposing materials. With just some paint, construction paper, and a few household items, they can create whimsical creatures.
Start by having the kids paint the rolls in colors that match their favorite animals. Once the paint dries, they can cut out ears, tails, and other features from construction paper. By gluing these pieces onto the roll, along with googly eyes for added fun, they’ll bring their animal creations to life. Then, display the finished animals proudly on a shelf!
Supplies you will need:
– Empty toilet paper rolls
– Paint in various colors
– Construction paper for features
– Scissors and glue for assembly
– Googly eyes to add character
This engaging craft boosts creativity while resulting in playful decorations that kids can showcase during playtime.
3. Egg Carton Flowers
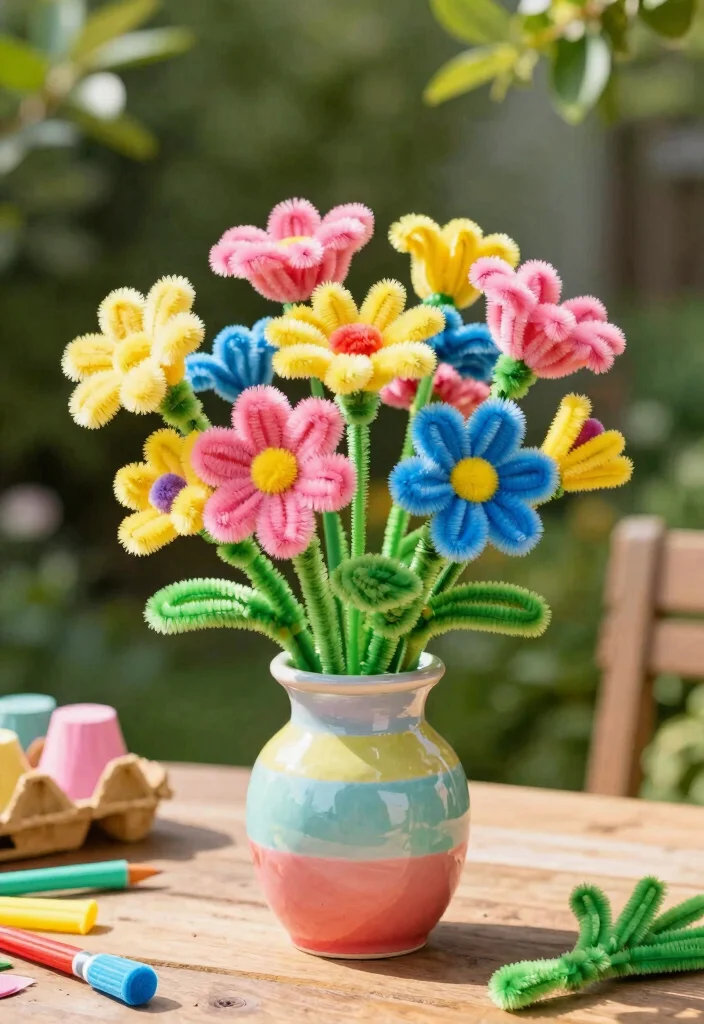
Turn your old egg cartons into beautiful flowers that can brighten up any space! This easy craft is perfect for kids who love art and want to make their own decorations. By cutting out the individual cups and painting them in vibrant colors, they can create their own unique floral arrangements. Adding pipe cleaners as stems makes the flowers come alive!
Start by cutting the egg carton into individual sections and then let the kids paint each cup in their favorite colors. After the paint dries, poke a small hole in the bottom of each cup and insert a pipe cleaner to form the flower’s stem. Finally, arrange the flowers in a vase or plant them in the garden to enjoy their handiwork!
Gather these materials:
– Empty egg cartons for the flowers
– Acrylic paint in bright shades
– Pipe cleaners for stems
– Scissors for cutting
These delightful flowers bring a touch of spring indoors, no matter the weather outside!
4. Recycled Paper Beads

Make beautiful jewelry using old magazines or scrap paper by creating recycled paper beads! This craft introduces kids to the art of bead-making and the concept of upcycling. By cutting the paper into triangles, rolling them tightly, and securing them with glue, they can create unique beads to string into necklaces or bracelets.
To start, have the kids cut the paper into long triangular shapes. Then, they can roll each triangle from the wide end to form a bead, applying glue at the end to secure it. Once all the beads are made, they can string them onto elastic or string to create stunning pieces of jewelry!
What you’ll need for this project:
– Old magazines or scrap paper for beads
– Scissors for cutting
– Glue to hold the beads together
– String or elastic for jewelry making
These colorful paper beads are a fashionable way for kids to express their creativity while promoting eco-friendly choices.
5. Plastic Bottle Planters
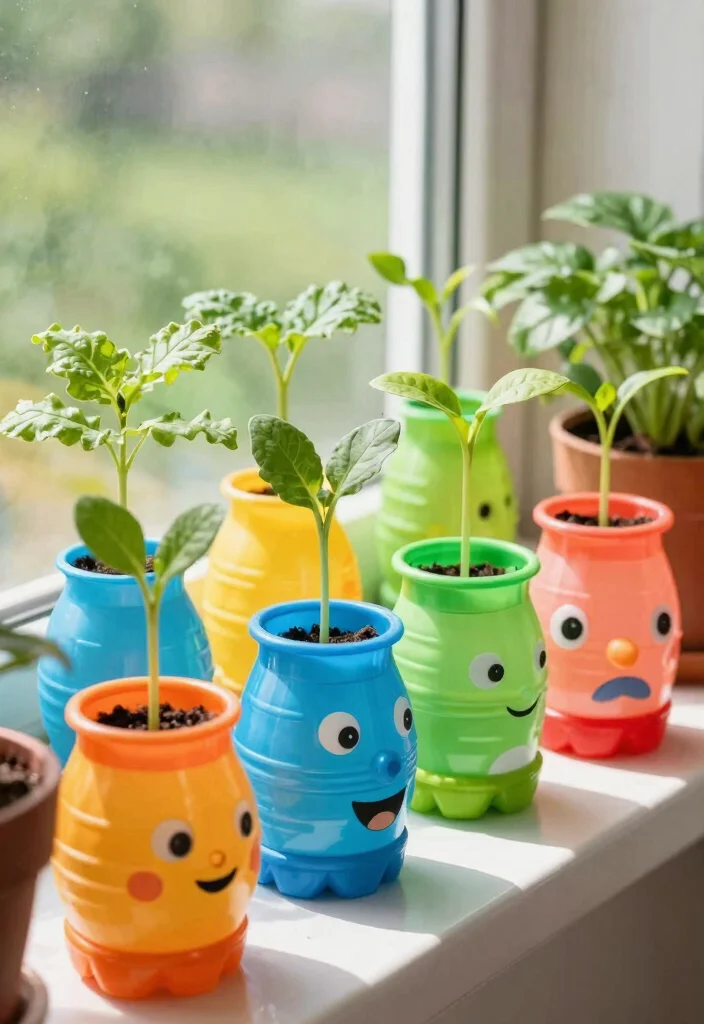
Transform empty plastic bottles into charming planters and introduce kids to the joys of gardening! This hands-on project allows children to create personalized planters by decorating them and filling them with soil and seeds. It’s a great way to teach them about the importance of recycling and nurturing plants.
Begin by cutting the plastic bottle in half, leaving the top for drainage. After that, let the kids decorate the outside with paint or stickers to make it uniquely theirs. Fill the bottom half with soil and plant seeds or small plants. Lastly, encourage regular watering and care to watch their plants thrive!
Essential items for this craft:
– Empty plastic bottles to use as planters
– Scissors for cutting
– Soil for planting
– Seeds or small plants to grow
– Paint or decorations for personalizing
These planters provide a fun way for kids to learn responsibility while enjoying the wonders of nature.
6. T-shirt Tote Bags
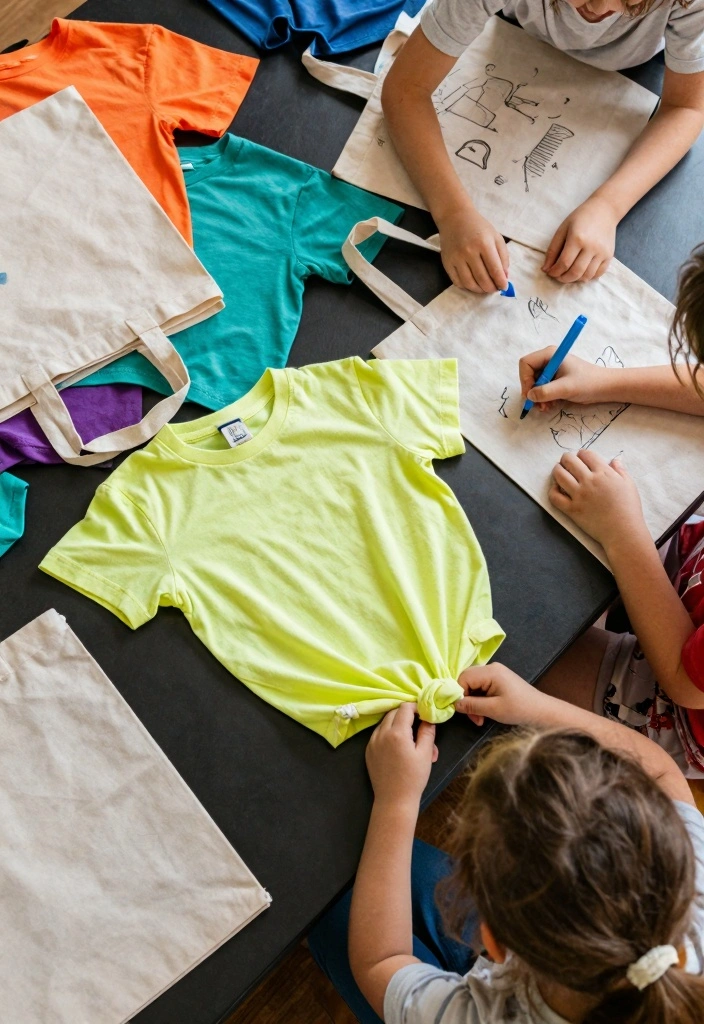
Give those old T-shirts a new life by turning them into trendy tote bags! This craft is perfect for older kids who want to learn to sew or tie knots. They can customize their bags with fabric pens or patches, making each one unique. Plus, it’s a simple way to reduce waste while creating something practical!
Start by cutting off the sleeves and neckline of the T-shirt to shape the bag. Then, turn the shirt inside out and tie knots at the bottom to secure it. After the bag is formed, let the kids decorate it with fabric pens or patches. Finally, they can fill their new tote bags with books or toys!
Gather these materials:
– Old T-shirts to recycle
– Scissors for cutting
– Fabric pens or patches for decoration (optional)
These tote bags are not just stylish; they promote eco-conscious choices in everyday life!
T-shirts can become treasure: turn them into tote bags and brag about clever crafting as part of our kids recycling ideas diy journey. This simple sew-and-tie project lets kids customize with fabric pens or patches, turning waste into something practical they’ll actually use.
7. Soda Bottle Bird Feeders
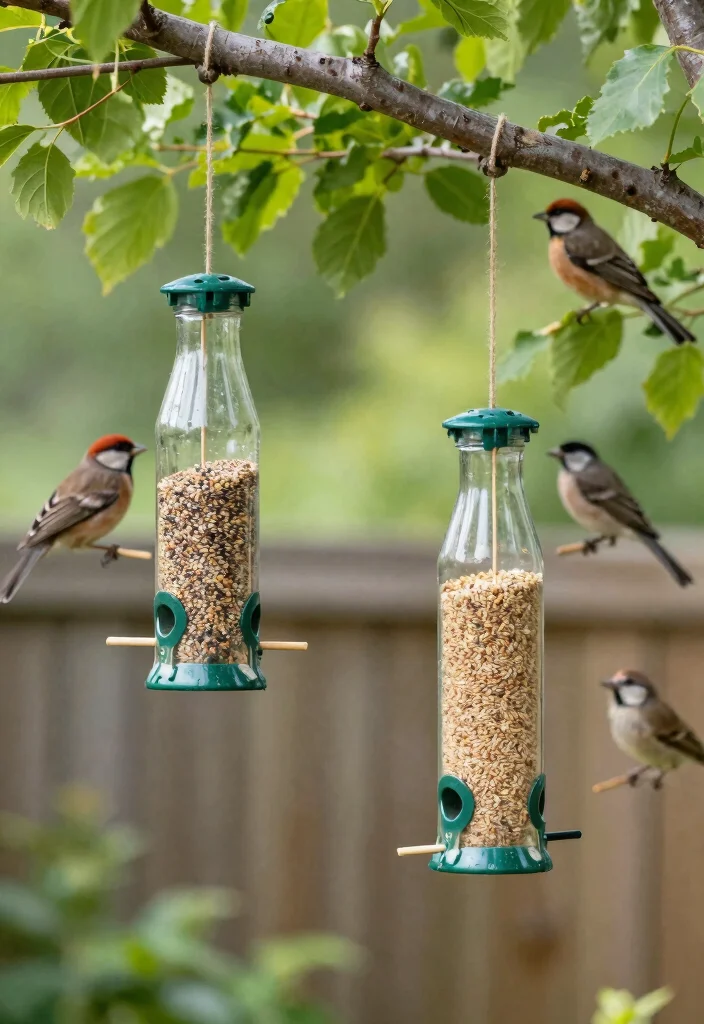
Create a simple soda bottle bird feeder and invite nature into your backyard! This fun project teaches kids about recycling while helping them learn about local wildlife and the importance of caring for the environment. With just a few supplies, they can attract birds and enjoy observing them feed.
Begin by poking holes into the sides of the soda bottle to insert a dowel for birds to perch on. Once that’s done, fill the bottle with birdseed, secure the cap, and tie string around the neck to hang it outdoors. Choose a spot where kids can easily see the feeder from a window to enjoy birdwatching!
Items needed for this project:
– Empty soda bottle for the feeder
– Wooden dowel or stick for perching
– Birdseed to attract feathered friends
– String or twine for hanging
This activity connects kids to nature and encourages them to appreciate the beauty of wildlife.
8. CD Art

Give old CDs a new purpose by turning them into stunning art projects! Kids can create beautiful mosaics, wall decorations, or even unique sculptures using these reflective discs. This craft not only inspires creativity but also shows children the beauty of reusing items.
Start by carefully breaking the CDs into smaller pieces (with adult supervision). Then, let the kids arrange the shards on a craft board or canvas in any design they imagine. Once they’re happy with the layout, they can glue the pieces down securely. Finally, they can add additional decorations or paint around the shards for extra flair!
Materials you’ll need:
– Old CDs for crafting
– Glue for securing pieces
– Craft board or canvas as a base
– Additional decorations like sequins or glitter
This project allows kids to unleash their artistic side while learning about the impact of waste on our environment.
Turning old CDs into art is a tiny act of bravery for kids—one broken disc becomes a bright mosaic and a lesson in reuse. Grab some shards, arrange them on a board, and let creativity shine. It’s a simple, hands-on way to show kids recycling ideas diy in action.
9. Paper Mache Bowls
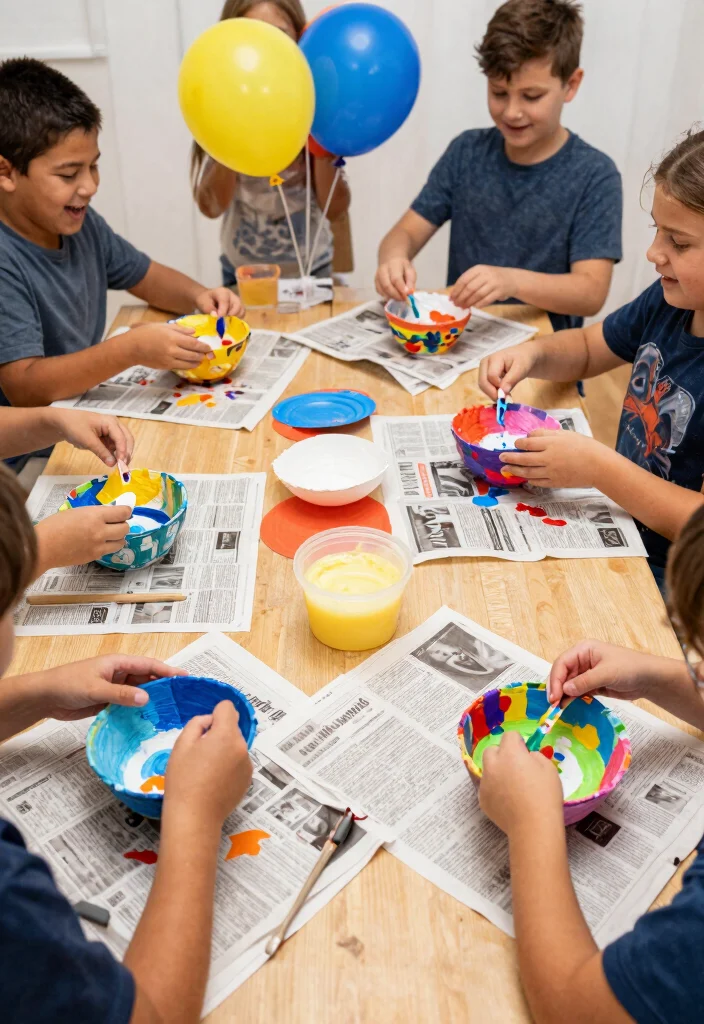
Kids will love transforming scrap paper into beautiful paper mache bowls! This fun and messy project is ideal for children who enjoy tactile activities. They can use old newspapers, magazines, or any scrap paper to create decorative bowls for their rooms.
Start by mixing flour and water to create a glue-like substance. Inflate a balloon to use as the base for the bowl, then tear the paper into strips and dip them into the glue before applying them to the balloon. Once everything is dry, pop the balloon and paint the bowl to complete the decoration. Finally, use these bowls to hold small items or as eye-catching decor!
Gather these supplies:
– Scrap paper (newspaper, magazines)
– Balloon for shaping the bowl
– Flour and water for glue mixture
– Paint or markers for decoration (optional)
This creative project allows kids to express themselves while learning about upcycling and sustainability.
10. Jigsaw Puzzle Art

Transform old jigsaw puzzles into unique artwork that captures special memories! This easy project encourages kids to think creatively about how to recycle puzzles missing pieces while still making something beautiful. They can assemble the remaining pieces into fun shapes and designs that can be framed or hung on the wall.
Start by arranging the puzzle pieces into a design on a canvas or frame. Once they’re satisfied with their layout, glue each piece down securely. After allowing the glue to dry, they can hang or display their jigsaw puzzle art proudly!
Items needed for this craft:
– Old jigsaw puzzles to recycle
– Frame or canvas to showcase the art
– Glue for securing pieces
Creating jigsaw puzzle art is a wonderful way to cherish memories associated with the puzzles while crafting something entirely new.
11. Milk Jug Scoops
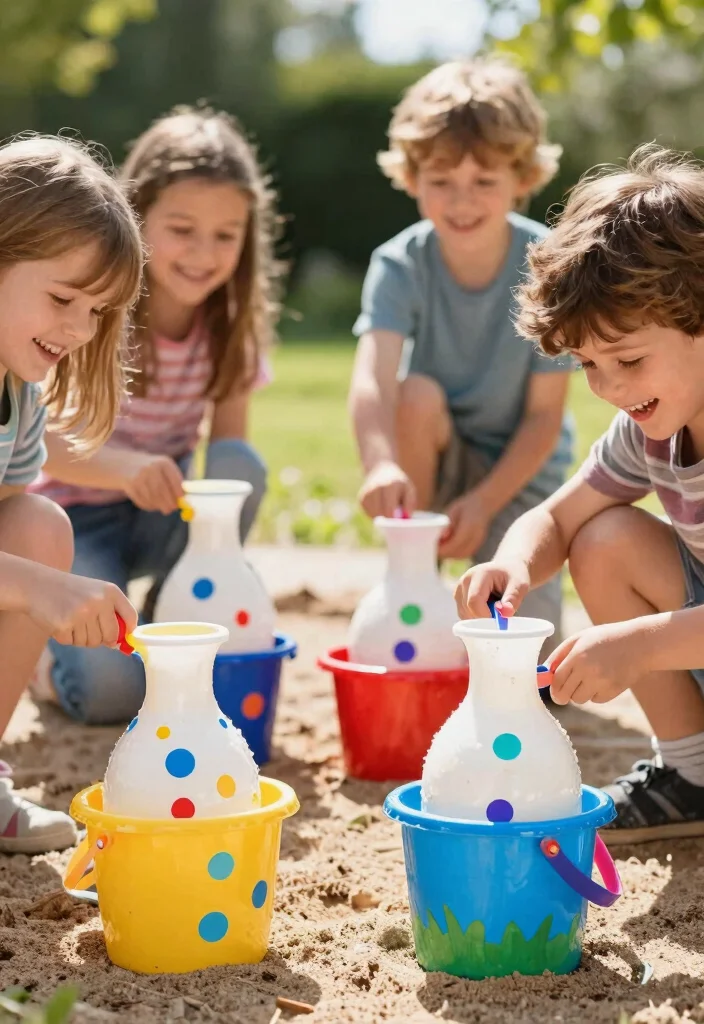
Repurpose an old milk jug into a handy scoop for outdoor play or gardening! This simple project emphasizes functionality and provides kids with a useful tool they can use for fun or practical tasks. They can personalize the jug for a unique touch while learning about recycling.
Start by rinsing and drying the milk jug thoroughly. Then, using scissors, cut a large opening on one side to create the scoop. Encourage the kids to decorate the outside with markers or paint for added flair. Finally, use the scoop for sandbox play or as a helpful tool in the garden!
What you’ll need:
– Empty milk jug to recycle
– Scissors for cutting
– Markers or paint for decoration (optional)
This handy scoop encourages outdoor play and helps kids learn practical skills while having fun.
12. Lace and Yarn Art
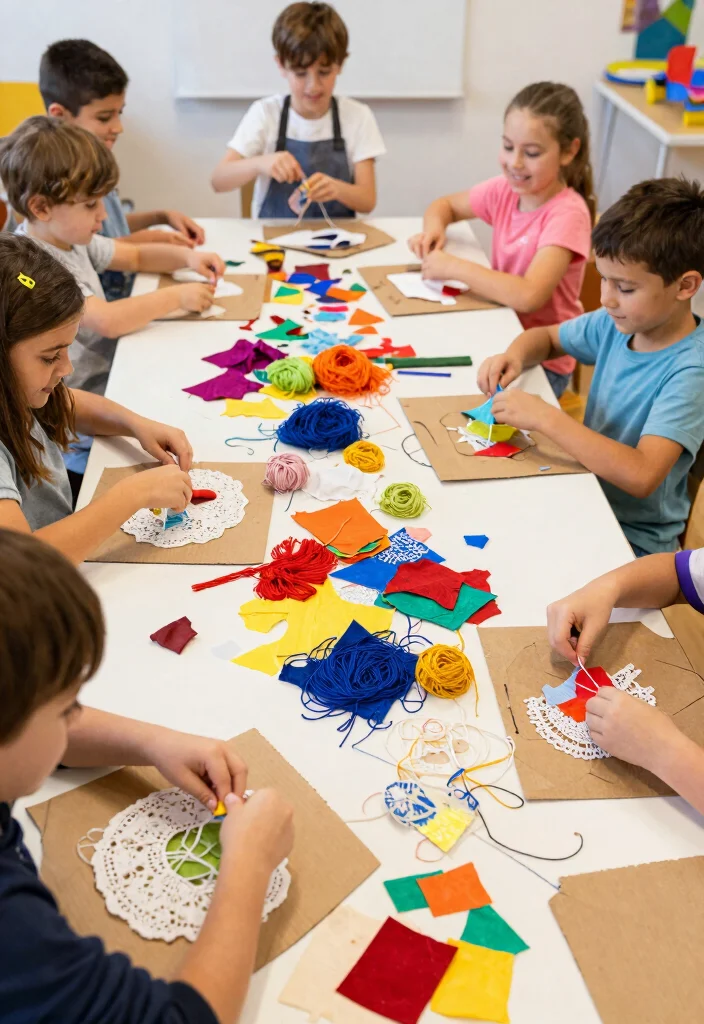
Turn old fabric scraps into beautiful lace and yarn art with this fun sensory project! Kids can weave strips of fabric or yarn through cardboard templates to create stunning wall hangings or decorations. This tactile activity enhances fine motor skills and allows children to express their creativity.
Begin by cutting the cardboard into shapes that will serve as a base. Next, cut the fabric scraps or yarn into long strips for weaving. Kids can then weave the strips through the cardboard to create their design. If desired, secure the ends with glue and hang the artwork for everyone to admire!
Essential materials for this craft:
– Old fabric scraps or yarn to recycle
– Cardboard templates for weaving
– Scissors for cutting
– Glue (optional) for securing ends
This project provides a creative outlet while effectively reusing fabric scraps, making it both fun and resourceful!
For kids recycling ideas diy, lace and yarn art turns scraps into vibrant wall hangings. Weaving fabric strips through cardboard boosts fine motor skills and sparks big creativity—no fancy supplies needed, just imagination and a little color.
13. Newspaper Seedling Pots
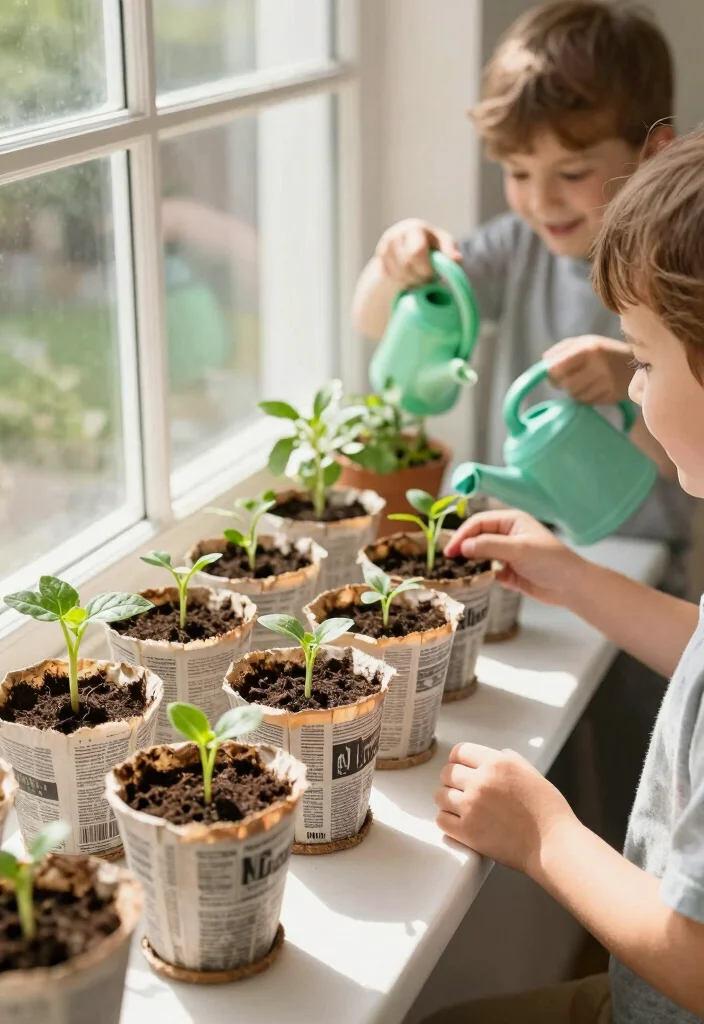
Kickstart your gardening adventure by making seedling pots out of old newspapers! This eco-friendly project is perfect for teaching kids about planting seeds and caring for plants. The pots are biodegradable, providing an excellent option for nurturing young sprouts.
Start by cutting the newspaper into squares about 6×6 inches in size. Roll the newspaper around a small cup to form a pot shape, tucking the bottom to secure it. After that, fill each pot with soil and plant seeds. Water them and place the pots in a sunny spot to watch them grow!
Items needed for this project:
– Old newspapers to create pots
– Scissors for cutting
– Soil for planting
– Seeds to grow
These newspaper pots are perfect for starting a garden, and kids will enjoy watching their plants grow while learning about the life cycle.
14. Decorated Cardboard Boxes

Transform old cardboard boxes into colorful storage solutions or imaginative playhouses! This project allows kids to unleash their creativity as they design, paint, or decorate boxes for various purposes, promoting organization and imaginative play.
Start by gathering cardboard boxes of different sizes. Then, let the kids paint or decorate them however they like to create their unique designs. These boxes can be used for storage or turned into playhouses, spaceships, or whatever their imaginations come up with!
Materials you’ll need:
– Empty cardboard boxes to decorate
– Paint or colored markers for creativity
– Stickers or decorative tape for embellishing
These decorated boxes encourage creativity while helping kids keep their spaces organized.
15. Upcycled Crayon Nubs
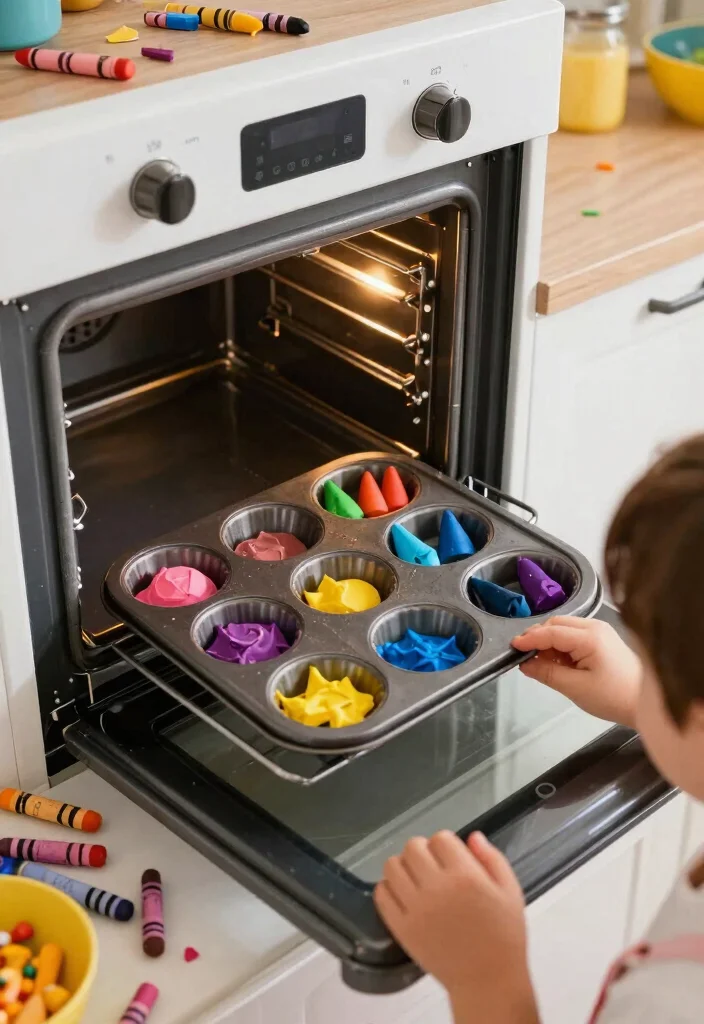
Don’t toss out those crayon nubs! Instead, turn them into new crayons with a little heat! This easy and fun project uses leftover bits of crayons to create colorful new shapes, making it a great way to recycle while keeping kids engaged in a hands-on activity.
Start by preheating the oven to 250°F (121°C). Remove the paper from the crayon nubs and break them into smaller pieces. Place the crayon pieces into muffin tins or silicone molds, filling each mold halfway. Bake them for about 10-15 minutes until melted, then allow them to cool completely before removing from the molds.
Essential items for this craft:
– Crayon nubs to recycle
– Muffin tin or silicone molds for shaping
– Oven for melting
These upcycled crayons provide a fun way for kids to enjoy coloring again while giving new life to waste!
Conclusion
Repurposing waste materials into fun and creative projects encourages kids to be mindful of the environment!
These 15 simple kids recycling ideas not only provide hours of entertainment but also foster a sense of responsibility towards our planet. Each project is a stepping stone towards instilling eco-friendly habits, creativity, and a love for crafting.
Now it’s time to gather those materials and start your own recycling adventure!
What will your kids create from their everyday waste?
Note: We aim to provide accurate product links, but some may occasionally expire or become unavailable. If this happens, please search directly on Amazon for the product or a suitable alternative.
This post contains Amazon affiliate links, meaning we may earn a small commission if you purchase through our links, at no extra cost to you.
Frequently Asked Questions
What are some easy DIY kids recycling ideas using everyday waste materials?
Here are quick, easy options to kick off kids recycling ideas diy. Try bottle-cap magnets, a cardboard city, egg-carton animals, paper-roll stamps, sock puppets, or tin-can wind chimes. Simple steps: gather clean waste items, sketch a design with your child, glue or tape pieces together, add color with washable paint, and let it dry. Safety tips: supervise small parts, use non-toxic paints, and trim any sharp edges. These projects are perfect examples of kids crafts and eco-friendly projects that use upcycled materials to create art from waste.
How can I keep kids engaged with eco-friendly projects and crafts?
Turn it into a fun routine. Set up a dedicated craft corner with labeled bins of safe supplies, and offer a short list of project options aligned with eco-friendly projects and creative recycling. Let kids choose, plan together, and then create. Display the finished pieces on a mini gallery wall to celebrate achievement. Regularly rotate materials to spark new ideas, discuss choices with your child, and emphasize upcycled materials as the star of art from waste.
What materials are safest and easiest to upcycle for kids’ art from waste?
Stick to everyday items that are clean and safe for little hands, such as cardboard, paper towel tubes, bottle caps, fabric scraps, plastic lids, and old magazines. Avoid glass, sharp metal, and any items with small parts that could be a choking hazard. Use non-toxic glue and washable paints, and always supervise younger kids. Clean items first and sort by color or texture to simplify projects. These choices embody upcycled materials for art from waste and support kids crafts that are safe and fun.
How should I store and display kids’ artwork made from upcycled materials?
Create a rotating display in your home—wire with clips, cork boards, or a small gallery wall—to show new pieces and keep kids excited. For long-term keepers, photograph the artwork and build a simple digital album, then store physical pieces in a labeled folder or reusable bin. Reuse frames or desks and keep the display fresh with new eco-friendly projects. Label each piece with the date and materials used (for example, upcycled materials) and celebrate creative recycling in your space.
Are there simple project ideas that require minimal tools and cost?
Absolutely. There are plenty of creative recycling ideas that use everyday waste and little to no tools. Try cardboard stamp printing, plastic lid mosaics, bottle-cap dragonflies, sock puppets, newspaper mache masks, and tin-can wind spirals. Steps are quick: gather items, plan a design with your child, glue or tape pieces, add color, and let dry. These eco-friendly projects prove you can do kids crafts with upcycled materials and still have big wow-factor. For a bigger selection, check the article’s 15 ideas to spark more inspiration.
Recommended Products

Over 2.2 Pounds of Crafting Fun: Kid Made Modern Arts and Crafts Supply Library contains pipe cleaners, pom poms, popsicle sticks, shiny sequins, colorful beads, silly googly eyes, scissors, needles, white glue, and many more!

Arts and Crafts for Kids Ages 4-8 - Unleash hours of engaging creativity and craft unforgettable moments with Mumaloo Surprise Craft Box for kids. Mess-free, adorable and enjoyable kids art projects for weekends, family bonding, and rainy days
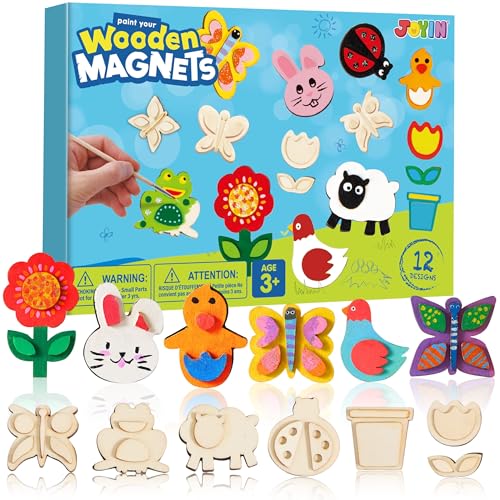
COMPREHENSIVE SET. Our DIY Creativity Art Supplies Kit includes 12 wood magnets, a paint palette, a brush, a glitter glue. The instruction sheet is included.
Related Topics

These recycling ideas are so creative! My kids love making things out of old cardboard, but I never thought of turning bottle caps into art. What’s your favorite project from the list?