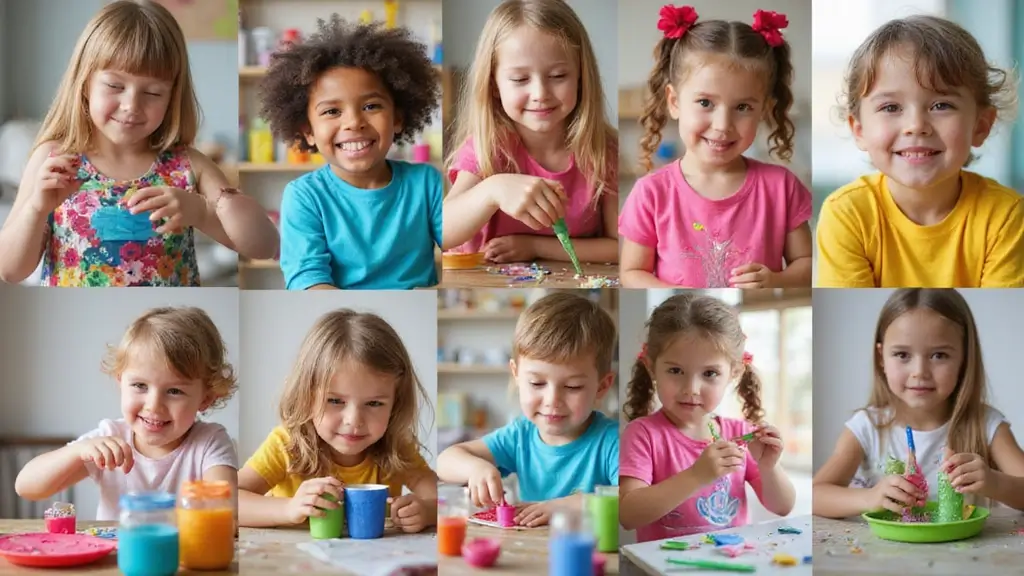
Paper is cheap and inviting. I am hooked on how a plain sheet can become art. I made this post to share easy paper craft ideas that fit real life. You can make real art with tools you already have at home.
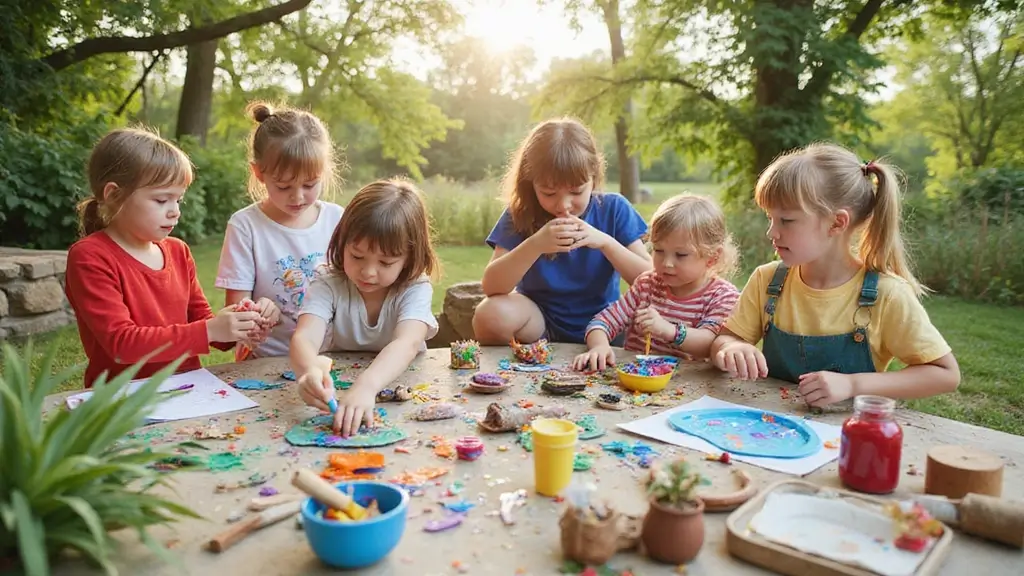
If you enjoy hands on projects, this one is for you. If you work with kids in a classroom or at home, you will find something that helps. These projects fit a quiet weekend, a rainy afternoon, or a last minute gift.
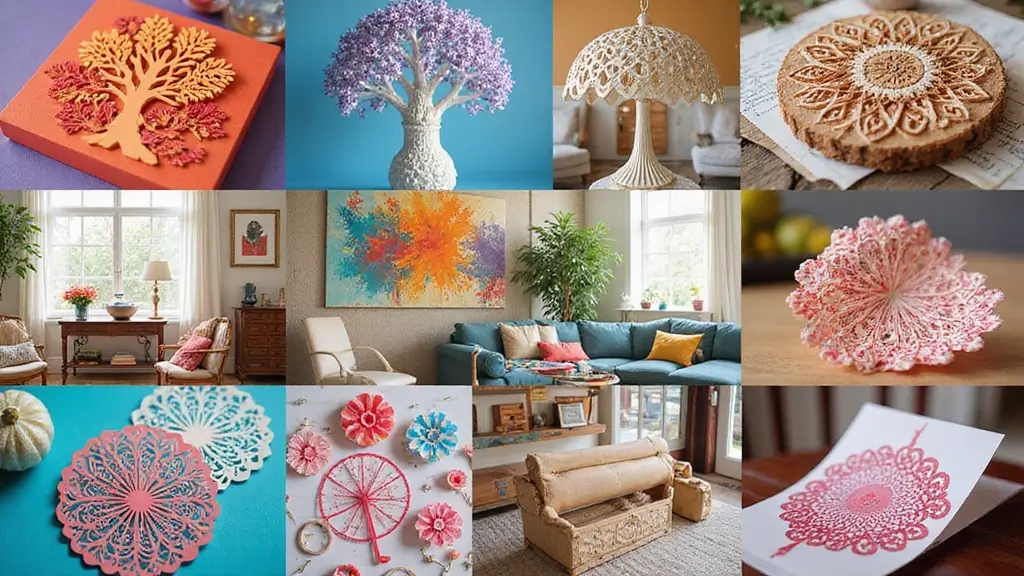
Inside you’ll find 26 paper craft ideas that turn simple paper into art. Each idea uses simple supplies like colored paper, scissors, glue, and a ruler. You can go from first cut to finished piece in a short time. From cards and garlands to tiny sculptures, there is something for every mood.
These steps are designed to be easy to follow. I include quick tips to help with clean edges and sturdy finishes. Start with one project, then add a second once you feel confident. You can mix and match colors and textures to fit your space.
Doing these crafts helps you slow down and focus. They are portable and quiet, perfect for small spaces. They also make thoughtful gifts, classroom decorations, or display pieces.
Ready to get started? Pick a simple design and gather your supplies. Try something small first, like a folded flower or a paper heart. The more you make, the easier it gets and the more you will see how far paper can travel. If you share your results with friends, you might spark a tiny art moment at home.
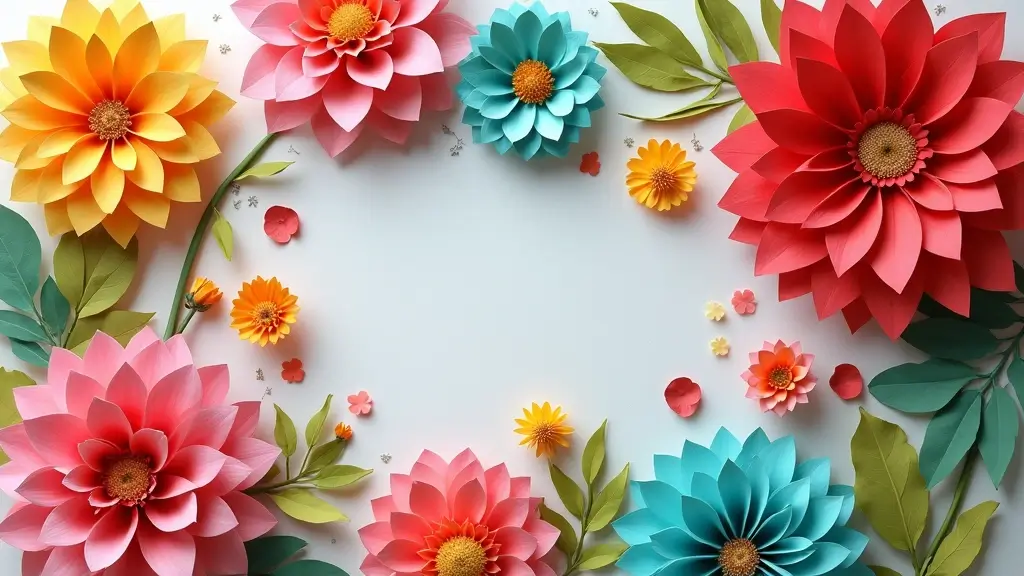
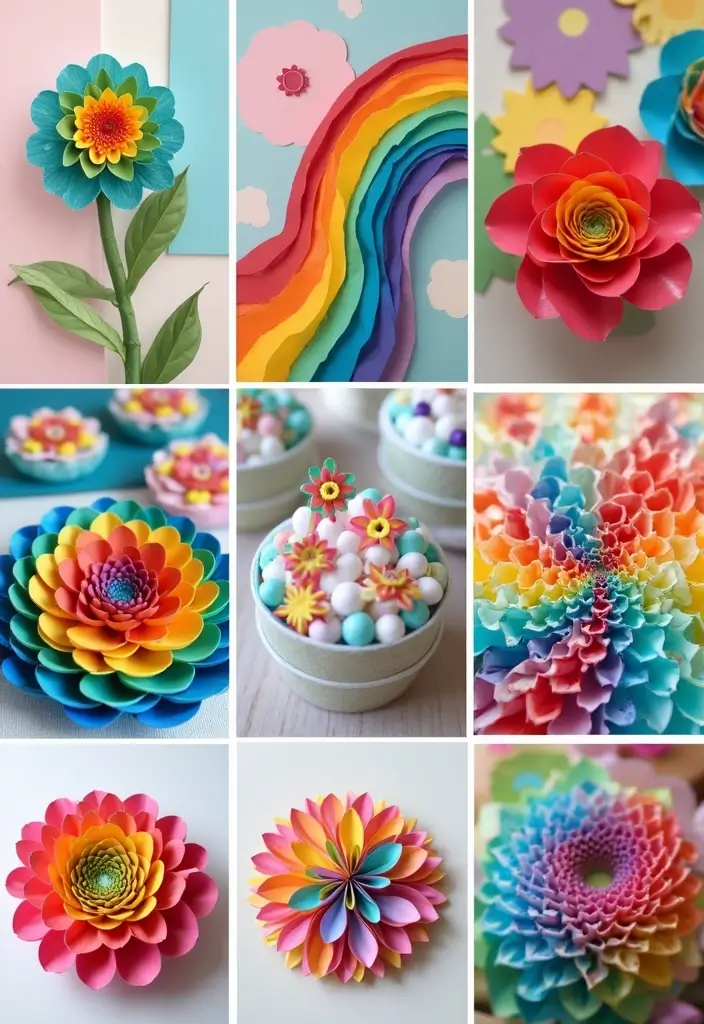
1. Elegant Paper Flowers

Need a simple way to bring color into a room that lasts longer than fresh flowers? Try elegant paper flowers. They’re easy to make and stay fresh year round. Here is why they work for home decor or events.
First, pick your paper. Tissue paper yields soft, airy petals. Scrap or card stock gives sturdier blooms. Next, cut petal shapes in several sizes. Start with a small center, then layer larger petals around it. Glue at the base to hold each layer. Shape a few petals with a gentle curl to give the bloom life.
You can craft many kinds. A rose needs tight curls. A daisy shines with crisp, spaced petals. A peony uses broader petals and extra layers. Create a green stem from a strip of green paper and attach it with glue or tape. Add leaves for a natural touch. Place the finished blooms in a vase or spread them along a table as centerpieces.
Tips:
– Use double-sided paper for more color on both sides.
– Mix flower sizes to make a lively arrangement.
– Add green leaves to anchor the bouquet.
These paper flowers never wilt and bring a pop of charm to any space.
@media(max-width:480px){
Recommended Products

FLOWER POWER: Transform your crafting experience with our delightful flower kit! Inside, you'll find 280 punch-out flower, stem, and leaf cutouts crafted from assorted bright colored card stock, offering a vibrant palette for your creations. But that's not all - we've included an IDEA GUIDE to spark your creativity, showcasing numerous fun and imaginative flower combinations. Let your imagination bloom!
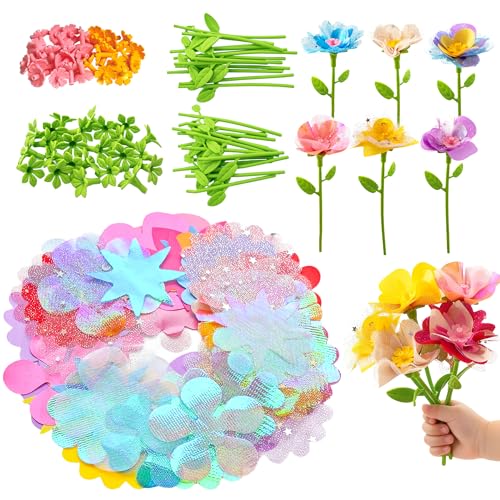
Refill Kit for Flower Making Kit: Specially designed for those that already own our flower maker, this refill includes all essential flower bouquet accessories to create 28 stunning fabric flower bouquets toys. Perfect DIY craft extension for girls aged 4–8.

Abundant to Use and Share: you will receive 28 pieces of paper flower templates totally, including 24 pieces of petal templates in 4 shapes, 6 pieces each shape in 6 different sizes, 2 piece of bottom templates in round and hexagon shapes respectively, and 2 pieces of leaf templates in 2 sizes, enough for you to DIY different paper flowers or share with others
2. Customized Gift Wrap
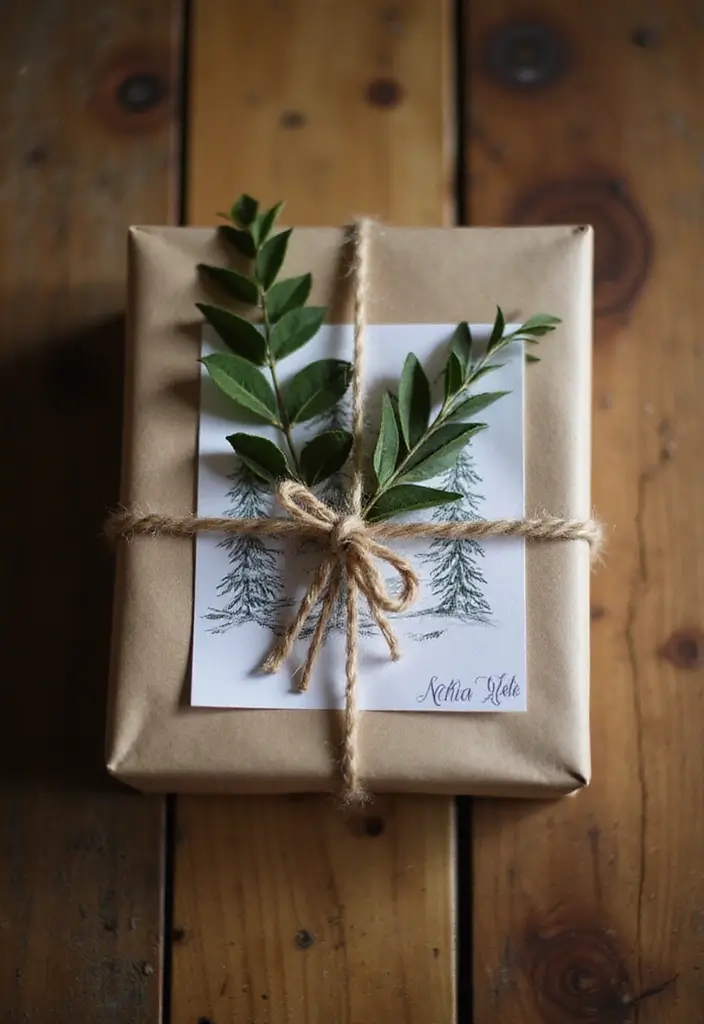
Need gift wrap that feels personal but costs little? Customize with recycled paper.
Here is why this approach works. It uses paper you already have. It saves money. It adds a handmade touch.
What you’ll need
– Old newspapers
– Brown paper bags
– Pages from magazines
Make your wrap unique
– Use stamps, paint, or simple drawings to create a one-of-a-kind pattern
– You can print a tiny scene or doodle that matches the gift
– Add a handmade tag for a personal touch
Wrap and finish
– Lay the paper flat, place the gift in the center, and fold the sides neatly
– Trim excess paper and crease the edges for a clean look
– Tie with twine or yarn for a rustic touch
– Add a handmade tag cut from leftover paper
Add natural accents
– Slide in dried leaves or a pressed flower for an earthy vibe
– Replace plastic tape with a thin paper strip to keep the look cohesive
Creative Ideas:
– Use family photos for wrapping that tells a story
– Add natural elements like dried leaves or flowers for a rustic look
– Pair your wrapping with twine or yarn for a charming, handcrafted feel
Your gift will stand out. It’s eco-friendly, affordable, and fun to make.
@media(max-width:480px){
3. Whimsical Paper Mache Sculptures
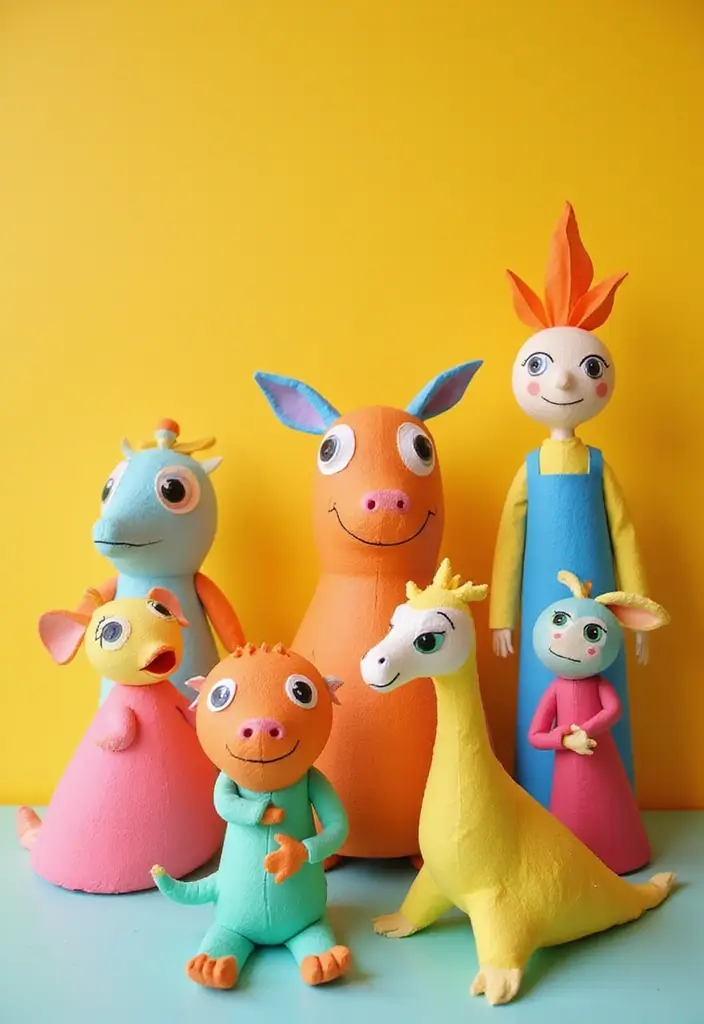
Here is why you should try whimsical paper mache. It turns simple paper into playful art you can display anywhere. With a light base, easy glue paste, and patient hands, you can finish a sculpture you’re proud of.
What you’ll need
– Base: a balloon for a round shape or a sturdy cardboard form for angular pieces
– Paper: newsprint or tissue, torn into strips
– Paste: equal parts white glue and water, or flour and water for a kid-friendly option
– Paints: acrylics or tempera, brushes
– Sealer: clear varnish or a spray sealant
– Tools: scissors, a bowl, a spoon or brush for mixing
Steps to build your sculpture
1) Pick your base and plan the look. A balloon makes a soft body; cardboard can shape a head or wings.
2) Mix paste until it is smooth and thick enough to coat strips without dripping.
3) Tear paper into strips. Short pieces work best around curves.
4) Dip a strip, wipe off the extra, then lay it on the base. Layer for strength.
5) Let each layer dry a bit before adding the next. Build slowly.
6) When all layers are dry, paint your sculpture. Start with a light base, then add details.
7) Finish with a clear seal to protect the paint.
Next steps: try animals, fairy-tolk creatures, abstract blobs, or silly faces. It’s a family activity that both kids and adults can enjoy and learn from.
@media(max-width:480px){
Recommended Products
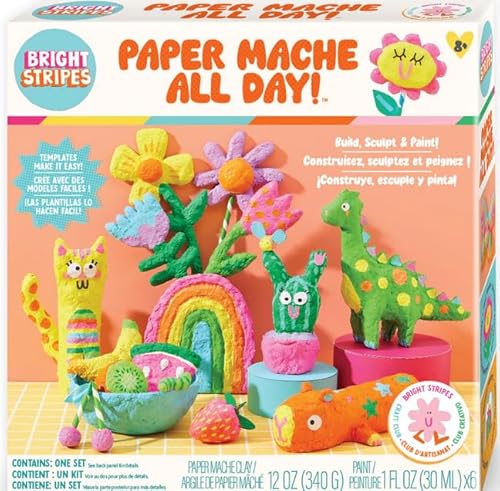
A MODERN CLASSIC CAMP CRAFT – A fresh update on traditional paper mâché projects, redesigned with easy-to-use forms and templates that help kids create with confidence.

ARTISTIC FLEXIBILITY: These plaster of paris rolls are the perfect canvas for your creativity, whether you're crafting a face wrap, a mask, or engaging in detailed plaster art and crafts.

The original and industry leading instant papier mache; just add water, no paper strip cutting or adding messy paste; beginner friendly with exceptionally professional resulst, sustainably sourced made from 100% recycled paper
4. Eye-Catching Paper Collage Art
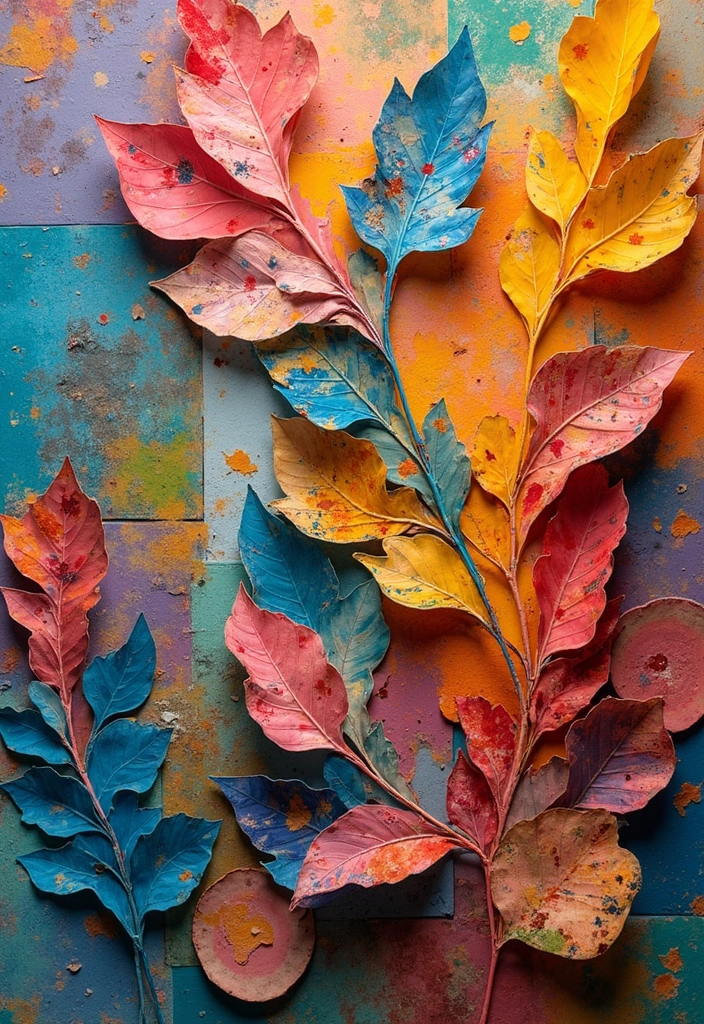
Eye-Catching Paper Collage Art
You want a simple art project that uses scrap paper and still looks striking. Paper collage makes that possible. You can use magazines, junk mail, colored paper, or old drawings. Cut or tear pieces into shapes you like. Let your imagination lead. You can mix in small photos, ticket stubs, or fabric scraps for a personal touch.
Next, set up. Use a sturdy canvas or thick cardboard. Start with a base layer. Add pieces on top. Move shapes around until a scene or mood starts to show. Glue them down and press gently. Let the glue dry. Frame when it is ready.
Here is why this approach works: it turns scraps into something new. You recycle, and you gain a quick, tactile way to share thoughts, memories, or feelings through color and form.
Collage Tips:
– Don’t chase perfection; rough edges add character.
– Mix textures by using glossy magazine bits with matte paper.
– Pick a theme to guide your choices for a cohesive look.
– Vary shapes and sizes to create rhythm and depth.
The finished piece is ready to shine. The best part is you can frame it and hang it in your room or on a hall wall.
Next steps: arrange the final layout, glue pieces, let it dry, then frame and display.
@media(max-width:480px){
5. Creative Paper Cards
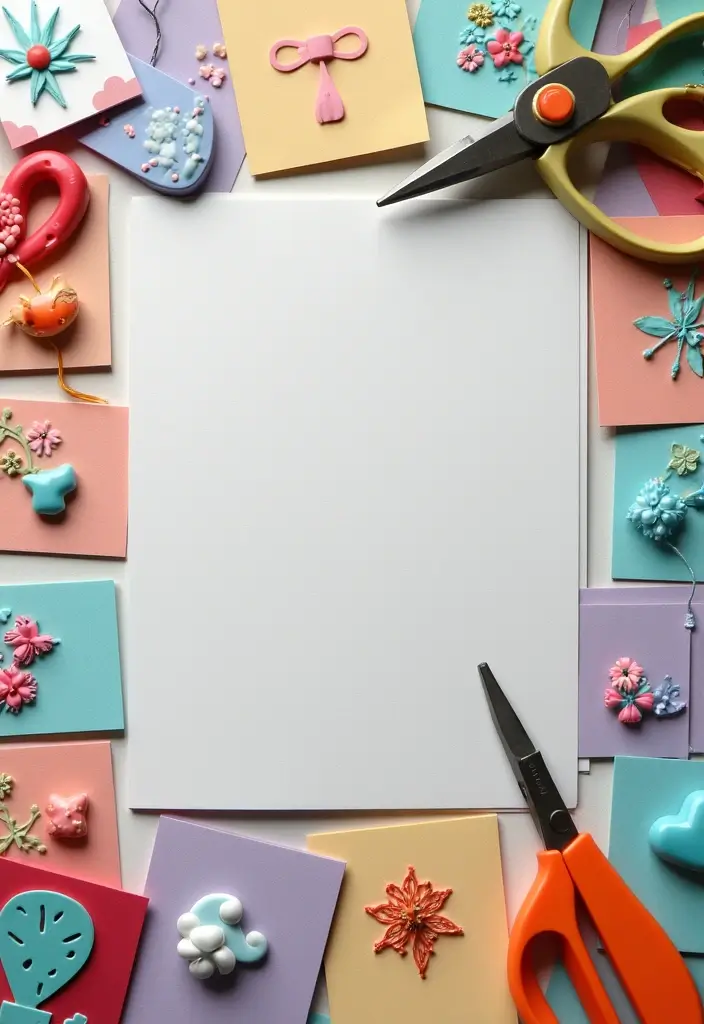
Are you looking for a way to say you care? Handmade paper cards do that. They carry your voice, not a screen. Start with good cardstock in a color you love. Fold it into a card shape that fits the moment. Then add a touch of art, such as drawings, cut-outs, or a pressed flower, so it feels unique.
– Front ideas: a tiny drawing, a cut-out heart, or a simple word like “Hi” written with care.
– Inside idea: a few kind lines and a personal note.
Keep your message by hand. A short, warm note often means more than a long one.
Card-Making Suggestions:
– Try different folding techniques. A pop-up or gatefold brings a surprised smile.
– Use recycled materials. Old cards, fabric scraps, or wrapping paper can become new art.
– Add small details. Ribbons, buttons, or a shiny sticker give texture and charm.
Tips to make it easy:
– Pick a size you can mail without extra postage.
– Practice a light stroke with a pencil before inking.
– Let the card dry a bit before closing it to avoid smudges.
Your handmade card will be kept and saved for years. It is a simple gift that speaks volumes.
No one can resist that personal touch.
@media(max-width:480px){
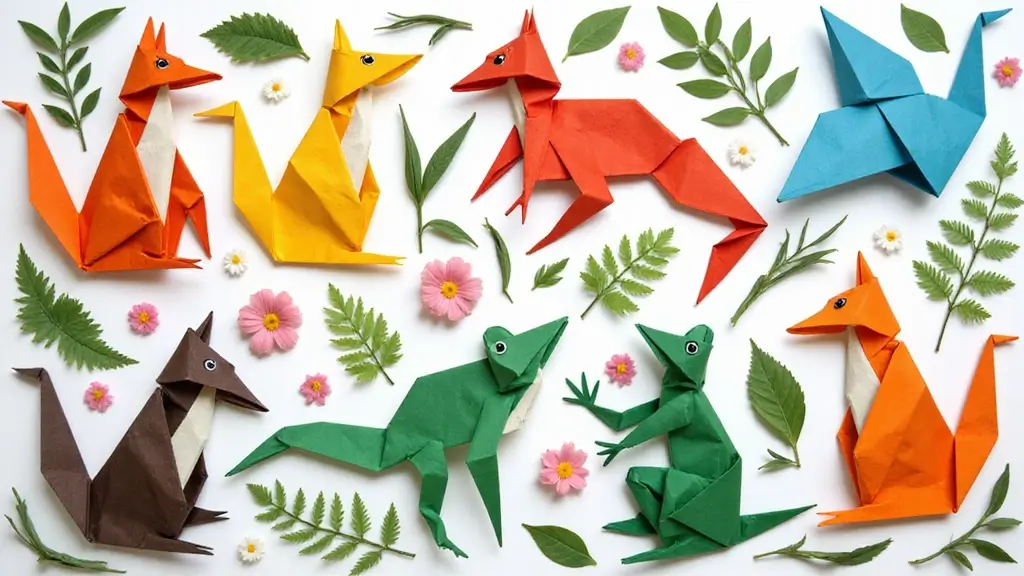
6. Stunning Origami Decorations
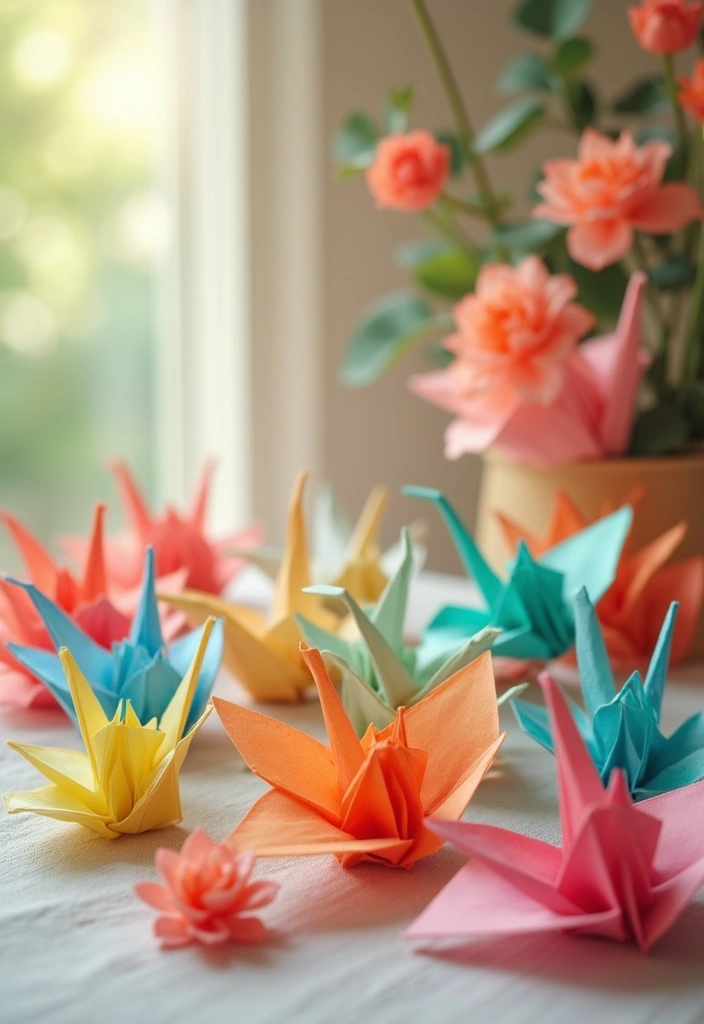
Origami is the simple art of folding paper. A plain square becomes a crane, a flower, or a small box with a few careful folds. It suits beginners and grows with you as you learn new forms. The result is decorations you can place around your home or use at a party. The process is calm, focused, and surprisingly quick.
Getting Started:
– Find tutorials that match your pace.
– Pick bright colors or patterned origami paper to add life.
– Practice the basic folds, like valley and mountain folds, to build control.
– Aim for crisp edges and neat creases so pieces look tidy.
This craft relaxes you and leaves you with something you can show off.
Here is what to try next.
– Cranes strung into a hanging garland for a wall or doorway.
– Lotus flowers as a simple centerpiece.
– Small origami boxes to hold treats or place cards.
To display them, use clear tape or thin string. Put a few cranes near the light so they catch the glow.
Origami decorations prove that little paper can make a big, bright impact. Gather a stack of square origami paper, a clean workspace, and a touch of patience. With practice, your home and party decor will feel warmer and more personal.
Now your space can glow with simple art.
@media(max-width:480px){
Recommended Products

[This Value Package Included] 10 strings of rainbow origami paper cranes premade, 10pcs per strings, total 100pcs. 5.9inch (big size) folded origami cranes / birds on per string

What's in the box-- 1 Bag of 50pcs with 8 mix color as pic, Yuzen paper, great quality. (if make to be garland, you need to connect the paper cranes by yourself by using fishing or cotton line, also can be as party favor/supplies/confetti). You can hang them on walls, trees, tables, windows or door to add dazzling atmosphere to twinkle themed birthday party, classroom party, new years party or other party. or put them on the party table.

Paper Crane Hanging Garlands: The package includes 3strings Japanese hanging cranes, each string include 10pcs paper crane, paper crane size:4.7”x 2.8”, total 5.2ft/string.
7. Vibrant Paper Beads
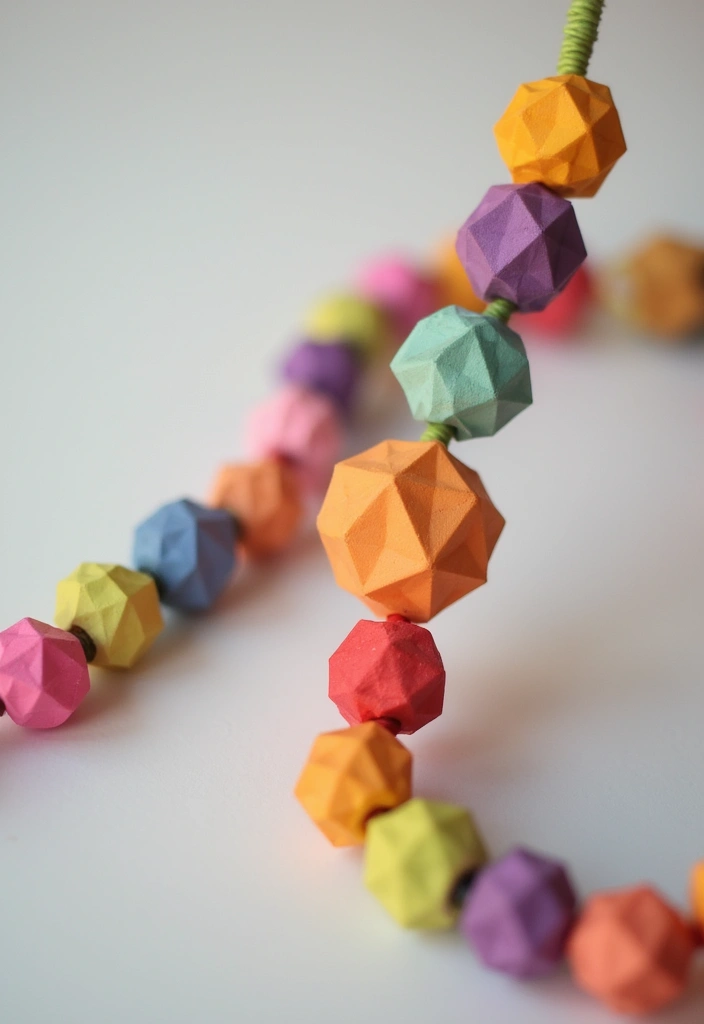
7. Bright Paper Beads
You want a quick, neat craft that uses scraps. Paper beads turn everyday paper into tiny, wearable art. Grab old magazines or colored scrap paper. Cut thin strips. A good size is about a quarter to a half inch wide and 3 to 6 inches long. Here is why this works.
Roll the strip tight. A toothpick or pin can help start the roll. Put a dab of glue on the edge, press until the bead holds its shape. Let the beads dry well before you handle them. The result is light, unique and easy to wear.
Make it last: seal each bead with a clear coat or acrylic sealer. This makes colors stay bright and keeps the paper from peeling.
Tips for great looks:
– Try different bead sizes. Mix slim beads with chunky ones for contrast.
– Use many colors. Create stripes, spirals or random patterns.
– Store finished beads in a dry place so they stay smooth.
Next steps: string beads into a necklace, bracelet, or earrings. Use strong thread or beading wire so they stay put. These little gems work as gifts or a fun way to recycle paper.
Give it a try and brag about your craft.
@media(max-width:480px){
8. Unique Paper Mosaics

Want a simple, striking way to turn paper into art? Paper mosaics turn magazines and scraps into bright, eye-catching images for your wall. They calm your hands as you place tiny pieces. This project works as a quick break or a longer session when you want to unwind. Try bright colors or calm tones. You can add a border with a contrasting shade.
Materials:
– Magazines, patterned paper, or colored scraps
– A sturdy base such as canvas or thick poster board
– A glue stick or white glue
– Scissors or a paper cutter
– Optional: a clear sealant for longevity
Steps:
– Pick a simple image or shape to start.
– Cut your paper into small pieces like squares or triangles.
– Lay pieces on the base, then adjust until the colors fit.
– Glue them down from the center outward to keep edges flat.
– Add depth with light and dark shades; try a simple gradient.
– Let it dry before hanging.
Tips:
– Use old magazines to keep costs down.
– Start with a tiny mosaic to learn placement.
– Keep a color map handy to guide your choices.
– If you want long life, seal with a spray coat.
Your finished mosaic can be a bold focal piece or a thoughtful gift.
@media(max-width:480px){
9. Decorative Paper Wreaths
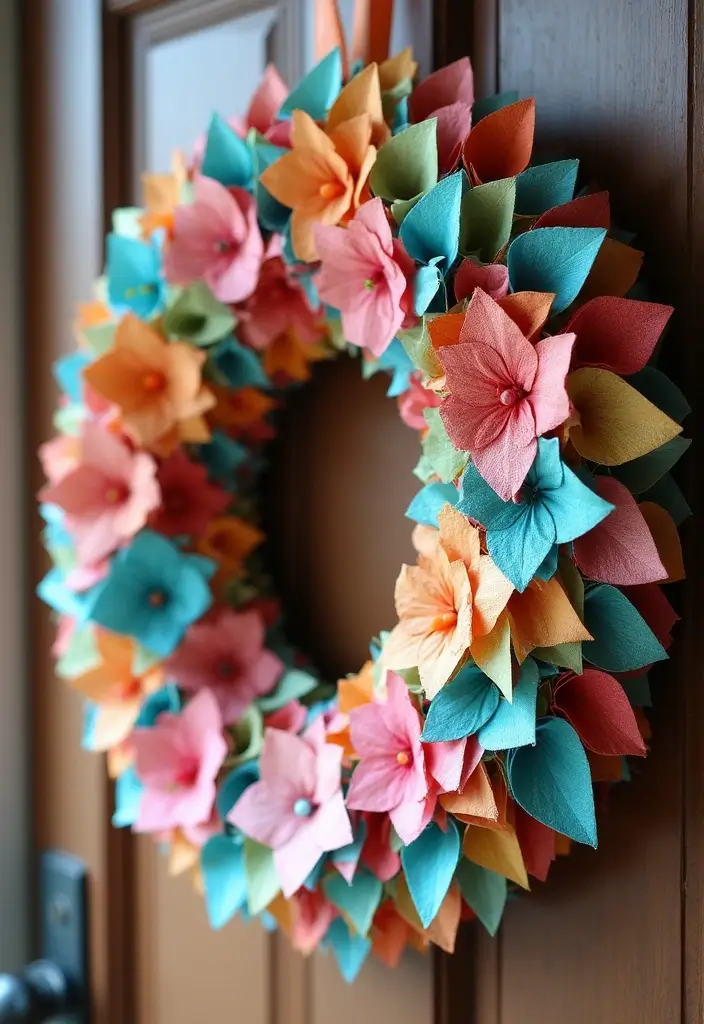
Want a warm welcome for your home without buying a new wreath? A decorative paper wreath is just the thing. Use strips from old book pages, wrapping paper, or sturdy cardstock. Twist, fold, and layer them into a circle that feels lively and personal. Hang it on your door or a wall to show your craft and your style.
What you’ll need:
– A base ring (cardboard, foam, or an old hoop)
– Paper strips about 1 inch wide and 6–8 inches long
– Glue or clear tape
– Scissors
– Optional extras: bows, faux flowers, buttons
How to build it:
– Step 1: Make small rosettes or folded petals from the strips.
– Step 2: Glue each piece to the base ring. Press firmly and turn as you go to cover the surface.
– Step 3: Layer pieces until the ring looks full. Add a hanging loop with ribbon.
Decor ideas:
– Use seasonal colors to match holidays or moods.
– Try shapes beyond circles—stars, hexagons, or sunbursts create new looks.
– Finish with a touch of shine using metallic strips or a light spray of glaze.
A paper wreath repurposes scraps into art. It’s light, affordable, and easy to change as your space changes. Next steps: pick a base, gather scraps, and start crafting.
@media(max-width:480px){
10. Playful Paper Puppets
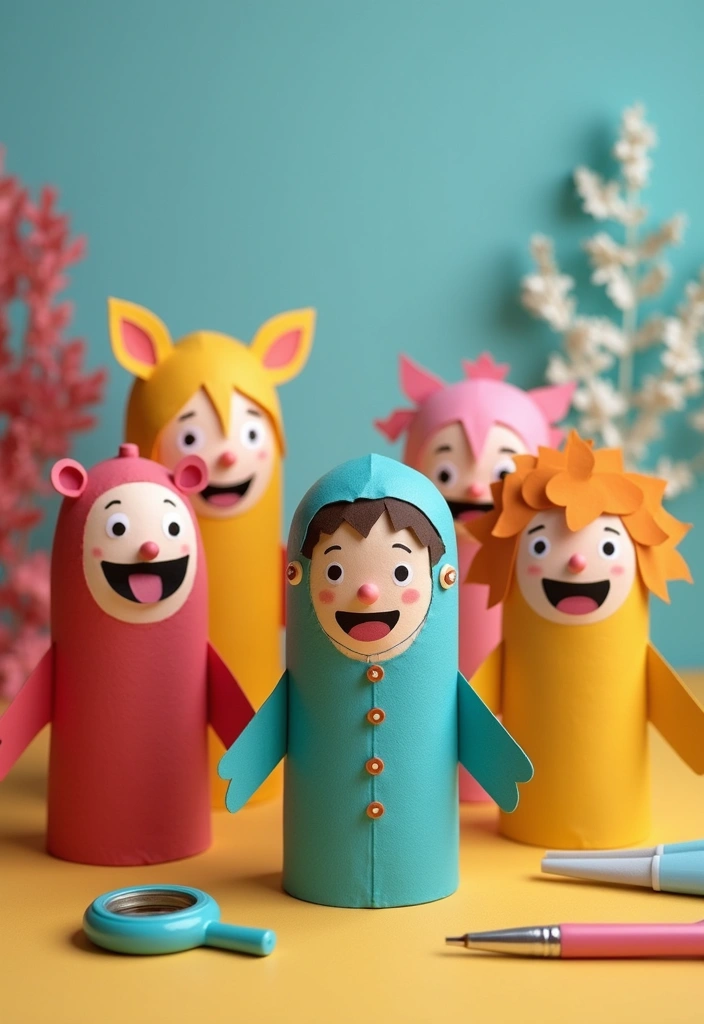
You want a simple way to tell stories that grabs attention. Playful paper puppets give you fast, friendly characters you can move and speak through. This tiny art project brings big smiles to family time or classroom work.
Materials you’ll need:
– Colored paper in a few bright shades
– Popsicle sticks
– White glue or glue sticks
– Markers and stickers
– Optional: kid-safe scissors, thin string for hair
Here is why these basics work. They’re cheap, easy to find, and you can reuse scraps. You’ll keep the mess low and the fun high.
How to build your puppets:
– Cut simple shapes for heads, bodies, and arms from paper
– Add faces and outfits with markers and stickers
– Glue the shapes to a popsicle stick to make a hand puppet
– Make a small stage from a cardboard box to show your story
Next steps? Let’s break it down. Practice a quick scene, then add a second puppet for dialogue. Swap voices, add sound effects with your mouth, and pause to ask, “What happens next?”
Your puppets entertain and teach. Kids stay engaged as they act, listen, and imagine. This is a calm, hands-on way to boost storytelling and teamwork at home.
@media(max-width:480px){
11. Paper Quilting
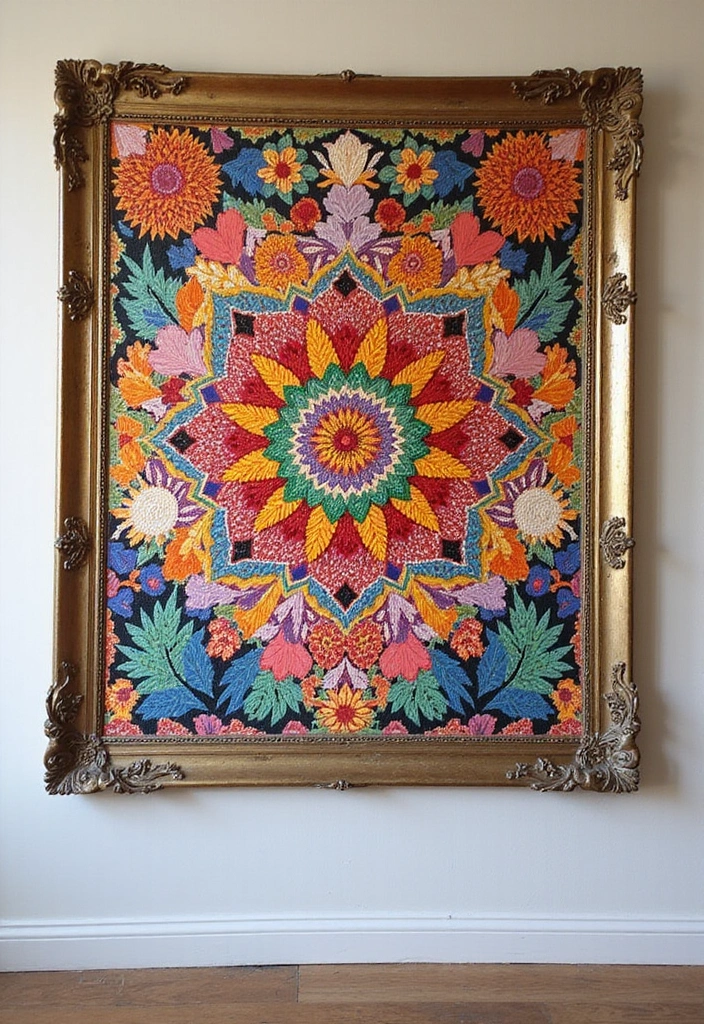
Want a warm, wall-worthy project that uses simple paper? Paper quilting gives the look of fabric quilts with only paper and glue. You cut out small pieces from patterned sheets. You arrange them into a quilt pattern on a sturdy backing. Then you glue the pieces in place. The result looks rich and cozy, like a real quilt, but lighter and mess-free. Start small, then grow your quilt with extra pieces.
Here is why it works. It keeps the charm of a quilt without sewing. It fits any space, big or small, and it uses scraps you already have. You can change the look by changing colors and shapes.
Here is how to begin. Start with a simple motif, like a square or diamond. Pick a color family you love. Lay out pieces on the backing first, so you see the design before gluing.
Quilt-Making Suggestions:
– Choose a theme or color palette to guide your design.
– Use various textures of paper for depth and interest.
– Frame your paper quilt to turn it into a bold wall piece.
This craft is easy to try, forgiving, and great for quiet afternoons. It helps you recycle and makes a cozy art piece you can be proud of.
@media(max-width:480px){
@media (max-width: 600px) {
.normal-quiz-iframe { min-height: 570px !important; height: 570px !important; }
}
12. Paper Cardboard Animals
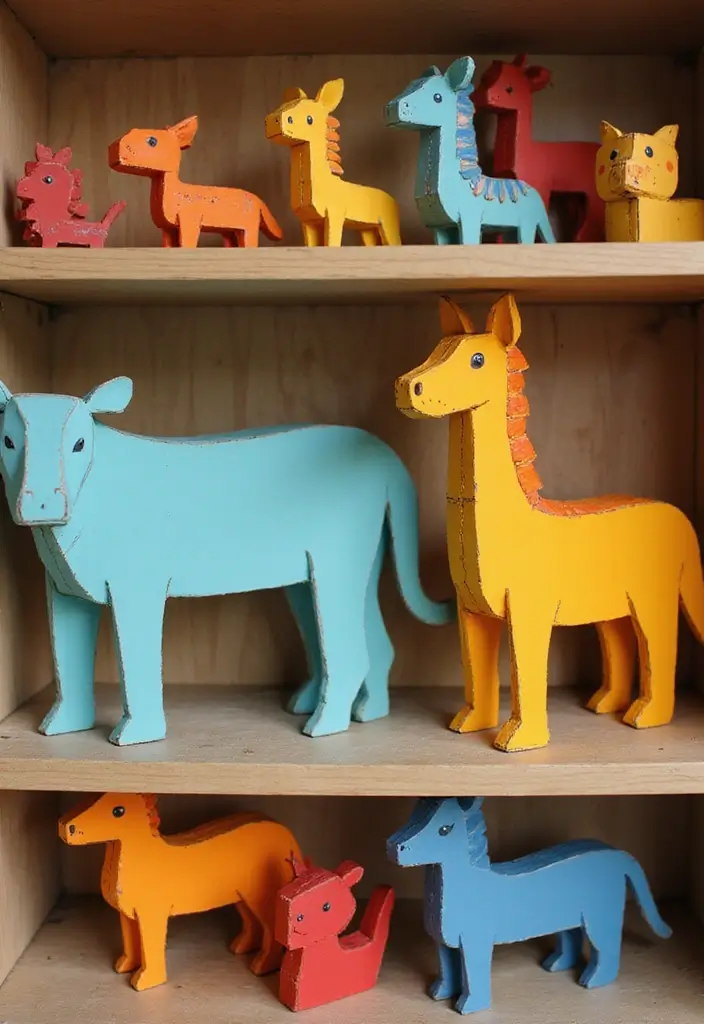
Paper Cardboard Animals
You want a fast, fun way to turn old boxes into friendly animal figures. Cardboard animal crafts reuse what you have and spark your creativity.
1) Gather scraps: a couple of cardboard boxes, scissors, glue, tape, paint or markers, and a bit of fabric or string.
2) Draw a simple plan for an animal, then cut out basic shapes. Use circles for heads, rectangles for bodies, and triangles for ears.
3) Glue pieces together to form your toy or shelf buddy. Let each layer dry before adding the next.
4) Add color and texture to your creature. Paint, color paper, or cover parts with fabric. Glue on eyes with buttons or felt.
5) Give your creature texture with string, yarn, foil, or fuzzy scraps.
6) If you want life, add a small LED inside for glow, or a simple moving part with string.
7) Display on a shelf, table, or your desk. They also work as soft toys with gentle glue and sturdy parts.
Animal Crafting Tips:
– Look for inspiration from your favorite animals.
– Use different textures, such as fabric or string, for added detail.
– Add tiny lights or small moving parts for a special touch.
These pieces can serve as decor or imaginative toys.
@media(max-width:480px){
13. Handmade Paper Vases
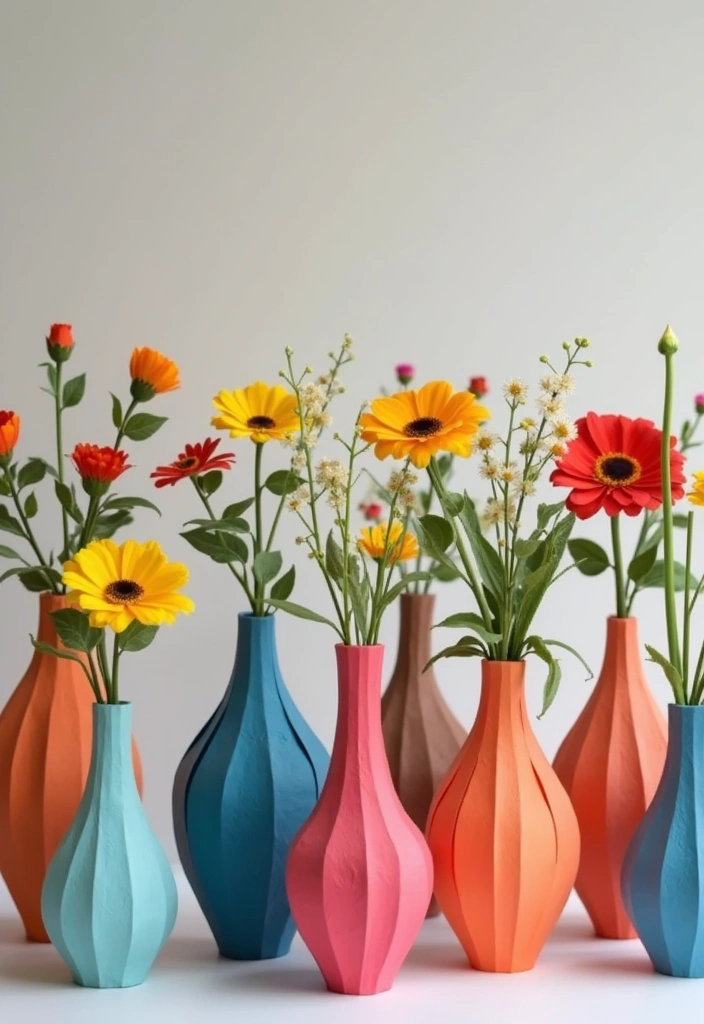
Want a vase that looks stylish but won’t break the bank? Handmade paper vases fit that need. They echo ceramic or glass while staying light and easy to lift. You build them with layered paper, rolling strips and gluing them into a sturdy shape. Let the form dry fully, then bring it to life with color and texture.
Here is a simple, practical way to make one.
– Gather thick paper or cardstock, white glue, scissors, and a ruler.
– Cut long strips that you can bend without tearing.
– Start shaping by rolling a strip and gluing it to a base. Add more strips, building up the walls as you go.
– Check for gaps. Add extra layers for strength.
– Let the vase dry completely before you decorate.
– Decorate with paint, washi tape, or natural touches like twine or dried flowers.
Vase-Making Ideas:
– Try different shapes, from round to tall and narrow, to fit your space.
– If you plan to hold real flowers, use water-resistant paper or place a plastic liner inside.
– Personalize them with simple patterns, decals, or bold color blocks.
These vases give your room a fresh look and show your hands-on skills. They’re great for shelves, desks, or as thoughtful handmade gifts.
@media(max-width:480px){
14. Creative Paper Coasters
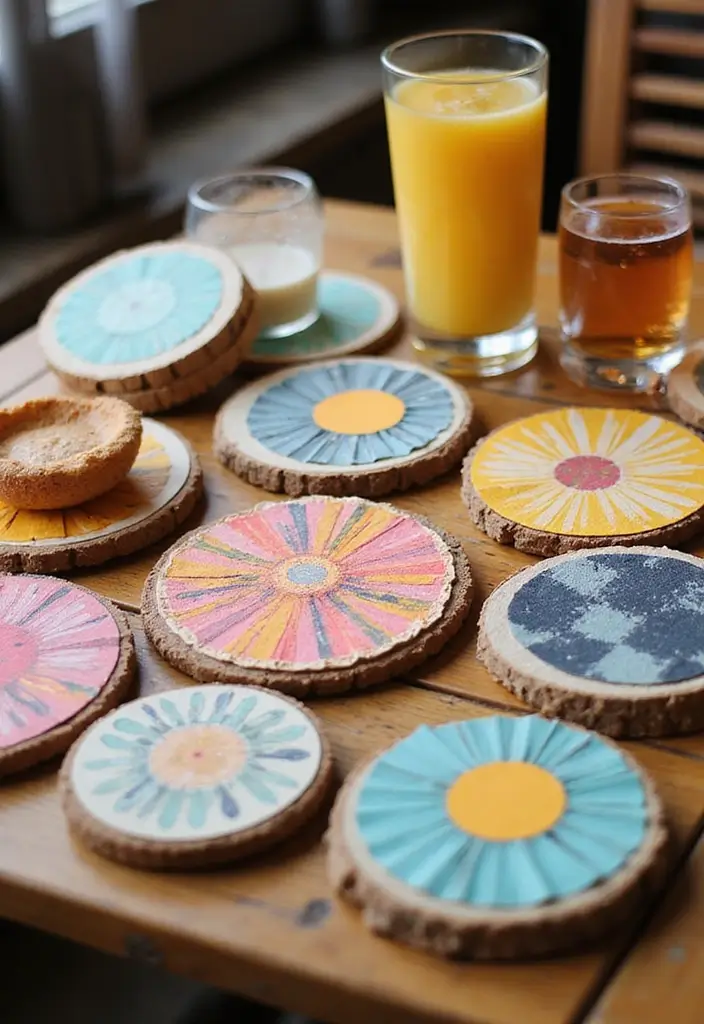
You want coasters that guard your table and match your room. Paper coasters can do that. They are easy to make, and you can swap them as your mood changes.
Here is what you need:
– heavy cardstock or several layers of light paper
– glue, scissors, a pencil
– optional fabric scraps, ribbon, or small buttons
How to make them:
– Cut your shape. Try circles, squares, triangles, or fun, free forms
– Layer two or three sheets for stiffness
– Decorate by drawing, painting, or gluing fabric, lace, or ribbon
– Seal the surface with a clear protectant to fight moisture
– Let it dry completely before use
– Add felt pads or cork on the bottom so they don’t scratch surfaces or slide
Coaster-Making Tips:
– Seal and protect against moisture
– Try shapes beyond the round
– Make a themed set for holidays or seasons
These coasters are small art you can use daily. They start conversations and keep your tables clean.
If a coaster peels, re-glue it and re-seal. For a lighter feel, use thinner paper in a stacked design.
@media(max-width:480px){
15. Detailed Paper Maps
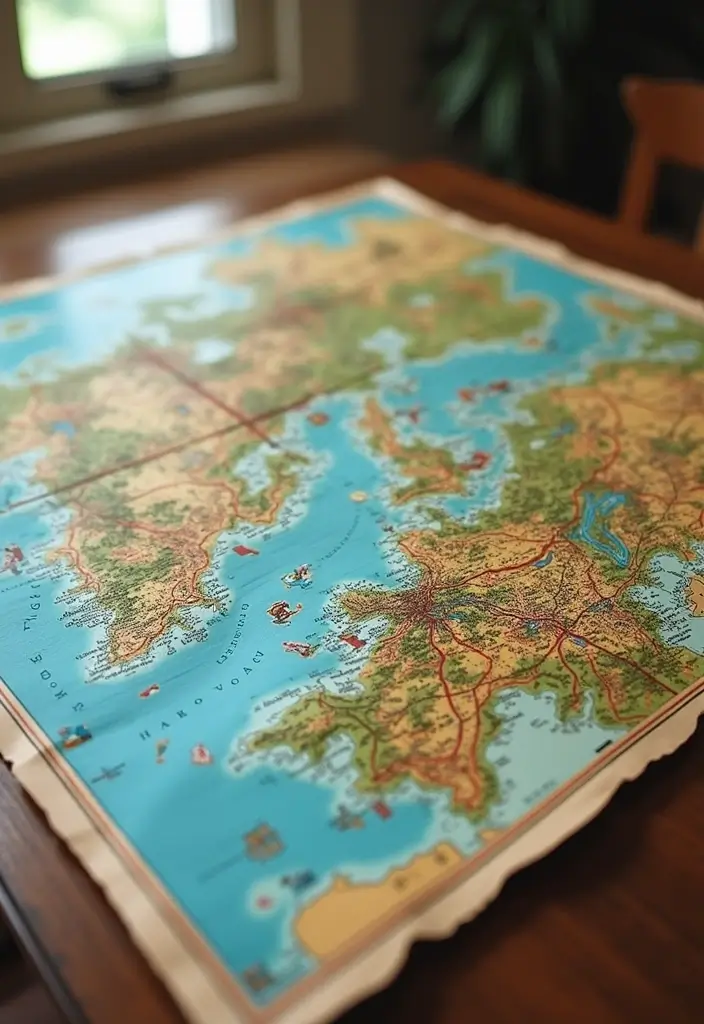
Travel fans want a map that feels personal. A handmade paper map can pull that off. You can map a real city or invent a place you love. Use atlas pages or colored paper to build land, roads, and landmarks. Then mount your work on a strong base and frame it.
What you need
– Old atlas pages or plain colored paper
– A thick base board
– Scissors, glue, a ruler, and a pencil
– Small stickers or stamps for symbols
– A clear spray sealant (optional)
How to build it
– Pick a theme you care about, like your hometown or a dream destination
– Cut land shapes, rivers, roads, parks, and notable spots
– Layer pieces on the base to add depth, using light colors for water and dark greens for forests
– Add tiny signs by labeling a harbor, a peak, or a square with a small name
– Keep edges neat and glue pieces flat for a clean look
Finishing touches
– Frame the map to turn it into wall art
– Press it under a heavy book for a day to keep it flat
– Quick seal with spray can help keep pieces in place
Here is why you’ll love it: it sparks wanderlust, starts good talks, and gives your room character.
@media(max-width:480px){
16. Paper Jewelry Boxes
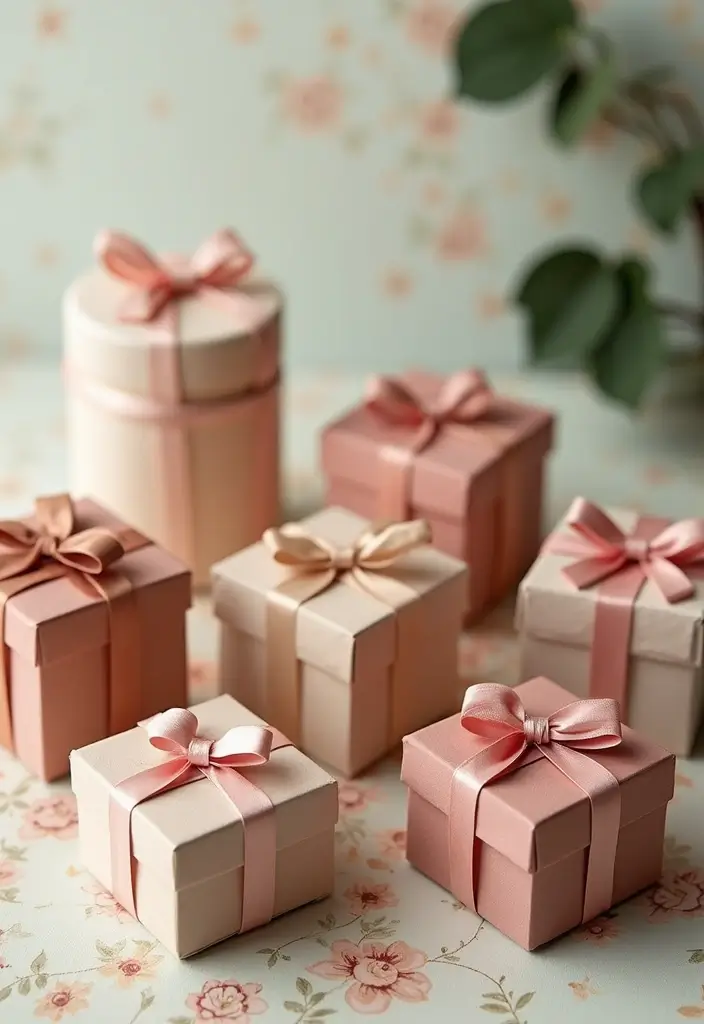
Feeling stuck with tiny, boring jewelry boxes? You can make a paper jewelry box that looks good and works well. Start with patterned cardstock and pick a size that fits your pieces—rings, earrings, bracelets, or a small set. You can keep it simple with a plain box, or go with a lid and little compartments to separate items.
Here is how you do it:
– Use a scoring tool to make clean, straight folds.
– Cut the pieces carefully and glue the tabs in place for a solid box.
– Line the inside with soft fabric or felt to add a luxury feel.
– Add a name, initials, or a small motif on the lid for a personal touch.
– If you like, tuck a slim ribbon around the lid to keep it closed.
Box-Making Ideas:
– Choose a simple cuboid for quick results, or design a box with a hinged lid for a sturdy look.
– Create small dividers inside so rings stay apart from bracelets.
– Pick bold colors for a gift box, or soft pastels for everyday storage.
– Finish with a subtle gloss coat to protect the surface.
These paper jewelry boxes are great gifts and handy storage. They protect pieces while showing care. Ready to try? Gather cardstock, a scoring tool, fabric, and a bit of glue, and you’ll have a chic box in no time.
@media(max-width:480px){
Recommended Products
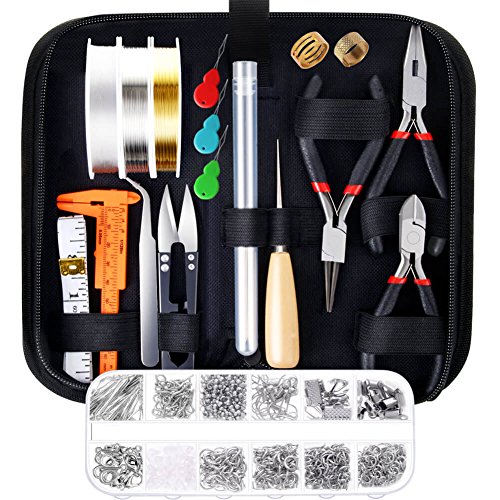
Please Note: If the pliers you received have some oil on the head that make it look like dirty, please do not worry. The jewelry pliers are coated with oil to prevent rust. Please wipe them clean with a cloth before use and apply oil to them before storage, which will help the pliers keep anti-rust.

All-in-one: Pizooro clay beads kits come with all the supplies and tools you need to get started, including 48-color 9600 pcs 6 mm clay beads, 850 pcs bead assortments like letter beads, happy Beads beads, pearl beads, spacer beads, heart beads, pendants, and jewelry-making accessories like bracelet elastic string, earring hooks, tweezers, scissors and jump rings. This makes it easy to get started with your new hobby without having to purchase additional beading supplies

24 EXPERTLY CRAFTED POPULAR COLORS - We selected 24 classic colors polymer clay beads to meet your requirements of DIY jewelry making projects. You can make a themed bracelet easily with mixed clay heishi beads and your favorite pendants. For example, black and pumpkin yellow make it the Halloween. Different shadows of green make it St. Patrick's day style
17. Decorative Paper Lanterns
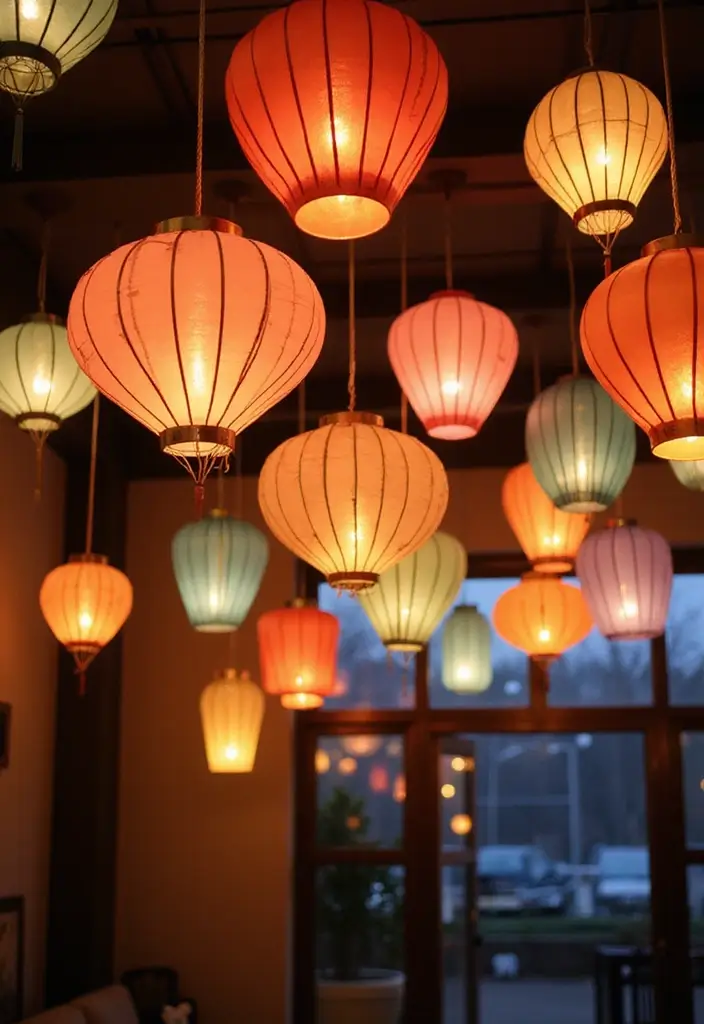
Want a warm, cozy glow without a big mess? Decorative paper lanterns make it easy. Cut and fold paper into a lantern shape. Slip in a small LED light inside for a gentle, safe glow. They come in bright colors or soft hues, so you can match them to any room.
You can use different sizes and colors. Hang lanterns in a cluster for a festive look or place a single tall lantern to draw attention.
Here is why decorative paper lanterns fit any space. They are light to move, cheap to make, and fast to finish. They work on walls, shelves, or ceilings. They are simple enough for beginners and fun for kids with adult help.
Lantern-Making Tips:
– Use colored or light-toned paper to soften the glow
– Add cut-out shapes to cast pretty shadows
– Hang with clear string or thin wire so they sway
– Use LED lights inside to stay safe
– Mix sizes and patterns for a lively display
Next steps.
What you need
– Colored paper or tissue paper
– Scissors and a ruler
– Tape or glue
– A small LED light or a fairy-light string with a battery pack
– String or ribbon for hanging
How to assemble
1) Cut a rectangle from the paper
2) Roll it into a tube and tape the edge
3) Close the ends with folded tabs
4) Cut small shapes for your design
5) Slip in the LED light and test the brightness
6) Hang in a safe spot away from heat
With a little practice you can build a whole wall of lanterns for any season or mood.
@media(max-width:480px){
Recommended Products

Non-blinking. Color Temperature: 3000K (Warm White).

High Quality Materials:The use of high-quality plastics that are non-toxic and tasteless will not cause harm to the human body.It will not be dangerous to children and can be used with confidence

Dimension(each): approx. 0.47×1.38inch(D×L)
18. Fun Paper Planes

You want a quick, cheap way to have fun with friends or family. Fun paper planes fit that need. They fold fast, fly far, and you can try several styles in one sitting. You get hands-on practice, a small craft project, and pure play. You can do this in a living room, on a lawn, or at a park.
Plane-Folding Tips:
– Use colorful sheets of paper. Bright colors help you see how the plane moves.
– Start with three easy designs: a classic dart, a wide wing glider, and a long nose plane.
– Change the wing length. Longer wings add lift and keep the flight steady; shorter wings go faster.
– Balance the nose. A tiny fold at the tip can shift weight for a smoother glide.
– Mark the center crease. A clean center line helps all folds stay even.
– Personalize your flyer. Draw a face or stripes to make it yours.
Test and play:
– Race them across a room or yard to find the farthest flyer.
– Compare results and note which design flies straight.
– Try light tricks like a slow climb or a gentle turn to add fun.
Here is why this works: simple folds teach you how lift, weight, and balance shape a flight. You see quick results and can tweak things right away.
Next steps: Grab a few sheets, pick two designs, fold, throw, and refine.
@media(max-width:480px){
19. Beautiful Paper Frames

You want frames that make your photos pop. Paper frames are cheap, easy to swap, and fun to make. Use patterned or plain paper. Layering adds depth. Small flowers or stickers can finish the look.
What you’ll need
– Patterned paper or colored craft paper
– Cardstock for backing
– Scissors, a ruler, and a pencil
– Double-sided tape or glue dots
– A craft knife for clean edges
– Simple decorations: stickers, pressed flowers, tiny beads
Here is how to build a neat frame:
– Pick a frame size that fits your photo.
– Cut a window in a piece of cardstock.
– Glue a larger piece of patterned paper behind it to form a border.
– Add a thinner paper layer on top for depth.
– Mount the stack on a backing sheet and place your photo inside.
– Place a photo in the opening and secure with a light dab of glue or a photo corner.
Framing tips:
– Use double-sided tape for a flat, tidy edge.
– Create a collage by lining up several small frames for a gallery wall effect.
– Match the colors to your art or photo so it feels one piece.
These paper frames are great on desks, shelves, or as gifts. They’re simple to make and easy to update.
For a softer look, round the corners or add a scalloped edge.
@media(max-width:480px){
@media (max-width: 600px) {
.visual-quiz-iframe { min-height: 995px !important; height: 1100px !important; }
}
20. Simple Paper Masks
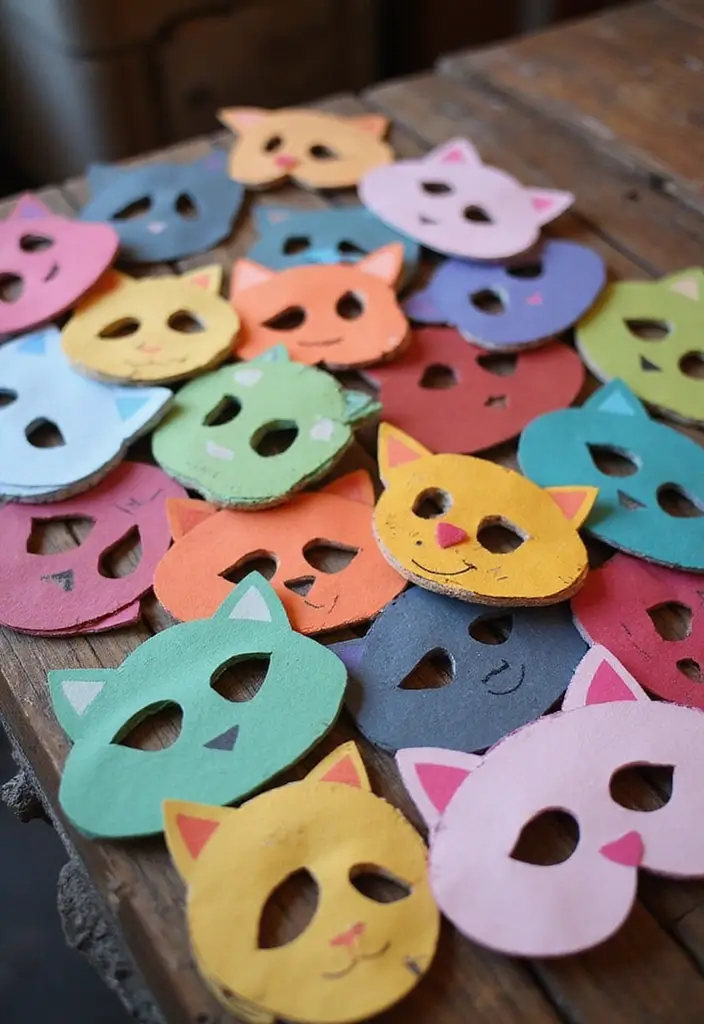
Want a fast, kid-friendly craft that ends with something you can wear? Simple paper masks fit the bill. You can shape them into animals, heroes, or goofy faces. They’re light, easy to store, and fun to decorate. Read on to turn plain paper into wearable art.
What you need
– sturdy paper or cardstock
– scissors and a hole punch
– elastic cord or a strap
– glue or tape
– markers, paint, stickers
– extra decorations like feathers, sequins, or paper shapes
Here is why these masks work for many settings. They’re safe for small hands, quick to finish, and great for pretend play or school skits.
How to build them
– Draw a simple mask shape. Cut it out. If you want two eye holes, cut them.
– Punch two holes on the sides for the elastic. Tie or glue on a small loop of elastic.
– Decorate. Paint faces, add fur or ears, crown shapes, glitter glue, or tiny charms.
– Finish and try it on. Use a strip of tape for a firmer fit if needed.
Next steps
– Create masks for a party backdrop or a mini show.
– Have a mask parade. Invite friends to wear theirs.
– They’re easy to store and reuse for future parties.
@media(max-width:480px){
21. Paper Snowflakes

Winter decor that feels handmade can warm up a room. Paper snowflakes are cheap, quiet to make, and they glow when light hits them. These are easy DIY snowflakes you can make with kids. Hang them in windows, on walls, or from the ceiling to add a cozy touch.
What you need
– Square paper (white for a classic look, or colored for a brighter twist)
– Sharp scissors
– Pencil (optional, to sketch a simple pattern)
– A flat work surface
How to make a snowflake
1) If your paper isn’t square, trim it to a square first.
2) Fold the square in half diagonally to form a triangle.
3) Fold the triangle in half again to a smaller triangle.
4) Cut small shapes from the two sides of the triangle. Do not cut all the way through the folded edge.
5) Unfold slowly until you see a snowflake. Gently press with your hands or place a heavy book on top for a minute to flatten.
Tips for crisp flakes
– Use sharp scissors and steady hands.
– Try different fold patterns to get unique designs.
– Use colored or decorative paper for variety.
– Add a light dusting of glitter for a frosty look on the edges.
Ways to display
– String several snowflakes on a thread to make a garland.
– Tape flakes to windows for a frosty, translucent effect.
– Clip a few to a wall or add them to a mobile for a quiet winter feature.
– Layer flakes on a table as a wintry centerpiece.
These simple snowflakes brighten your space without costing much. They’re easy to make and store for next season.
Next steps: gather paper and scissors, try three different snowflake sizes, and test how they look in your window or on a string.
@media(max-width:480px){
22. Artistic Paper Place Cards

You want guests to feel welcome the moment they sit down. Artistic paper place cards help you do that. They add warmth and style to the table. You write each guest’s name or a short note on them.
Here is why this works. A handmade card tells people they belong here. It guides seating without asking them to guess. It looks good from across the room and up close.
Materials
– Heavy cardstock or decorative paper
– Vellum sheets for a soft layer
– Scissors and a ruler
– A scoring tool or bone folder
– Glue or double-sided tape
– Gel pens or fine markers
– Optional: washi tape or embossing pen
Folding ideas
– Tent cards with a simple fold
– Flag cards on a toothpick for height
– Mini bookmark cards slipped under a plate
– Small pop-up cards for a playful touch
Decoration ideas
– Mix matte and shiny papers for depth
– Add a thin border with a colored pen
– Use a tiny sticker or stamp to mark sections
Place Card Ideas
– Create wedding or holiday vibes with color and pattern
– Combine different textures for a rich look
– Add a personal note or short quote for warmth
Next steps. Gather supplies, pick a fold you like, and test a few designs before the big day.
@media(max-width:480px){
23. Paper Scrapbook
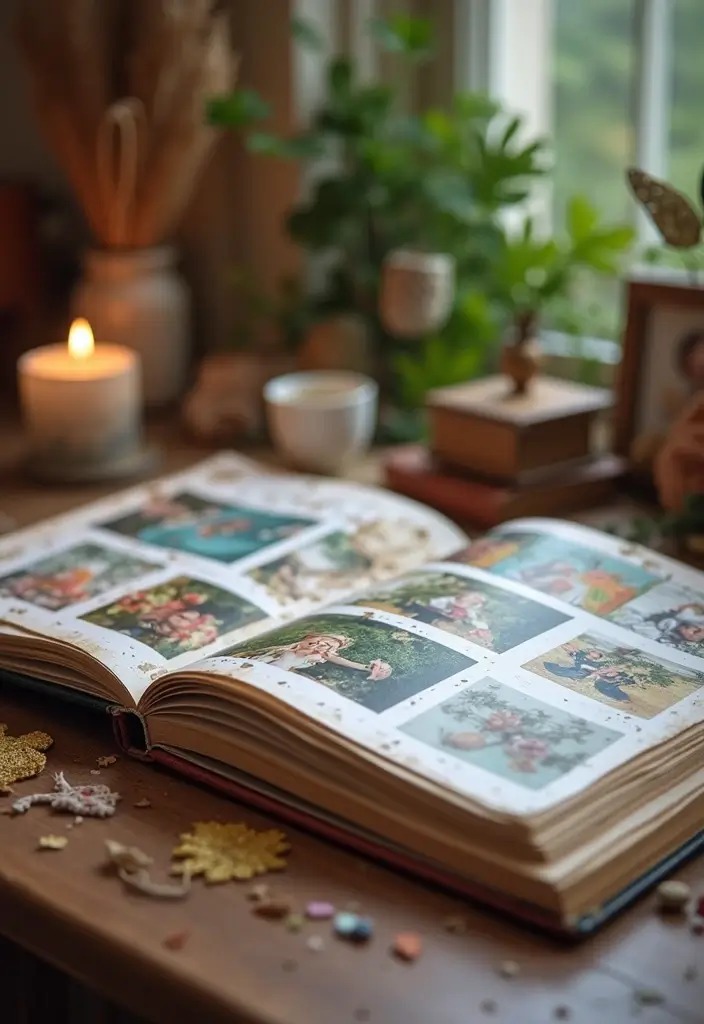
You want a paper scrapbook that tells your story. It’s more than photos in a book. It’s color, texture, and memories you can touch. Gather your favorite photos, a few mementos, and some decorative papers. Pick a moment to start, then dive in today.
What you need
– Acid-free glue or tape
– Scissors and a ruler
– Photo corners or small craft glue
– Decorative papers, stickers, and small embellishments
– Journaling space for captions
Here is why these basics matter. Photos stay bright longer when you use acid-free glue. The layout stays neat when you plan it first.
Next steps
1) Pick a theme or simple timeline for your pages.
2) Gather items: photos, tickets, notes.
3) Do a light layout first. Move items until you like the balance.
4) Glue items in place. Leave space for captions.
5) Add captions or simple doodles with date and place.
6) Layer mats, a bit of fabric or lace for texture.
7) Put pages in protectors or a binder so they last.
Scrapbooking Tips:
– Organize by theme or date.
– Mix textures with fabric, lace, or ribbon.
– Add captions with dates to tell the story.
– Use small stickers and gentle embellishments.
Your scrapbook becomes a warm keepsake you can flip through for years to come.
@media(max-width:480px){
24. Fun Paper Banners
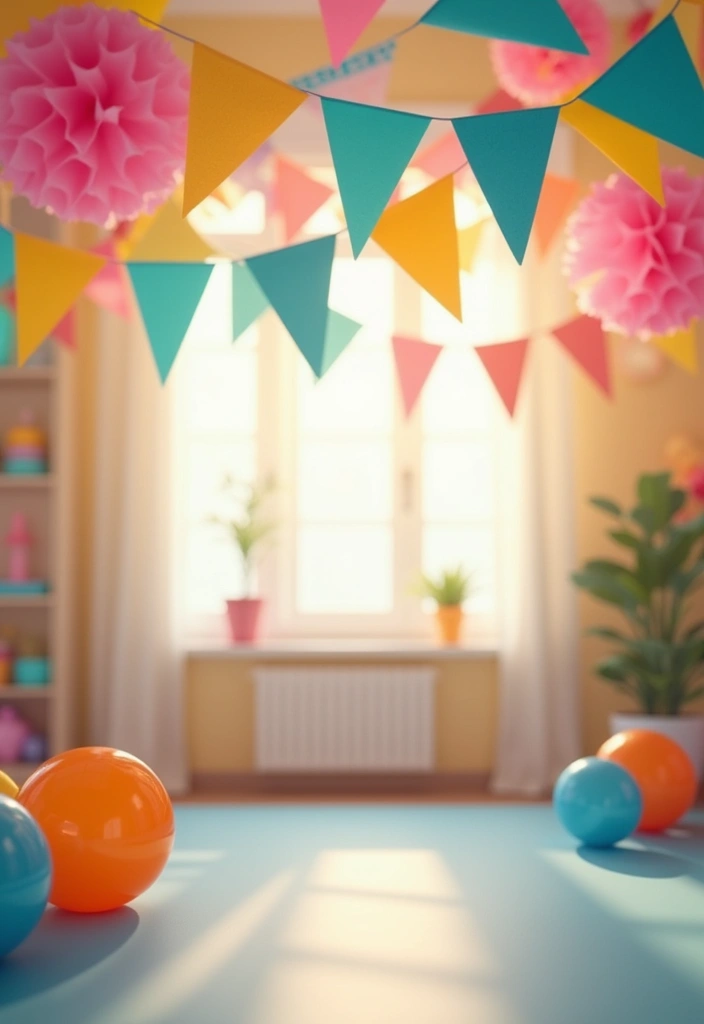
Need a quick way to make a party feel special? Paper banners are a simple win. They add color, texture, and life to any room. With a small setup you get a bright display that guests notice.
Materials you’ll use
– Colored paper in several shades
– A light string or twine
– Scissors and tape or glue
– Markers, stickers, or a white pen
Banner-Making Tips:
– Mix bold colors with softer tones for balance
– Thread shapes at regular spaces for a neat look
– Try pennant flags, circles, triangles, or stars
– Add small ribbons, twine, or buttons for extra texture
How to make your DIY banners
1. Cut shapes in different sizes and colors
2. Write short messages or simple doodles on each piece
3. Make a small hole at the top of every shape
4. Thread the shapes onto the string and space them evenly
5. Tie the ends and hang where people will see them
Where to place banners
– Across a doorway to welcome guests
– Along a wall above a table
– Between windows or over a mantle
Why banners work
They catch the eye and move as people walk by. They set a festive mood with little effort. You can reuse panels for other events by swapping the words.
Next steps
Choose a theme, grab supplies, and start cutting. In under an hour you have a cheerful decor piece that makes the room feel warmer.
@media(max-width:480px){
25. Paper Chain Garlands
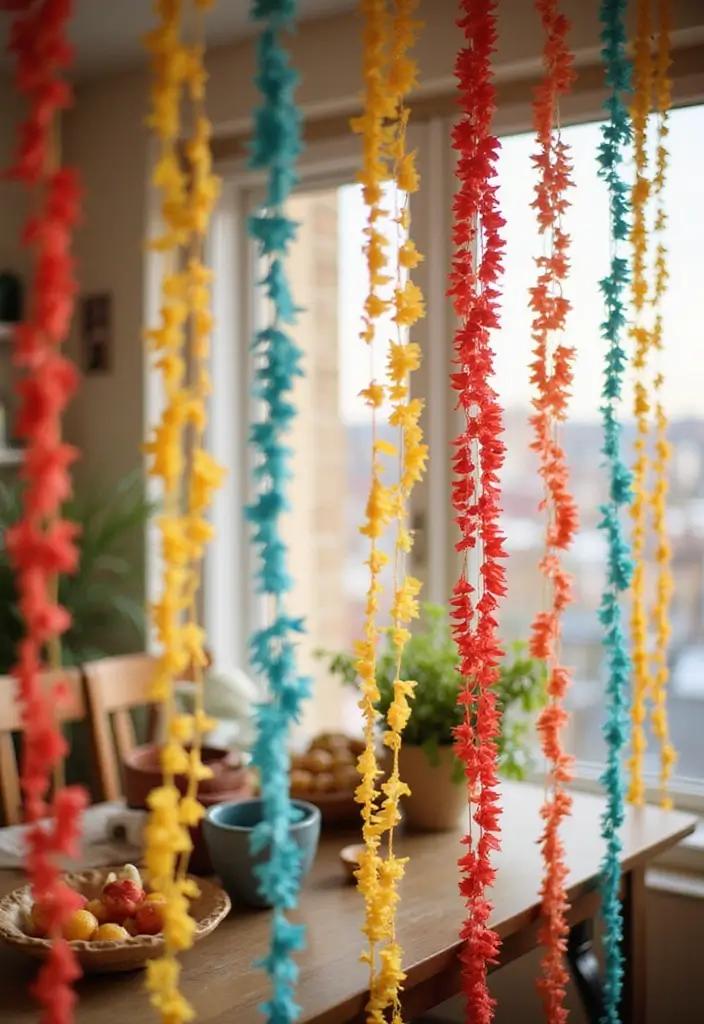
Wanna add a splash of joy to a room without spending a lot of time or money? Paper chain garlands are a simple, friendly way to do it. They flutter with every breeze and glow in bright colors under lights. Here is why they work for homes and parties: they are easy to make, light to hang, and you can change the look in minutes.
What you’ll need
– Colored paper strips (construction paper works well)
– Scissors
– Glue or tape
– String, thread, or ribbon for hanging
– Optional markers or stickers for extra flair
How to make them
– Cut strips about 1 to 2 inches wide and 9 inches long. You can adjust the size for a denser or lighter chain.
– Make a loop with the ends and glue or tape it shut. That loop becomes the first link.
– Slide a new strip through the loop and press to secure. Keep adding loops until you reach the length you want.
– Attach the ends to a string or hang the garland directly from hooks, tape, or nails.
Next steps: choose a direction for your garland—horizontal across a wall, or draped in a soft curve along a mantel.
Style and placement ideas
– Use a single color for a clean look, or mix bright shades for a party vibe.
– Mix in patterns or metallic strips for a modern twist.
– Try layering several garlands at different heights for depth.
Garland-Making Tips:
– Customize the length to fit your space.
– Experiment with different strip widths for varied effects.
– Hang them above doorways, mantels, or as a backdrop for events.
With a little planning, you’ll have charming paper chain garlands that brighten birthdays, home decor, and seasonal setups.
@media(max-width:480px){
26. Artistic Paper Wall Art
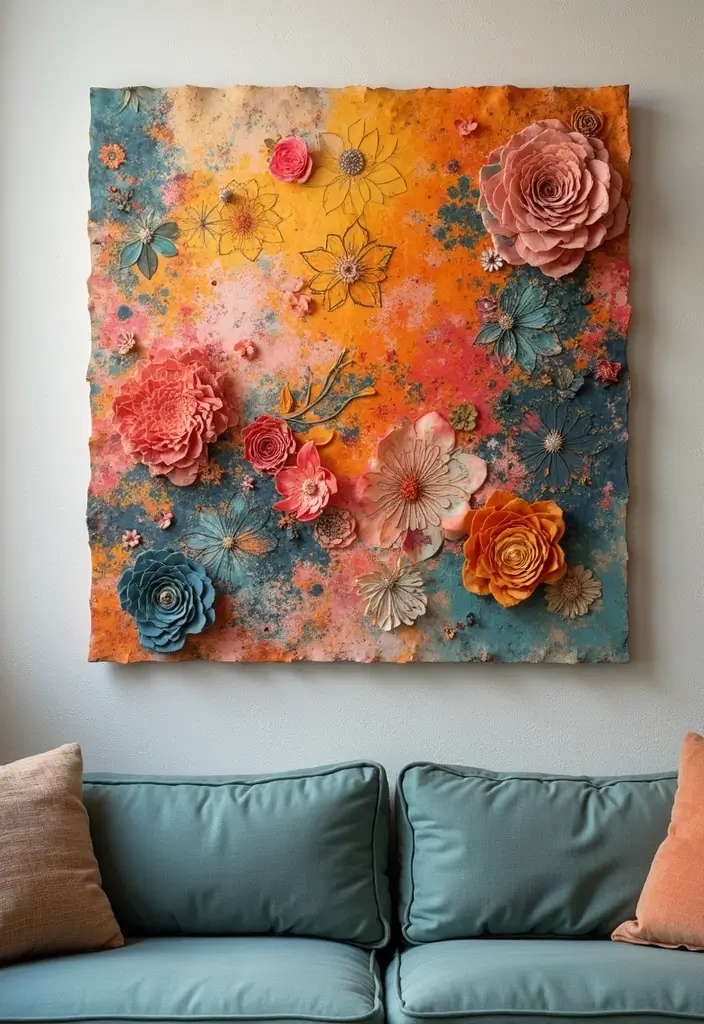
Artistic Paper Wall Art
You want a bold wall look that fits your space and budget. Artistic paper wall art uses layered cutouts to add depth and color. Frame them or mount on the wall. Choose themes you love for your room.
Here’s why it works. Layered paper creates shadows and texture that real paint can’t match. The light weight lets you swap designs. You can build a mini gallery with a few pieces.
What you need
– Colored paper, scissors, a cutting mat, a ruler, and glue
– A frame or removable mounting adhesive
– A pencil and ideas for patterns
How to make it
– Plan a design with a few shapes in different sizes. Sketch on scrap paper first.
– Cut each layer carefully. Use a sharp blade for clean edges.
– Layer pieces on a base sheet or inside a frame. Leave small gaps to show the shadow between layers.
– Hang where light hits the art softly. Move it around to see the shadows change.
Next steps: start with a small piece, then grow a three-piece series for a gallery wall. Your wall can speak with clean lines and calm color.
@media(max-width:480px){
Conclusion
The beauty of paper craft DIY projects lies in their versatility and creative potential. From elegant flowers to whimsical masks, these 26 projects highlight how simple paper can transform into unique art pieces. Embracing recycled materials not only fosters creativity but also contributes to sustainability. Whether you try one or all of these ideas, let your imagination soar and have fun creating. Share your projects and connect with others who appreciate the art of paper crafts!
Note: We aim to provide accurate product links, but some may occasionally expire or become unavailable. If this happens, please search directly on Amazon for the product or a suitable alternative.
This post contains Amazon affiliate links, meaning I may earn a small commission if you purchase through my links, at no extra cost to you.
Related Topics
paper craft DIY
recycled paper art
easy craft projects
handmade decorations
creative paper projects
beginner friendly
whimsical art
budget friendly crafts
paper collage
DIY home decor
seasonal crafts
paper gift wrap