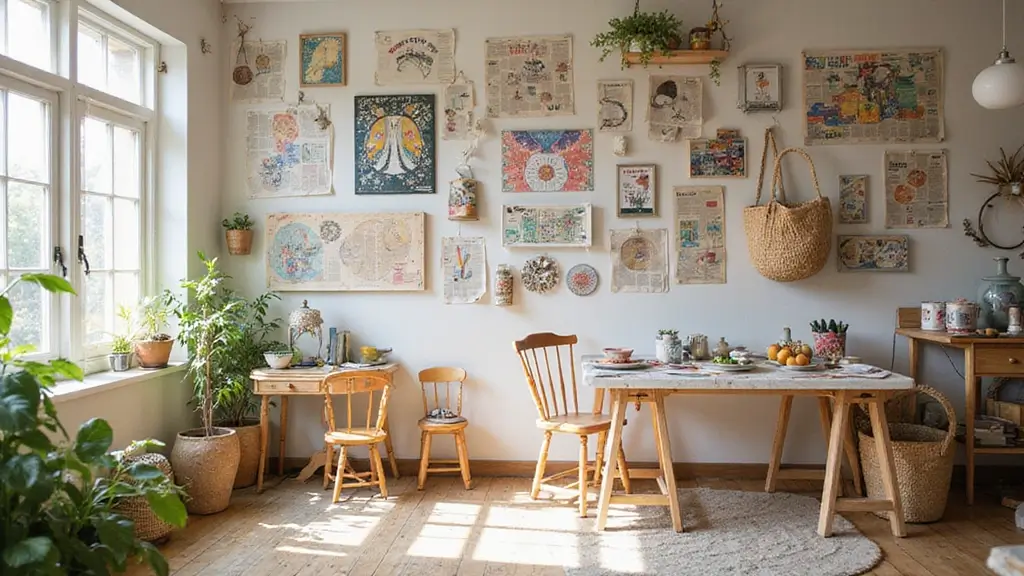
This topic has me obsessed with crafts that reuse the stuff already in our homes. I wanted to share ideas that are easy, affordable, and kind to the planet. These 28 recycled kids crafts show that small swaps can spark big creativity. You can turn cardboard tubes, bottle caps, fabric scraps, and old containers into games, art, and practical keepsakes.
If you’re a parent, caregiver, or teacher who wants kid friendly, mess friendly activities that teach real skills, this is for you. You care about waste reduction, hands on learning, and time with kids that feels meaningful. This list helps you fill a week with small, doable craft moments that teach eco creativity.
What you’ll get is 28 DIY projects that reuse common materials. Each idea includes simple steps, a quick materials list, and tips to adapt for younger kids or bigger ones, all about upcycling and reuse. Projects cover art, games, and simple home decor, all built around reuse and practical thinking.
Here is why this works. Kids see how reuse lowers trash and saves money. They practice planning, measuring, sorting, and problem solving. They learn about color, texture, and how parts fit together. Materials range from cardboard and paper to plastic lids and fabric scraps. We keep safety in mind with easy adult supervision where needed.
Here is how to use the list: pick a project for a rainy afternoon or a weekend craft time. Set up a small recycling station with bins for plastic, paper, and metal. Let kids pick what to make and how to customize it with color and texture. These projects fit many ages and can be done as a quick solo activity or a family group project.
Finally, this is not about perfection. It is about making something new while learning and having fun. If you try these, share what you made and what you learned. You will start a habit of seeing junk as a chance to create. That small habit can grow into many eco friendly acts that keep our planet in mind.
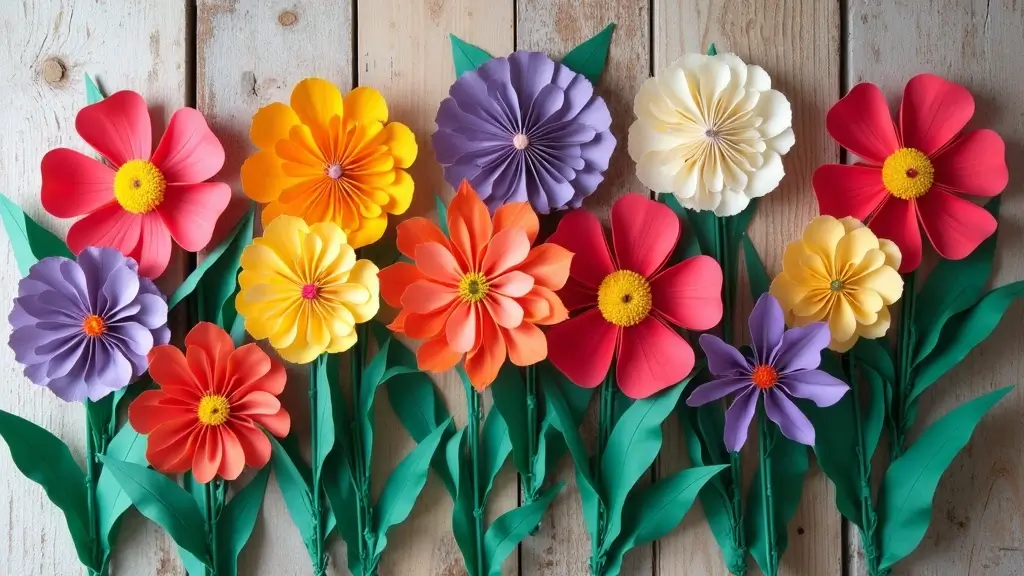
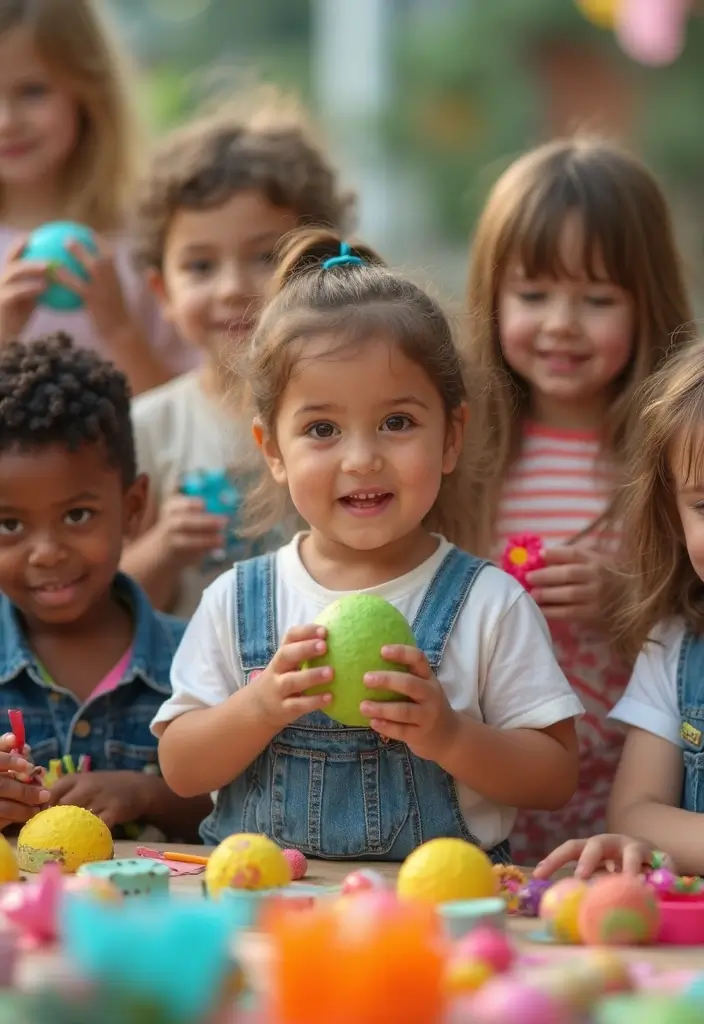
1. Egg Carton Flowers
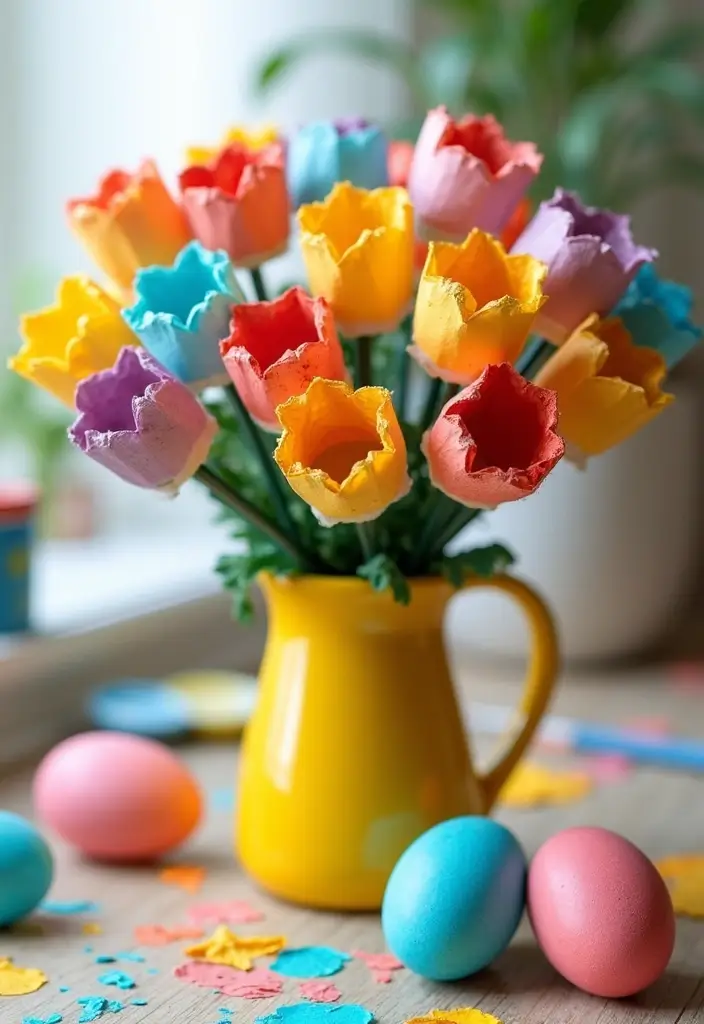
Here is a simple way to turn egg cartons into color and life. You get a hit of creativity and an easy recycling win all at once. Egg Carton Flowers light up a shelf and teach kids a first lesson in reusing waste.
– Materials Needed:
– Egg cartons
– Paints (acrylic or poster)
– Paint brushes
– Scissors
– Pipe cleaners or wooden sticks
– Glue
– Optional glitter
Here is why this works. The egg cup sections are small and safe to cut. They become petals in seconds. You move from plain cardboard to a bright bouquet with quick brush strokes.
– Step by step:
1) Cut the carton into individual cups.
2) Shape the cups into petals.
3) Paint each petal in bold colors.
4) Let them dry.
5) Glue petals around a stem made from a pipe cleaner or stick.
6) Add a leaf if you like.
Next steps: repeat with other colors to build a mini garden. You can tape them to a clay pot or place them in a painted jar.
– Tips:
– Mix white glue with a splash of water to make a glue wash for a shiny finish.
– A light dusting of glitter adds sparkle without mess.
Here is the payoff. Kids practice cutting and painting. They learn that small scraps can become something lovely. You get a cheerful display that invites conversation about recycling, not waste.
@media(max-width:480px){
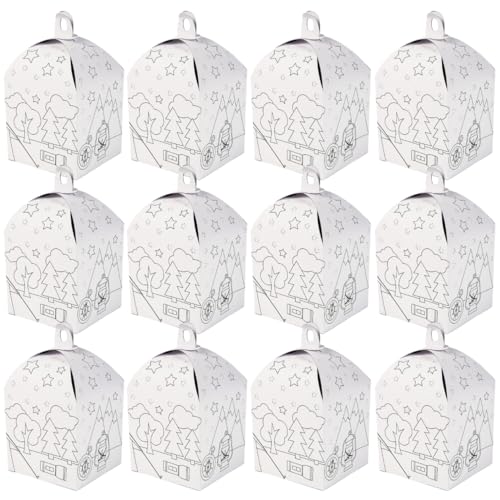
Recommended Products

Complete Craft Kit: this Set includes 12 blank paper egg carton, 12 assorted paints and 2 paintbrushes; All crafting accessories are ready in one pack; Children can start DIY instantly, use the full tray as a painting board or take apart pieces to craft varied animal art


This 10-count set of wooden eggs for crafts features a smooth, unpainted surface, making them perfect for hand-painting, dyeing, and decorating. Whether using acrylic paint, watercolors, markers, or wood stains, they absorb colors beautifully, making them an excellent choice for Easter egg painting, art classes, and holiday decorations.
2. Bottle Cap Snakes

Need a quick, eco-friendly craft you can do with kids? Bottle cap snakes are simple to make and fun to play with. They turn old bottle caps, beads, and string into wiggling, kid-safe art.
Materials You Need
– Clean bottle caps
– Colorful beads
– String or thin cord
– Scissors
– Optional: acrylic paint for bright caps
How to Make It
1) Wash each cap and dry it well. Dull caps still work, and you can paint them later.
2) Thread a piece of string through a cap. Add a bead for an eye, then a bead for a scale.
3) Add more caps, keeping a little space between them. Tie a small knot between caps to hold them in place.
4) If you want a rainbow look, paint the caps before threading and let them dry fully.
5) Finish with a short tail and a longer body. Wiggle the snake to test movement.
Tips and Safety
– Work with kids and keep scissors out of reach.
– Let painted caps dry before handling.
– Use bright colors to make patterns and learn color pairing.
Why This Helps
Here is why: the project builds fine motor skills as little hands thread caps and tie knots. It also sparks creativity with color choices and patterns. Best of all, you recycle items into new art.
Next steps: Make several snakes in different colors and line them up for a mini snake garden.
@media(max-width:480px){
3. DIY Tin Can Lanterns

Want a cozy glow for your yard that uses what you already have? These DIY tin can lanterns turn old cans into safe, magical lights. They’re a great way to teach eco-friendly thinking while you craft together.
Materials Needed
– Empty tin cans
– Water
– Hammer
– Nails
– Safety goggles
– Tea lights or LED candles
– Optional: non-toxic paint or scrap paper for decorating
How to make them
– Start by rinsing the cans and removing any labels. Let them dry so you have a clean surface.
– Fill each can with water and pop it in the freezer. The frozen water helps the can keep its shape and protects tiny hands during punching.
– When the water is solid, take out the can. Use a hammer and nails to punch simple shapes like stars, circles, or hearts. Leave a sturdy lip at the top so the edges stay safe.
– Let the ice melt, rinse the can, and wipe it dry. Check for sharp edges and smooth them with a bit of sandpaper if needed.
– Put a tea light or LED candle inside. Set the lantern on a metal tray or bricks so it won’t scorch the surface.
Tips and ideas
– Try different can sizes for a wall of lights.
– Decorate the outside with kid-friendly paint or paper for extra charm.
– String several lanterns together for a soft garden path.
This project keeps waste out of the trash and lights up your outdoor nights in a simple, kid-friendly way.
@media(max-width:480px){
Recommended Products
Complete DIY lantern craft kit includes 12 easy-to-assemble luminaries with vibrant markers and fun decorations for personalized creative expression. Perfect arts and crafts for kids ages 4-8 and older.


4. Paper Roll Animals
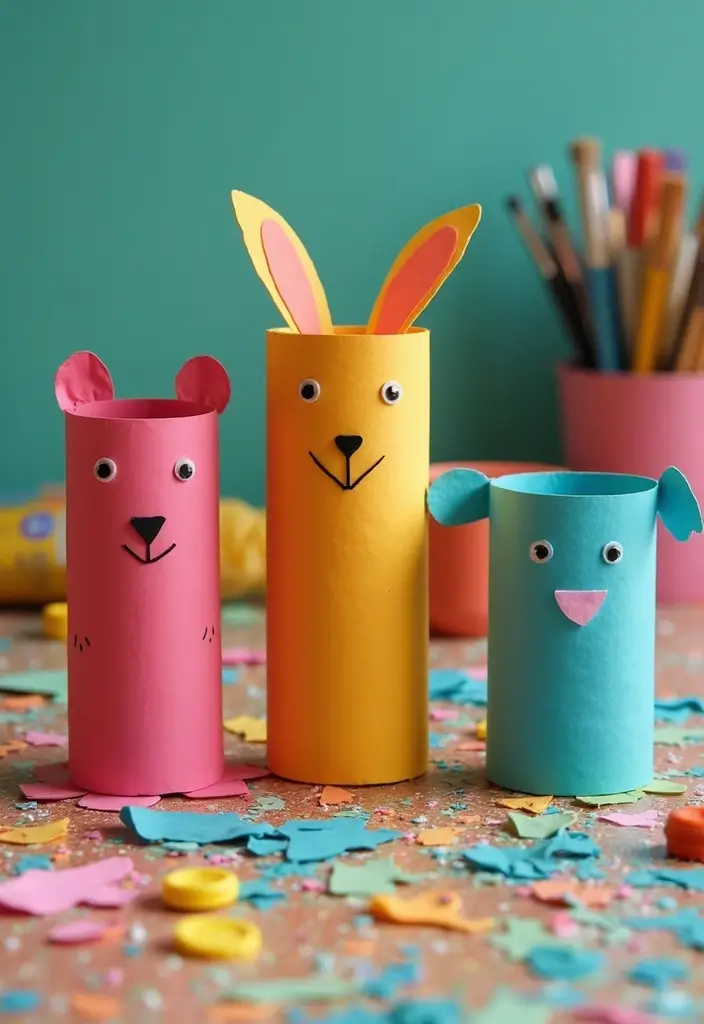
Want a quick, kid-friendly craft that uses scraps and sparks imagination? Paper Roll Animals turn old toilet paper tubes into cute, memorable creatures. This recycled kids crafts idea helps kids see how a tiny scrap can become a friend.
What you need
– Toilet paper rolls
– Paints and brushes
– Markers
– Glue
– Scraps of paper or felt
– Optional googly eyes
How to make them
Here is how you can do it.
– Cut the rolls to different heights to build a small animal group.
– Paint the bases in bright colors. Let colors dry before you add faces.
– Add eyes, ears, noses, and tails with felt, paper, or marker details.
– Draw whiskers, stripes, spots, or fur textures to give each character its own look.
– Glue on extra bits like a bow, hat, or scarf for a playful touch.
Why it helps
Here is the reason this works.
– It is quick, simple, and keeps kids engaged.
– It uses scraps, so it fits a low-cost, low-waste plan.
– It invites stories as kids invent names and tiny adventures for each animal.
Tips
– Create a mini zoo on a table or shelf. Let kids host a quick show with their creatures.
– Use the finished animals to spark a short story or a classroom talk about caring for the planet.
– Take photos as you go to keep a record of craft time.
@media(max-width:480px){
Recommended Products
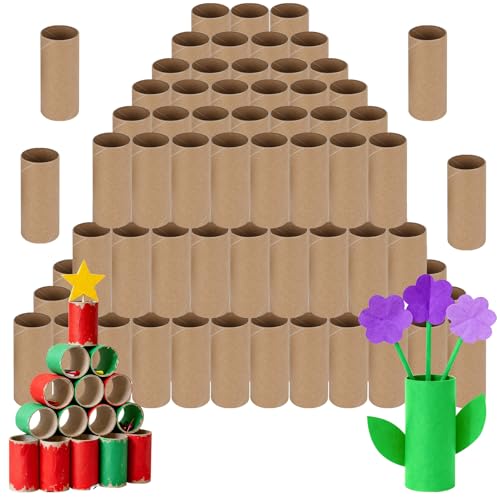
100 pcs cardboard tubes with box: You will got 100 pcs cardboard tubes for crafts with box , convenient for long-term storage, suitable for schools, families, and handicraft enthusiasts to use in bulk

【120 Ready-to-Create Tubes = Endless Possibilities!】Stop scrambling for supplies! Get a universal-sized bulk pack (120 tubes) – enough for 30+ group projects. Perfect for last-minute school crafts, birthday parties, or weekend DIY marathons without repeat store runs.
5. Nature Collage
Looking for a simple outdoor art project that teaches kids to notice nature and turn it into art? Here is why a Nature Collage can be a perfect fit. It blends hands-on discovery with creativity and gives belongings a fresh life on cardboard.
Materials Needed
– Cardboard or sturdy poster board
– White glue or glue sticks
– Natural finds: leaves, twigs, petals, seeds, small stones
– Optional: a clear spray sealant to protect the finished piece
Let’s break it down. You want something easy to set up and hard to mess up. Cardboard keeps things affordable, and a glue stick is friendly for small hands. The natural items add color, texture, and real stories from outdoors.
Step-by-step
1. Gather items outside or bring a bag of finds from your yard. Let your child feel textures and notice colors.
2. Place pieces on the board first. Try patterns, shapes, or a tiny scene before you glue.
3. Glue the items down. Press gently and give the collage a little dry time.
4. If a piece is fragile, glue it with extra care and rest it flat to stay smooth.
Tips
– Stack thinner pieces on top of sturdier bases for better staying power.
– Work outdoors or in a well-ventilated area when using spray sealant.
– Keep the collage flat as it dries to avoid warp.
Variations
– Make seasonal collages, like spring greens or autumn leaves.
– Explore warm tones or cool tones to tell a color story.
– Add a light 3D touch by layering items with small glue dots.
What you learn
– You see how nature becomes art and why textures matter.
– You practice planning, patience, and fine motor skills.
Next steps
– Hang the finished collage where family can admire it.
– Frame the piece or set it on a display shelf to inspire more eco crafts.
Nature collage ideas for kids fit well as a kid-friendly outdoor art project and eco-friendly nature art. It’s easy to do, teaches value, and makes memories from real-world finds.
@media(max-width:480px){
6. Recycled Paper Beads
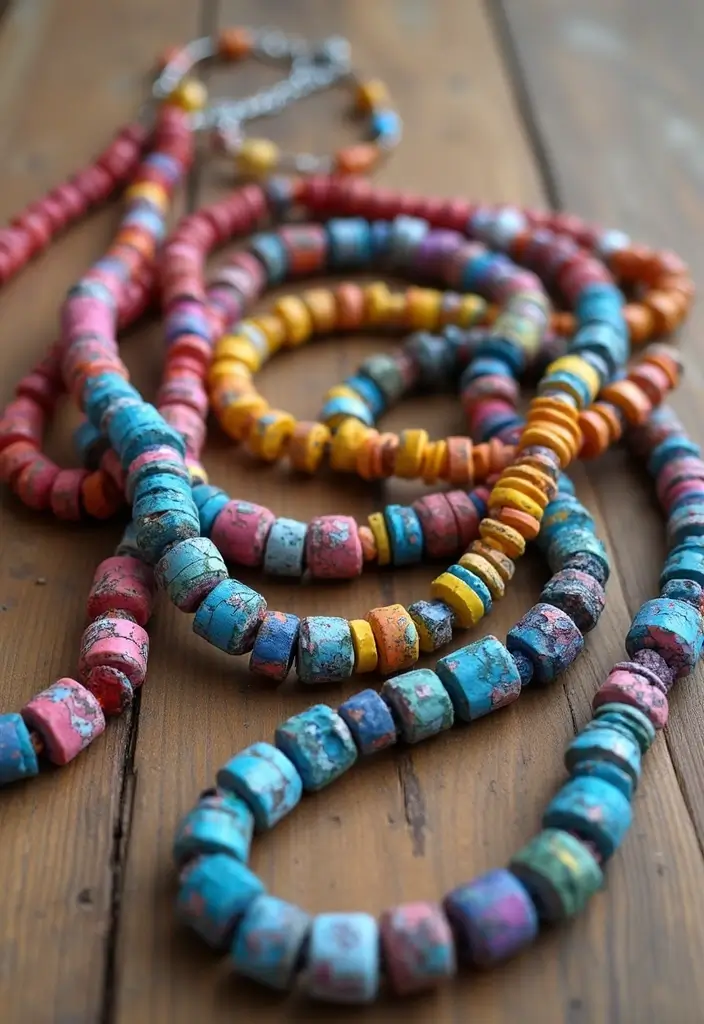
Want a quick, kid-friendly craft that trims waste and makes pretty jewelry? Recycled paper beads do just that. You turn scraps into color and texture you can wear.
Here is how to pull it off.
– Materials Needed:
– Old magazines or wrapping paper
– Scissors
– Glue
– Toothpicks
– String or thread
– Optional: clear nail polish for a shiny finish
– Steps:
– Cut paper into small triangles. The smaller the triangle, the tighter the roll.
– Roll each triangle around a toothpick. Keep it tight and press the edge with glue to seal.
– Set the beads on a flat surface and let them dry completely. A warm windowsill or a tabletop works well.
– After drying, thread the beads to make a necklace, bracelet, or keychain. Mix colors and sizes for a fun, bold look.
– Tips:
– Seal beads with clear nail polish for extra shine and strength.
– Create color stories by grouping similar hues.
– Store completed beads in a labeled box so you can grab them later.
Here is why you’ll love this project: it uses scraps, invites creativity, and helps kids practice patience. Next steps: grab your scraps, gather supplies, and start your first strand.
7. Recycled T-Shirt Tote Bags
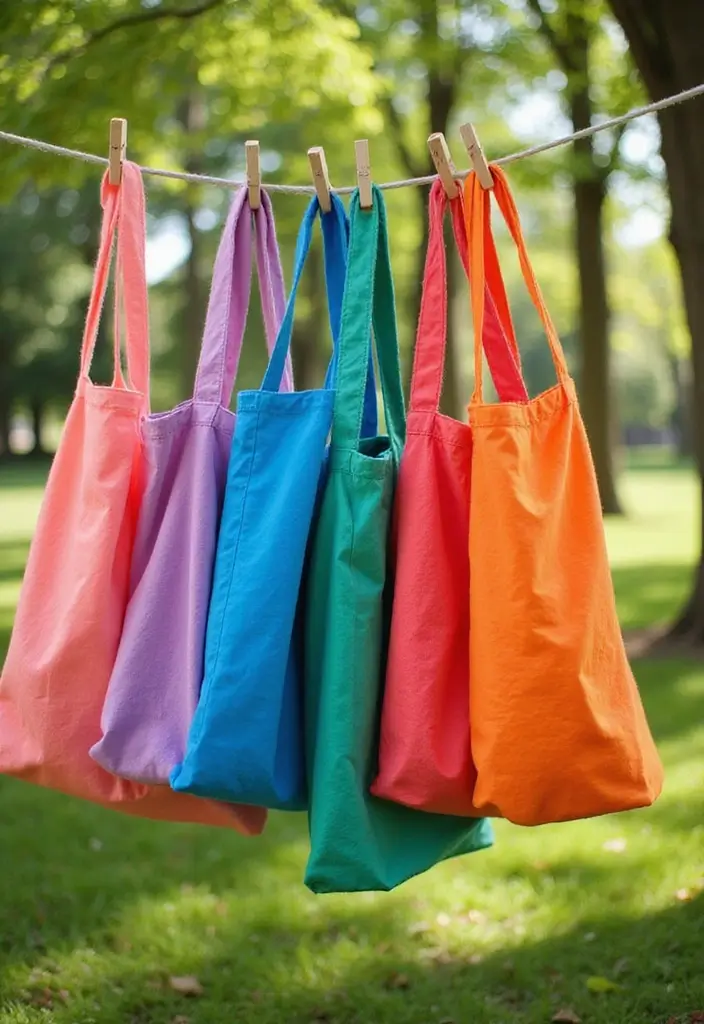
Got old t‑shirts lying around? You can turn them into handy totes that kids love to use. This project shows why reusing clothes matters and how a simple bag can spark eco-friendly pride.
Materials Needed
– Old t‑shirts
– Scissors
– Fabric markers or patches
– Optional: a needle and thread or fabric glue
Here is why these basics work. The shirt already has a soft handle and a built‑in shape. It keeps the project simple and cheap. Now let’s break it down.
Steps
1) Cut off the sleeves and the neckline. Leave enough fabric at the top to form the bag opening.
2) Turn the shirt inside out. Grab the bottom hem and tie it into sturdy knots at two spots. This creates the bag’s base.
3) Turn the bag right side out. You have a tote with a roomy pocket and a comfy strap.
4) Decorate. Use markers to draw patterns or add patches for a unique touch.
Here’s a practical tip. If you want a stronger bag, sew the bottom or add a second shirt layer and stitch the edges. That makes it tougher for books or groceries.
Ways to use your tote
– Carry books to the library
– Pack snacks for a picnic
– Hold toys during car trips
Tips and quick ideas
– Pick shirts with bold prints for instant style.
– Wash the shirt first to reduce marker bleeding.
– Make a set in different sizes for siblings.
Limitations? These bags are light duty. They work well for light items and quick trips, not heavy tools. Ready to try? Grab a shirt, follow these steps, and watch old fabric get a new life.
@media(max-width:480px){
@media (max-width: 600px) {
.normal-quiz-iframe { min-height: 570px !important; height: 570px !important; }
}
8. DIY Seed Bombs
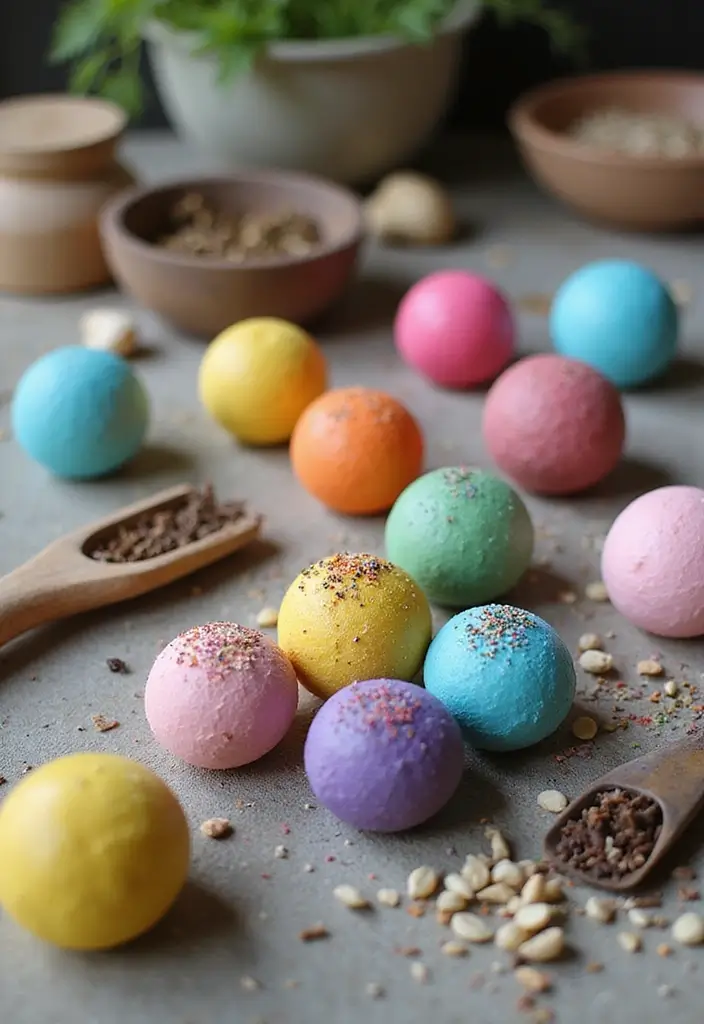
If you want greener spaces with little work, seed bombs can help. They bundle seeds with compost or clay into small balls you can toss into rough spots. The result is color, scent, and new life where plants struggle. Here is why they work: the clay or compost shelters seeds until rain comes, giving seeds a safe start in tired soil.
Let’s break it down. Here is how you make them.
– Materials needed: Native seeds, compost or clay, water.
– Steps:
– Step 1: Mix seeds with enough compost or clay to form a crumbly dough.
– Step 2: Add just enough water to hold together without being sticky.
– Step 3: Roll the dough into marble-sized balls.
– Step 4: Set them in a shady spot to dry for 24-48 hours.
Next steps: toss the bombs into sunny patches, cracks, or neglected corners. They rest until rain or a gentle soak wakes the seeds, then green sprouts appear. You can use this project to talk about local plants and wildlife.
Tips: choose seeds native to your area to help pollinators. Avoid busy paths where feet might crush the bombs.
@media(max-width:480px){
@media (max-width: 600px) {
.visual-quiz-iframe { min-height: 995px !important; height: 1100px !important; }
}
Recommended Products

🌱 6 Unique Seed Varieties for Endless Fun: Spark curiosity with 6 different seed types—Kidney Bean, Pea, Soya-Bean, Radish, Chili, and Carrot! Watch kids compare growth speeds, colors, and root shapes, turning each planter into a mini science experiment.

GROW YOUR OWN GARDEN - With this complete set, kids will have fun decorating their pots, then planting cosmos, nasturtium, and basil seeds. The included materials make growing an herb and flower garden easy!

Exciting Dual Growing Options: With the HopeTiger Kids Root Viewer, your child can experience the wonder of plant growth in two exciting ways. Choose the soil method for a natural approach that supports healthy root development, or opt for the hydroponic method, which is faster, cleaner, and provides an up-close view of how roots and shoots grow. Both methods offer an interactive, educational journey in gardening, planting, and growing that will spark your child’s curiosity and imagination.
9. Plastic Bottle Planters
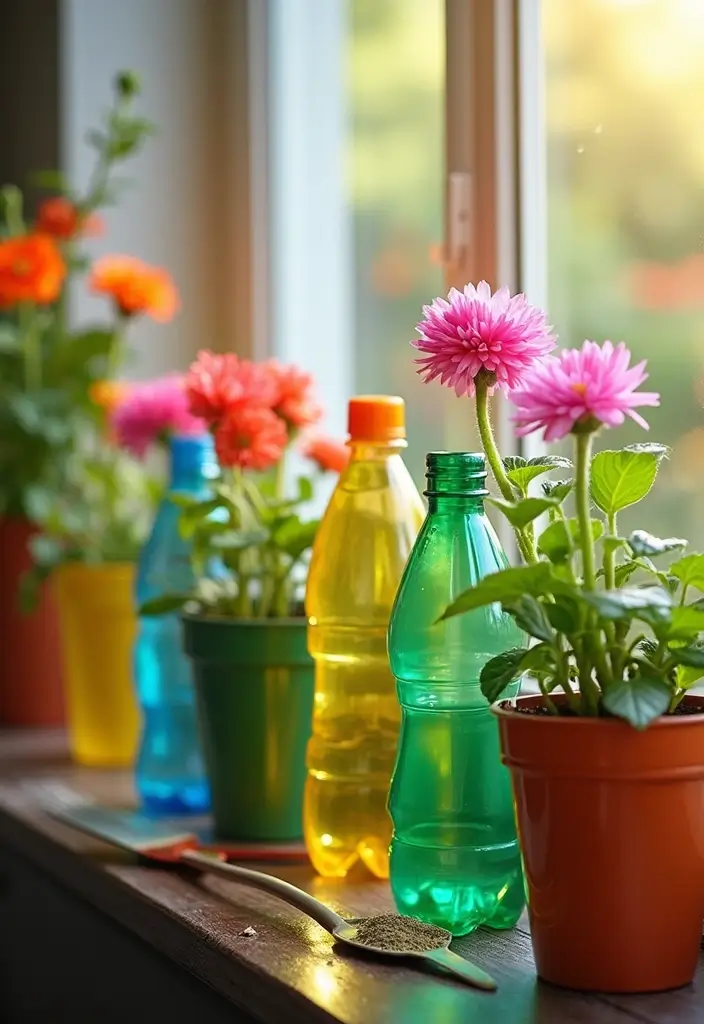
You want a simple, affordable way to show kids how plants grow. Recycled plastic bottle planters fit the bill. They turn old bottles into tiny gardens and teach care, patience, and responsibility. It’s hands on, colorful, and practical.
– Materials Needed: Plastic bottles in a few sizes, potting soil, seeds or small plants, non toxic paints or markers, scissors, a pin or nail to make holes, water.
– Notes: Choose bottles with wide mouths for easy filling. Set up a small workspace to keep paint from getting on furniture.
– Steps:
1) With adult help, cut each bottle in half. Use the bottom as the planter and the top as a cover or mini pot. Remove labels and rinse well.
2) Poke several tiny drainage holes in the bottom.
3) Fill with soil, tap gently to settle it.
4) Plant seeds or tiny plants. Cover seeds lightly with soil, then pat it flat.
5) Decorate the outside. Kids can draw leaves, stripes, or patterns.
6) Place planters in a sunny spot and water as needed.
– Tips: Use different bottle sizes for herbs, flowers, and greens. Let paint dry fully before use. Put a tray underneath to catch extra water. Clean the area when you’re done.
Next steps: Watch shoots emerge, adjust sunlight, and share photos of your green mini garden.
@media(max-width:480px){
10. CD Mosaics

Here is why you should try CD mosaics. Old CDs sit in a drawer or bin. You can turn them into bright art that teaches recycling and eco creativity. This project is simple, cheap, and fun.
– Materials needed: Old CDs, a sturdy canvas or thick cardboard, glue, scissors, a pencil.
– Set up: Clear a clean work area. Break CDs into small pieces. Tip: wear gloves if you want. Have a shallow tray to keep shards from rolling.
– How to build: Draw a simple outline on the canvas. Start at one corner. Press the CD shards into glue and lay them flat. Create a pattern with blues, greens, and other colors. Let light catch the shiny pieces as you move.
– Theme ideas: animals, nature, underwater scenes, or a favorite character. A theme helps you pick colors and shapes.
– Finishing touch: Add a border with a marker or paint. Let it dry completely before you hang it.
– Cleanup: Gather tiny pieces with a damp cloth. Recycle unused shards at a local drop-off if it’s allowed.
– Next steps: Try new patterns. Make a set of mini mosaics to display on a wall.
– Benefits: It teaches recycling. It builds fine motor skills. You get a unique piece of art you can be proud of.
11. Newspaper Seedling Pots
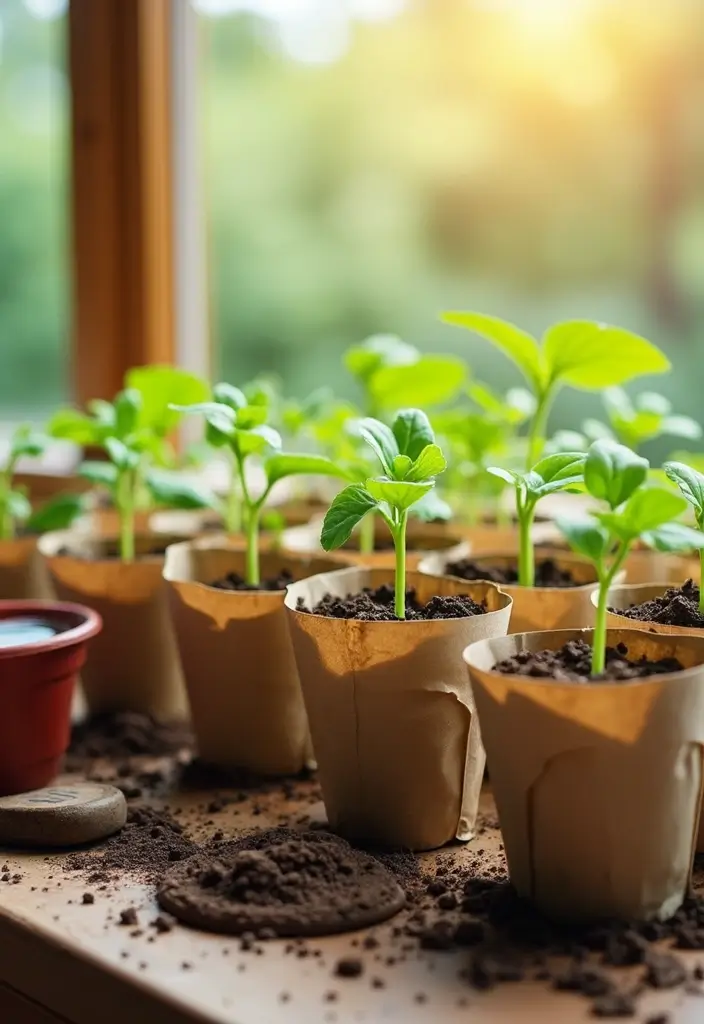
Want a simple, eco-friendly project that teaches kids about plants and recycling? Try newspaper seedling pots. You turn old newspapers into tiny pots, then grow seeds right in them. These seed starting pots from newspaper are biodegradable, and roots slip out easily when it’s time to plant in the garden.
Materials Needed
– Old newspapers
– Soil or potting mix
– Seeds
– A small cup or mold to shape the pots
Here is why this works: the paper holds soil gently and supports young roots as they grow.
Steps to Make Pots
1) Roll a stack of newspaper around a small cup or mold.
2) Fold the bottom to close the pot shape.
3) Gently pull out the cup; you have a paper pot.
4) Fill with damp soil.
5) Place 1 or 2 seeds inside and cover lightly.
6) Water softly until the soil feels barely moist.
Planting and Care
– Set pots on a tray and place them on a sunny windowsill.
– Keep the soil just damp, not soggy.
– When seedlings grow, press the pot into the garden soil. The paper breaks down as roots grow.
Tips
– Make different pot sizes for different plants.
– Label each pot with a name and date.
– Use thicker paper for wetter soils.
Limitations
– Pots can fall apart in heavy rain. Move them indoors until you’re ready to transplant.
With a little practice, this recycled craft turns kids into confident gardeners.
@media(max-width:480px){
12. Painted Rock Animals

You want a quick, eco-friendly craft that kids love. Painted rock animals make that easy. They turn simple stones into cute creatures. They add a touch of nature to your home or yard. It is a calm activity that builds focus and boosts creativity.
Here is how you do it.
– Materials Needed: Smooth rocks, acrylic paints, brushes, sealant.
– Steps:
1) Collect smooth, flat rocks on a walk or from your yard.
2) Rinse them and let them dry completely.
3) Choose an animal design that is simple to start, like a cat, frog, or bee.
4) Paint a base color and let it dry.
5) Add features with simple shapes—eyes, nose, spots, stripes.
6) Add a tiny scene or your kid’s name if you like.
– Tip: Seal with a clear coat after the paint dries to protect from rain and sun.
Why do this craft? It helps kids observe how rocks differ. It helps them see how colors work together. It strengthens hand control and patience. The finished rocks can decorate a garden path, a plant pot, or a sunny windowsill. This project uses what you already have and fits into outdoor or indoor play.
@media(max-width:480px){
13. Upcycled Jar Lid Magnets
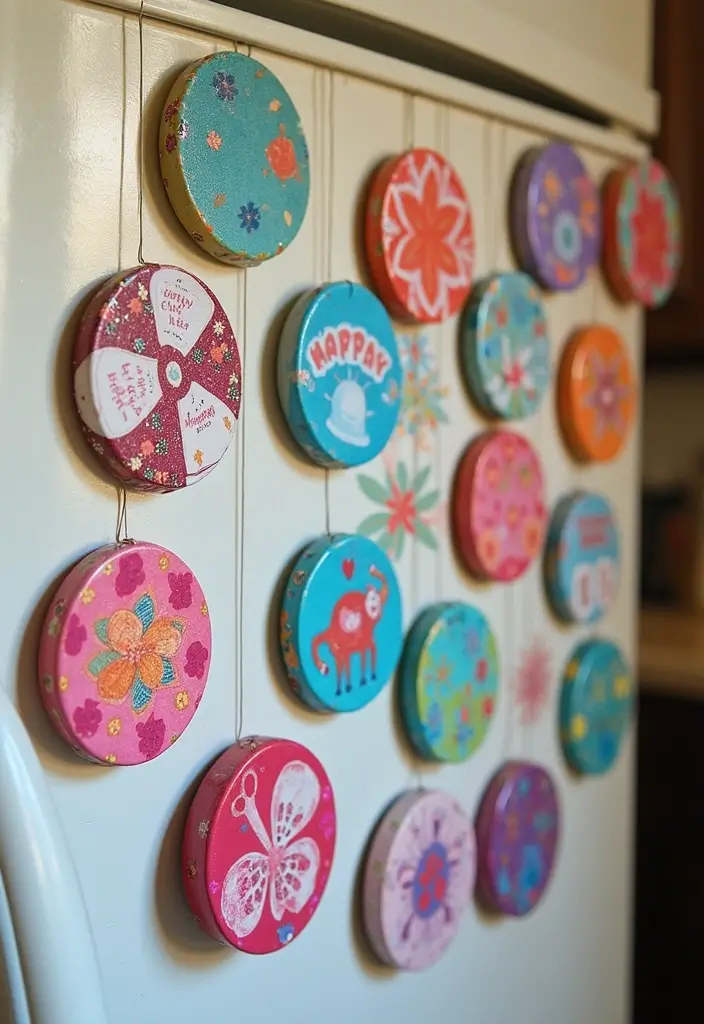
Struggling to find a quick, kid-friendly craft that uses what you already have? Upcycled jar lid magnets fit the bill. They’re inexpensive, easy, and they turn everyday scraps into fridge art you can be proud of.
Here is why they work: jar lids are already a perfect circle, magnets stick to the back, and kids love seeing their own art on the fridge. This simple project builds fine motor skills as little hands press, place, and glue. It also teaches reuse without slowing you down.
Let’s break it down.
– Materials Needed
– clean jar lids
– magnets
– decorative paper or fabric
– glue
– Step-by-step
1) Wash and dry the lids so glue sticks well.
2) Let your child decorate the inside with paper, fabric, or stickers.
3) Glue a magnet to the back and hold it until it sticks.
4) Let them dry flat for a few hours before use.
Next steps: make a set for the seasons. Try spring flowers, summer suns, autumn leaves, and winter snow scenes. You can swap the designs as the weather changes.
A few tips to keep it simple: use small magnets that fit the lid’s back, trim paper to fit, and keep a few lids in a box for quick rainy-day crafts. If a magnet isn’t strong enough, try a stronger craft glue and a second magnet preload.
Want more ideas? Add photos or tiny drawings for a personal touch that makes your fridge feel homey.
@media(max-width:480px){
14. Pinecone Bird Feeders

A quick, kid-friendly craft to help birds this winter is the pinecone bird feeder. It teaches about wildlife while you create with nature.
Materials you need:
– Pinecones
– Peanut butter
– Birdseed
– String
How to make it:
Here is how you do it. First spread peanut butter all over the pinecone. The sticky layer makes the seeds stick and feel cool to touch. Next roll the pinecone in birdseed. The seeds cling to the peanut butter, creating a colorful, crunchy coating. Tie a loop of string around the top to make a hanger.
Hang your feeder outside where birds can reach it. Place a few in different spots to attract several kinds of birds. Sit back and watch chickadees, sparrows, and other guests arrive for a snack. You see wildlife at work and learn why birds need food in winter.
Tips for a better feeder:
– Use natural peanut butter for safety and good stick.
– Place feeders away from doors and high-traffic areas.
– Rotate locations every few days to lure different birds.
– Keep feeders clean by removing old seeds so mold does not grow.
This simple project blends art with nature. It shows kids how to care for animals and how small, eco-friendly crafts can make a difference in a yard.
@media(max-width:480px){
15. Yarn-Wrapped Letters
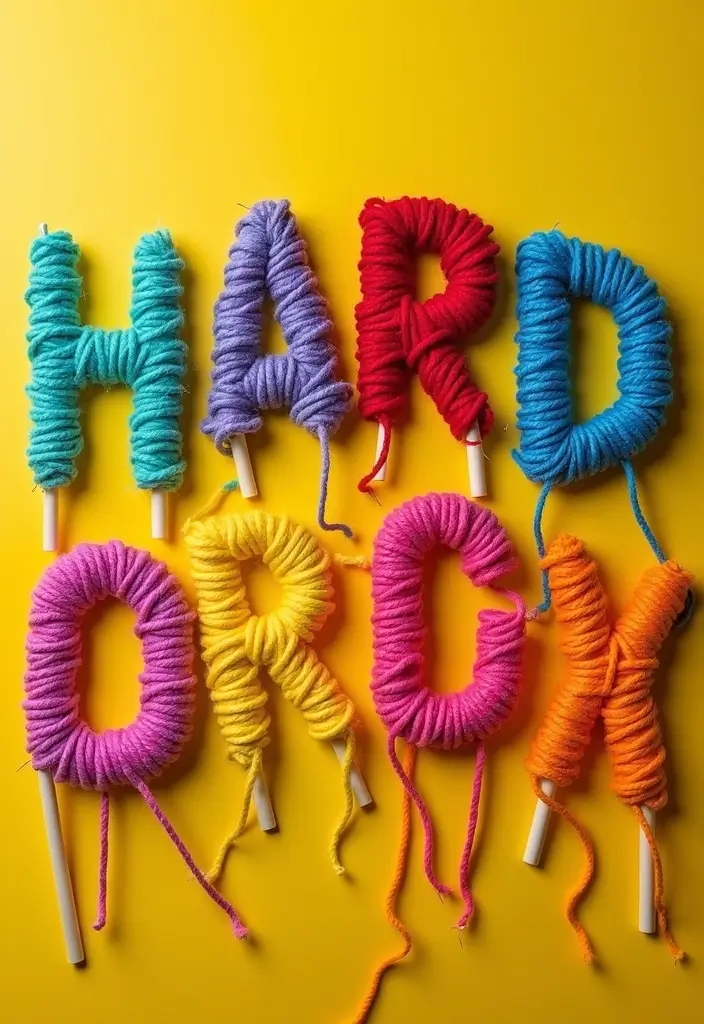
Want a quick, cozy project that teaches eco thinking? Yarn-wrapped letters fit. You pick the word or your initials and turn simple cardboard into wall art. It uses low-cost, recycled supplies and builds steady hands.
– Materials Needed
– Cardboard letters or pre-made letters
– Yarn in your favorite colors
– Scissors
– Glue
Here is why this works: the hands-on touch helps kids focus and finish a small, beautiful piece they can be proud of.
– What to Do
1) Cut rough edges from cardboard if you made the letters yourself.
2) Lay the letter flat on a table.
3) Start wrapping yarn from the back.
4) Tuck and glue the end when you finish a row.
5) Move to the next section until the whole letter is covered.
6) Glue extra yarn ends to secure them.
Next steps: mix colors to create a playful mix or go with a soft, single tone for a calm look. If you like texture, try using a second yarn that’s fuzzy or sparkly.
– Tips to Make It Your Own
– Pick colors that match your room mood: bright for a kids’ space, pastel for a sleepy corner.
– Add tiny embellishments like beads or buttons for a 3D feel.
– Clip the letters to a wooden board or hang them with a simple string.
Display ideas: line them above a desk, on a bedroom wall, or near a cozy reading nook. This craft stays manageable for small hands and gives your room a warm, personal touch without waste.
@media(max-width:480px){
16. Upcycled Crayon Candles

Do you have a drawer full of old, broken crayons? You can turn them into bright, usable candles your family will love. This simple project blends art with eco care, and you can do it with kids of different ages.
Materials Needed
– Old crayons (peel wrappers and break into small pieces)
– Wicks
– Molds or muffin cups
– A double boiler or a small pot and a heat safe bowl
– A stir stick and paper towels for clean work
How to Make It
1) Gather crayons and remove the wrappers. Break them into small bits.
2) Set up a safe melt area. Melt crayons slowly in a double boiler, stirring until smooth.
3) Place a wick in each mold. Pour the melted color into the molds.
4) Let the candles cool completely. Trim the wicks and pop them out when solid.
Tips and Variations
– Layer colors for stripes that pop.
– Pour one color, then a different color to create a marbled look.
– Use silicone molds for easy removal.
– Let the wax cool fully to keep edges neat.
Safety and Fun Upgrades
– Work with an adult, especially when melting wax.
– Keep heat low and away from kids to avoid burns.
– Try glow‑in‑the‑dark or metallic crayons for special effects that shine in low light.
With a little care, you turn old crayons into cozy, colorful candles. It’s a small habit that teaches recycling and makes something useful you can enjoy together.
17. DIY Felt Scraps Toys
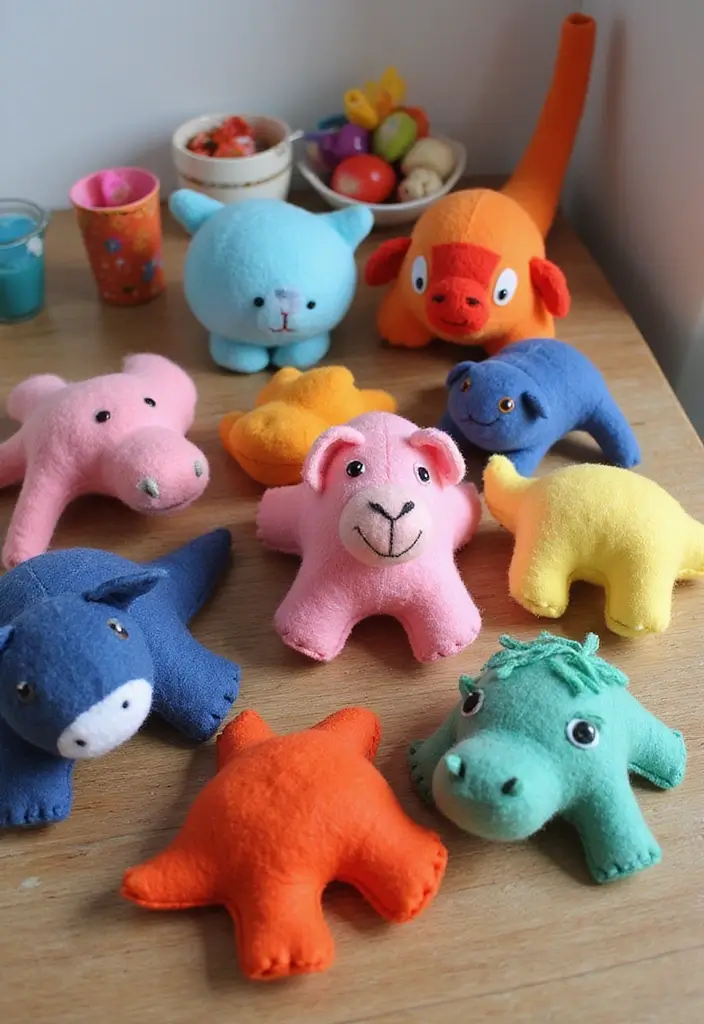
You want a simple, neat craft that uses up scraps and helps kids learn to sew. DIY Felt Scraps Toys fits that need. It turns old felt into soft, tiny toys that spark imagination without a big mess.
Materials Needed
– Felt scraps in bright colors
– Scissors
– Needle and thread or fabric glue
– Embellishments like buttons, ribbons, or safe beads
Here is why this works: felt is easy to cut and painless to sew. It holds shapes well, so you can finish a toy fast and see results right away.
Steps to Make Your Toys
1) Pick one or two simple shapes, such as an animal, a heart, or a car.
2) Cut out two matching pieces from your chosen felt.
3) Place the two pieces together with the felt’s good side facing in. Thread a needle and start a simple stitch, or run a line of glue around the edge.
4) Leave a small gap if you want a soft, stuffed toy. Finish by sewing or gluing the edge closed.
5) Add details with embellishments like a button eye, a ribbon tail, or a tiny stitched mouth.
6) Let glue dry if you used glue, then test your toy and admire your work.
Pro Tips
– Use a small felt bag to store the toys when you’re done. It keeps scraps tidy and makes cleanups easy.
Next steps: mix colors for an entire toy family, or create a themed set—like forest animals or mini vehicles—to encourage storytelling and play.
@media(max-width:480px){
18. Upcycled Suitcase Planters
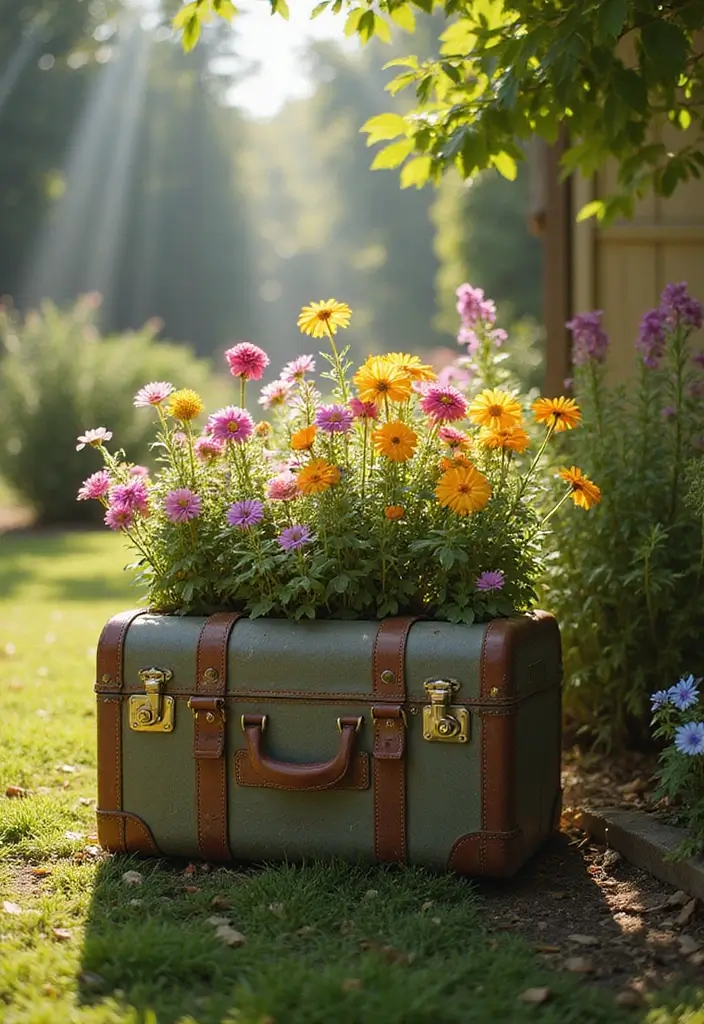
Do you want a garden idea that kids love and that shows reuse in action? Try upcycled suitcase planters. They turn old luggage into eye catching planters. You plant herbs or flowers in a soft earth bed and watch the soil come alive.
What you need
– Use an old suitcase.
– Use a plastic liner or thick trash bag.
– Fill with potting soil.
– Place small potted plants or seeds inside.
– Use a drill or nail to make drainage holes.
How to make it
Here is why this works.
1. Wipe the suitcase clean with soap and water.
2. Poke several small drainage holes in the bottom.
3. Line the inside with a plastic liner to keep soil from soaking the fabric.
4. Fill the case to about three quarters with potting soil.
5. Set your plants on the soil and cover the roots with more soil.
6. Water gently until the soil is damp.
Style tips and care
– Paint the suitcase in kid friendly colors to brighten the garden.
– Add labels or tiny signs for each plant.
– Use different suitcase sizes for a layered look.
– Set the planters on a sturdy stand or wheels so you can move them.
Why it helps
This project shows kids how waste becomes life. It teaches soil care, watering, and plant growth in a simple, hands on way. It fits classroom crafts, backyard gardens, and balcony spaces.
@media(max-width:480px){
19. Recycled Bottle Cap Mosaics

Looking for a kid-friendly craft that saves plastic and sparks color? Recycled bottle cap mosaics fit the bill. They blend art with reuse. You collect caps, sketch a plan, and glue pieces into a picture.
Choose a canvas or sturdy board as your base. Lay out a simple design first, like a sun or a fish. Then press each cap in place with glue. When the glue dries, you get a bright, one-of-a-kind mosaic.
Materials needed
– Bottle caps in many colors and sizes.
– A clean canvas or flat board.
– Glue that sticks to plastic; use craft glue or hot glue with adult help.
– Optional: a light pencil guide.
Tips for a better mosaic
– Mix small and large caps to add texture.
– Group caps by color family to make patterns pop.
– Start from center and work outward, or add a border first.
– Press caps firmly and let glue dry completely.
How to finish and care
– Let glue cure for 15 to 30 minutes.
– If you want extra durability, seal with a clear spray.
– Show off your art on a wall or fridge.
This project boosts color sense and planning. It teaches reuse and eco creativity in a hands-on way. It can be done solo or as a team project.
20. Recycled DIY Birdhouses
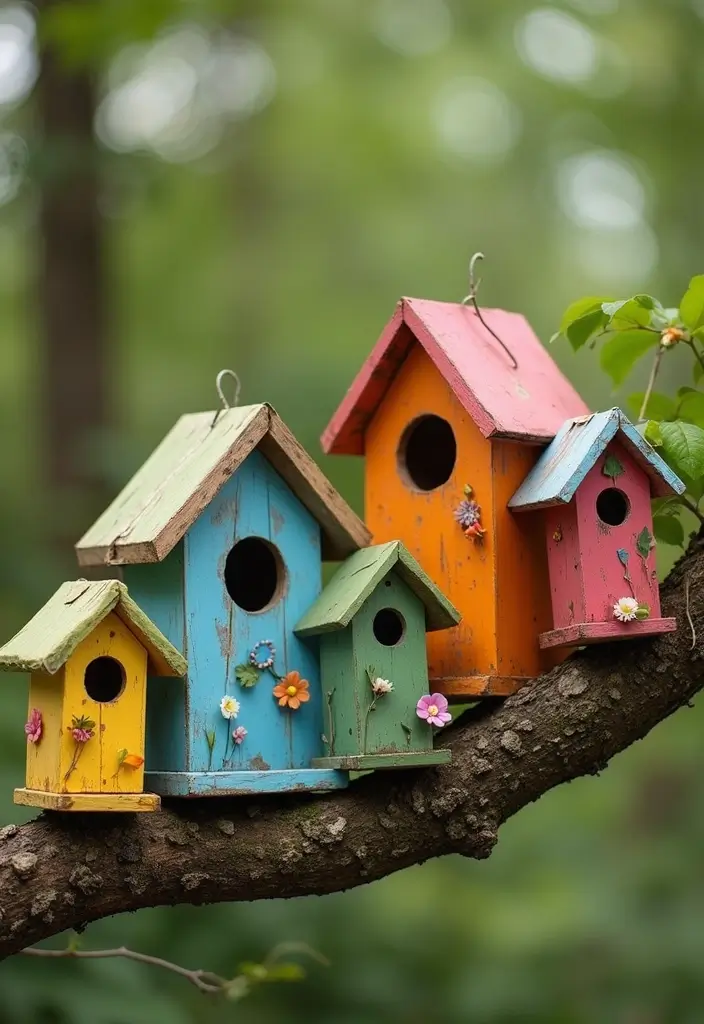
Want a kid-friendly project that teaches about birds and the planet? Recycled DIY Birdhouses use things you already have and turn them into cozy homes for local birds. It’s hands-on fun with a clear view of wildlife.
Materials you need
– Milk cartons or small wood scraps
– Non-toxic paint and brushes
– A string or twine
– A tiny perch (stick or dowel)
– Scissors or a safe tool (adult help)
– Sandpaper or a file for smooth edges
– Optional decorations like stickers or natural textures
How to build it
1) Clean and dry your base. If you use a milk carton, cut off the top and rinse well.
2) Cut a front hole about 1.5 inches wide. Smooth the edges so little hands stay safe.
3) Add a perch under the entrance. Secure with glue or a tiny nail.
4) Paint and decorate. Pick bright colors, but keep the hatch area clear for birds.
5) Hang it up. Use string to mount the birdhouse on a post or tree branch in a sunny, sheltered spot.
Tips and care
– Keep the design simple. Clear shapes work best for kids and birds.
– Choose non-toxic paints. Let coats dry fully before handling.
– Check the birdhouse every season and remove old nests when needed.
Next steps: set up a small bird-friendly corner and note which birds visit your new home.
Recommended Products
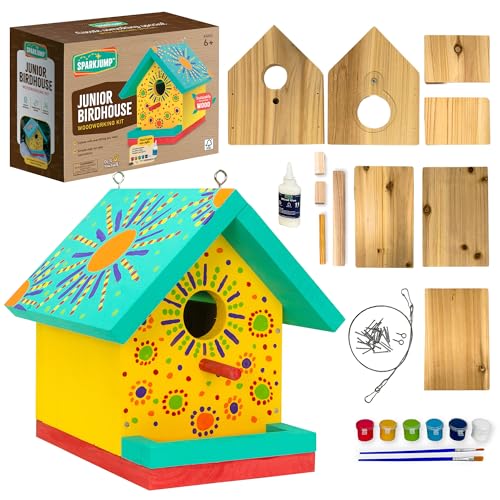
Turn Weekends Into Memories – These birdhouse kits for adults and kids make family time easy, giving parents and children a chance to build, paint, and laugh together while creating something real.

DIY Birdhouse Kit: Build and decorate a 6-inch wooden bird house with this hands-on woodworking kit for kids. A fun way to inspire creativity, STEM learning, and nature play through crafts for kids ages 4-8 at home, school, or playdates
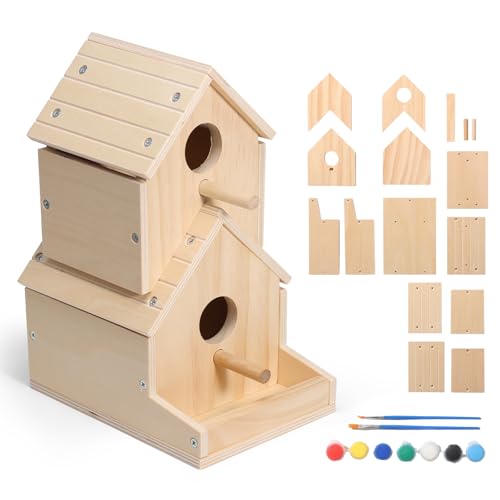
Everything You Need is Included: This complete birdhouse kit comes with 16 wood boards, 7 paint pots, 2 brushes, a pack of screws, and a screwdriver. No additional tools are needed for assembly, making it the perfect woodworking gift kit for kids
21. Upcycled Stenciled Totes
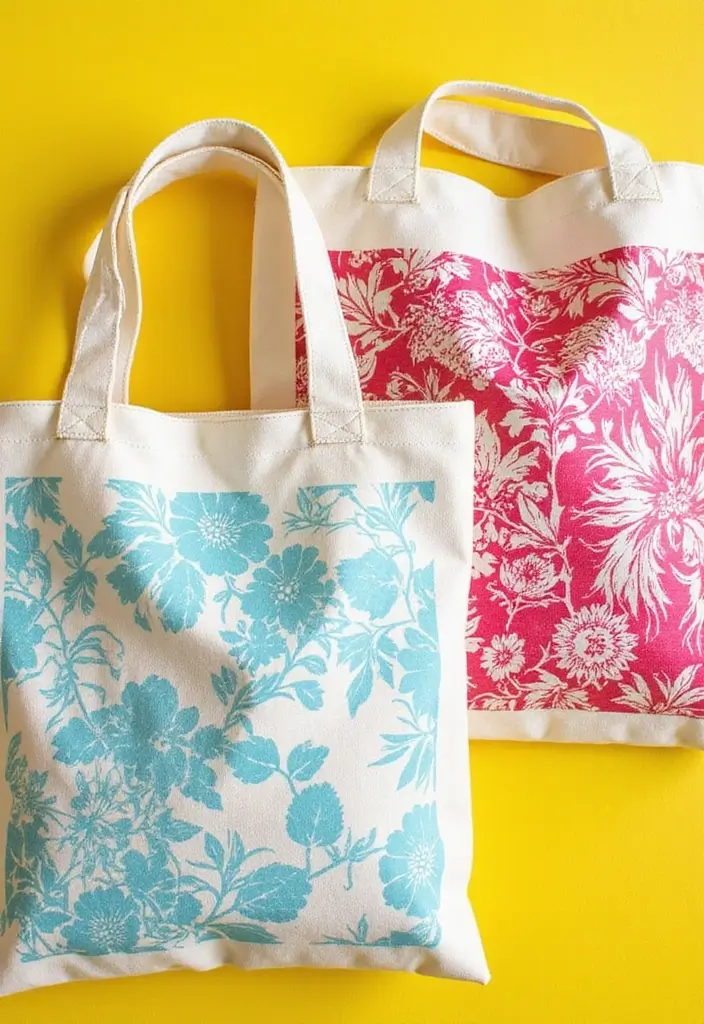
Here is why you will love this project. It turns old bags into fresh totes for shopping, library trips, or quick trips to the store. You get to combine art with care for the planet. It stays simple for kids and leaves room for their own twists.
Materials Needed:
– Old fabric or bags
– Stencils (cardboard shapes or plastic cutouts)
– Fabric paint
– Masking tape
– A small sponge or brush
What you do:
Next steps show quick wins.
1) Pick a sturdy base bag. It should be clean and flat.
2) Make or choose stencils. Stars, hearts, or letters work well.
3) Decide where the design goes.
4) Tape the stencil in place. Press gently so it won’t move.
5) Dab paint on the stencil with a sponge. Use thin layers and let colors sit a moment.
6) Lift the stencil slowly. Let each color dry before adding another.
Tips:
– Try holiday themes for gifts.
– Mix bright colors for a bold look.
– Two colors per stencil add extra pop.
Finish and care:
Let the tote dry completely. If the paint needs heat setting, iron over a cloth on low heat for a few minutes. Hand wash gently and air dry to keep the design bright.
22. Foam Tray Stamps
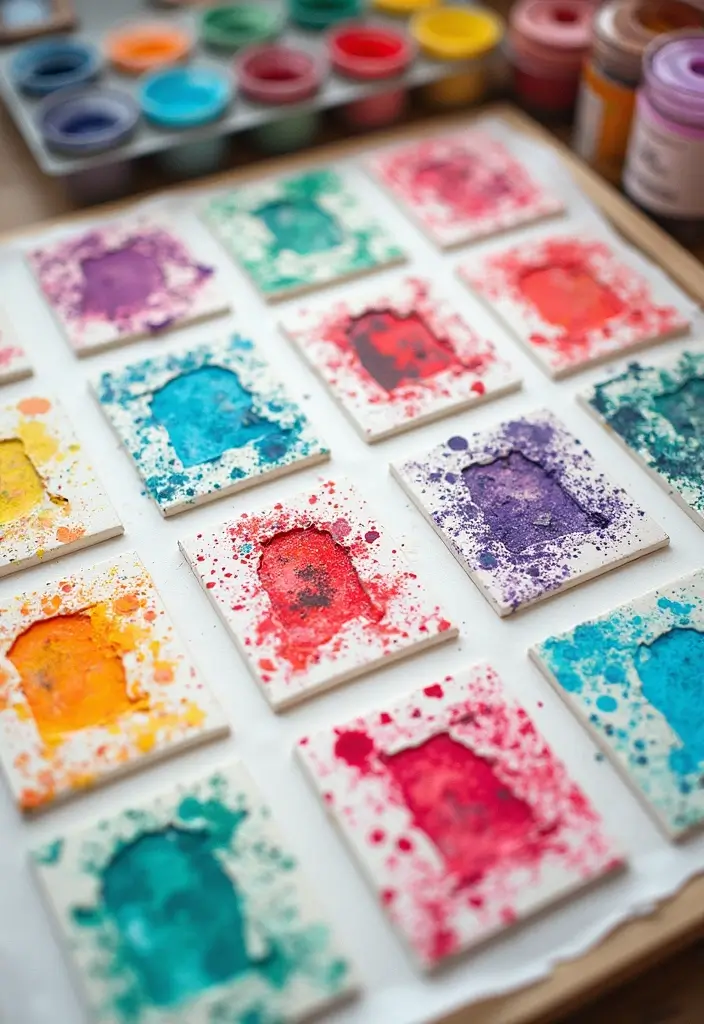
You want a craft that’s easy, fun, and friendly to the planet. Foam tray stamps do just that. They turn waste into art and spark kids to notice patterns, textures, and color.
– Materials you need
– Foam food trays
– Scissors
– Paint (washable and kid-safe)
– Cardboard or a small wood block
– Paper or fabric to stamp on
Here is why this works: simple tools, big impact. Next steps keep the project flowing.
– Make the stamps
– Cut simple shapes from the foam. Hearts, circles, stars, or zigzags work well.
– Glue or tape the foam shapes to the cardboard block so they stand firm.
– Press lightly to feel how the shape sits in your hand.
Let’s break it down: sturdy stamps make clean prints. If a stamp wobbles, reattach it.
– Stamping time
– Dip the stamp into paint. Tap off extra paint so blobs don’t spread.
– Press straight onto paper. Lift in a smooth, straight line.
– Try repeats of the same shape for neat patterns.
Next steps: let the designs dry, then talk about what you made and how reuse helped the planet.
– Tips and safe ideas
– Mix shapes and colors for bold patterns.
– Use large paper for a big mural, or small paper for cards.
– Clean stamps with a quick soap wash after crafting.
You’ll gain a fun art activity that teaches reuse and sparks eco creativity without extra fuss.
@media(max-width:480px){
23. Recycled Magazine Art
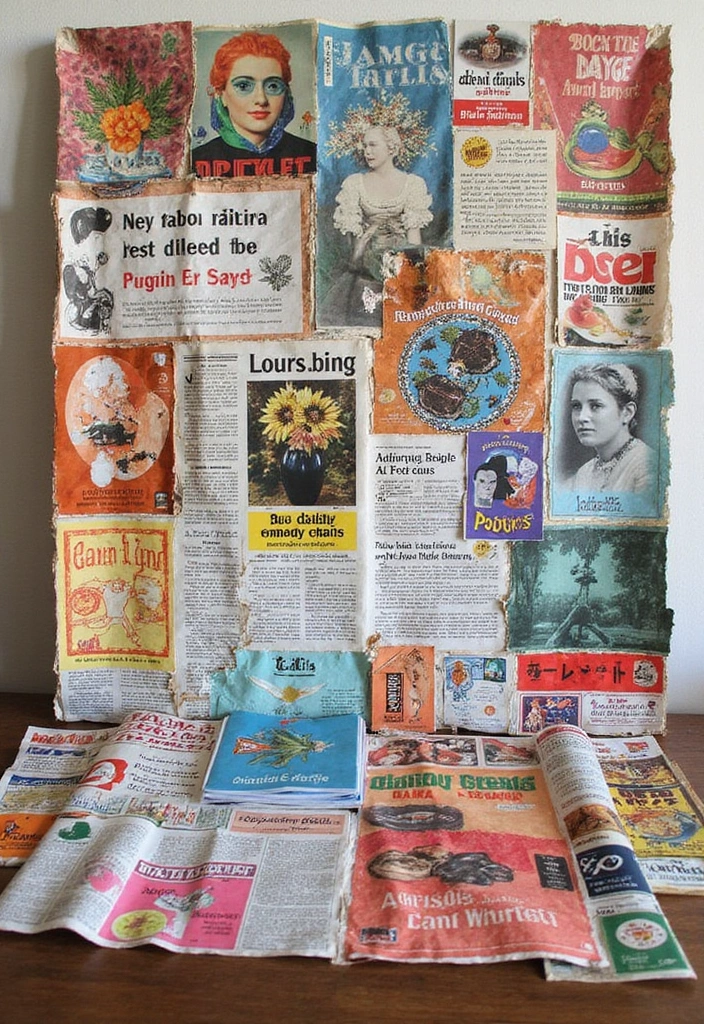
You want a simple, eco friendly art project you can do at home. Recycled Magazine Art fits. It turns old magazines into bold colors and new stories. You get creativity and a sense of helping the planet at the same time. Think of it as a magazine collage you build piece by piece.
Materials
– Old magazines
– Glue or glue sticks
– Scissors
– Canvas or thick paper
– Optional: a flat board to glue on, a sealant to protect the finish
What to do
Start by picking a theme you love. You could collect bright pages, nature photos, or patterns. Cut out images, colors, and shapes. Arrange them on your canvas first, then glue them down. Let pieces overlap or ride the edges for texture. Once you like the look, press each piece flat and let the art dry.
Creative ideas to try
– Make a color story by sorting pieces from darkest to lightest.
– Build a portrait out of tiny magazine scraps.
– Create a city, sea, or forest scene with layered textures.
Tips that help
– Use a light background so colors pop.
– Mix big blocks with tiny bits for depth.
– Keep a small pair of scissors for detail and a thin layer of glue for smooth edges.
– If glue clumps, wipe the tip and apply thin coats.
Why it works
This is an easy way to reuse paper and cut waste. It also builds focus and planning skills.
Next steps
Store your art flat and add a seal if you want longevity.
@media(max-width:480px){
24. DIY Water Bottle Planters
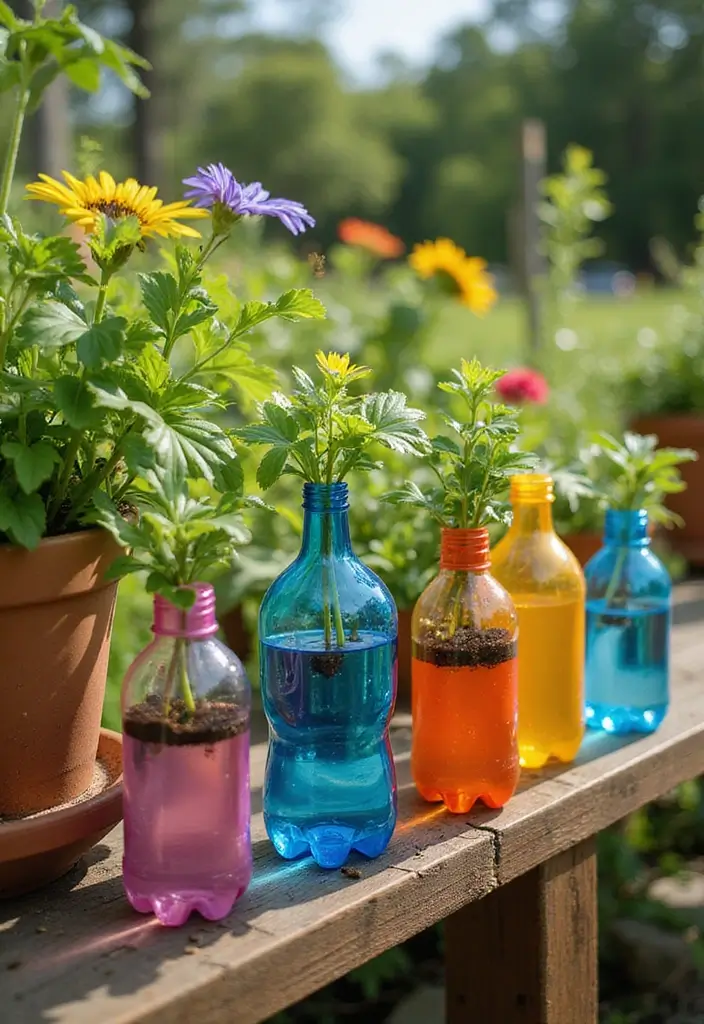
You want a kid-friendly project that shows how to recycle and grow something you can watch. DIY water bottle planters make this easy. They teach care for plants and for the planet. You can turn scrap bottles into small homes for herbs, flowers, or greens. It also helps cut plastic waste.
Here is why this works. Kids see a direct result. The planters are light, cheap, and safe. You can do this in a kitchen, yard, or windowsill. Next, gather the tools.
– Materials Needed: Old water bottles, soil, seeds or small plants, paints or stickers, scissors, a tray for catching soil.
Let’s break it down
Step 1. Cut the bottle in half. Leave a lip to help grip. Punch a few small drainage holes in the bottom. Keep the top half; you can use it as a mini greenhouse later.
Step 2. Fill the bottom half with soil. Add seeds or a small plant. Pack lightly.
Step 3. Decorate the outside. Let kids paint or stick on pictures. Make sure the interior stays dry.
Step 4. Place the planters on a tray. Water gently. Keep in a sunny spot.
Next steps. Check soil every couple of days. Water when the top inch feels dry. Rotate planters so all sides get sun. Label each planter to track what you planted.
This craft blends recycling with hands-on gardening. It builds patience, responsibility, and a small green space you can boast about on your windowsill.
25. Creative Recycling Boxes
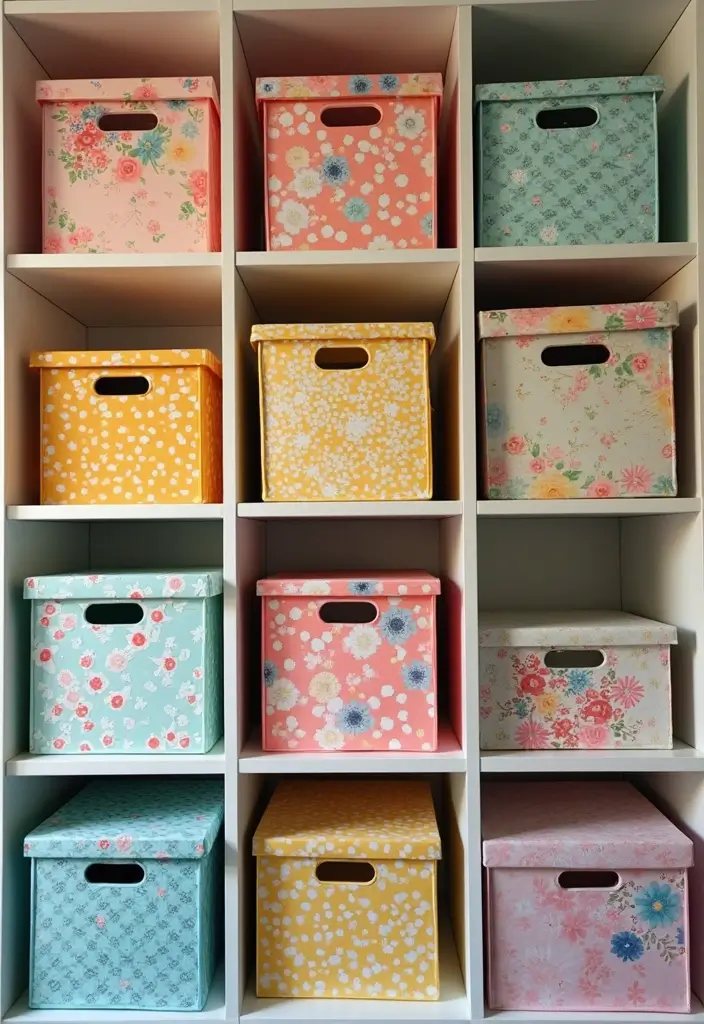
Need a simple, eco friendly way to tidy your art space. Creative recycling boxes can help you organize and teach eco thinking. You turn old boxes into neat storage and learn how reuse works.
Here is why this works: kids see a box as a tool, not trash.
Materials Needed
– Use old boxes for storage.
– Have paint or markers for decorating.
– Gather fabric scraps or contact paper.
– Keep glue and scissors handy.
What you do
– Step 1. Clean the boxes and dry them.
– Step 2. Plan your color theme and what each box will hold.
– Step 3. Decorate with paint, fabric, or paper.
– Step 4. Label each box and stack it on a shelf or hang it on a wall.
Next steps
– Label boxes for quick access.
– Color code by use or room.
– Let kids sign their name on a box to take pride.
Why this helps
– It shows how to recycle by reusing what you already have.
– It makes a kid’s space feel tidy and calm.
– It builds sorting and planning skills.
Tips
– Label boxes for easy access.
– Use color codes to group items.
– Keep lids on smaller boxes to hide dust.
– Make a dedicated box for projects in progress.
26. Recycled Greeting Cards
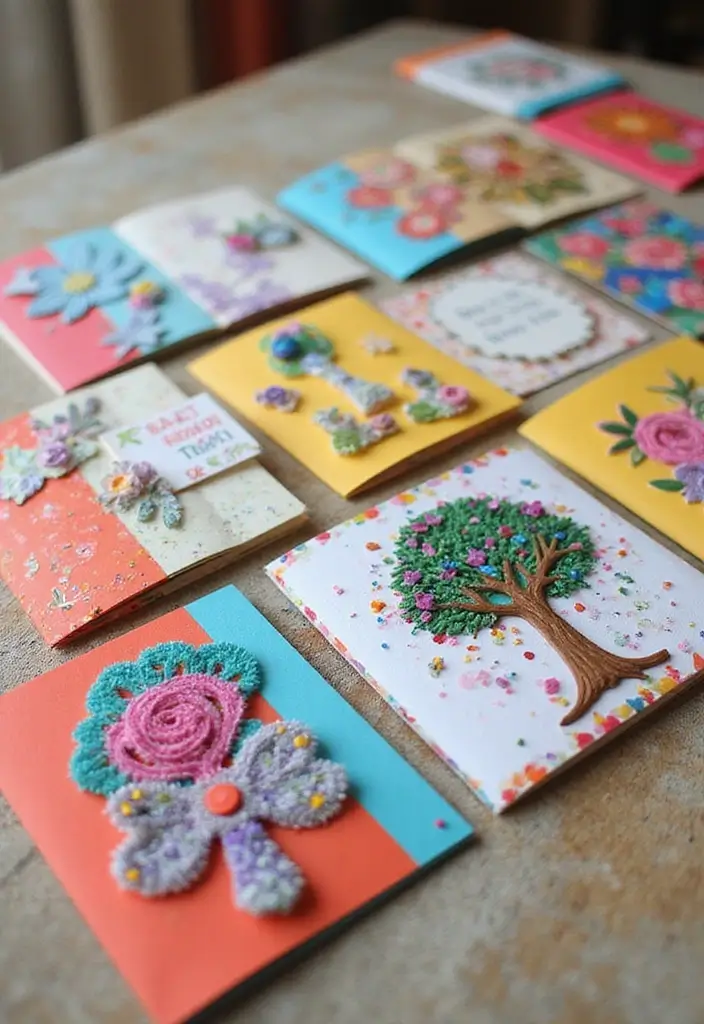
Want to send a note that feels warm and kind to the planet? Recycled greeting cards fit the bill. They turn old paper into fresh, bright art your kid can be proud of. Here is why this works: reuse teaches care, and personal designs make gifts feel special. Let’s break it down.
Materials Needed
– Old cards or scrap paper
– Wrapping paper, magazine pages, or colorful scraps
– Stickers, glue, and markers
– Scissors (optional) and a pencil
How to Make Them
– Step 1: Gather scraps and plan a simple design.
– Step 2: Cut out shapes from the scraps.
– Step 3: Glue the pieces onto a folded card base.
– Step 4: Add a short message or a doodle with markers.
– Step 5: Let glue dry before you gift it.
Tips to Shine
– Keep a card kit in a box with a notepad so you can grab supplies anytime.
– Make sets for different occasions: birthdays, thank yous, celebrations.
– Use textures like corrugated paper or ribbon scraps for flair.
– Save all old cards for future reuse.
Next steps: gather your scraps and start today. This simple project builds eco creativity and gives you a personal, low-waste way to celebrate any occasion.
@media(max-width:480px){
27. Recycled Plastic Bag Weaving
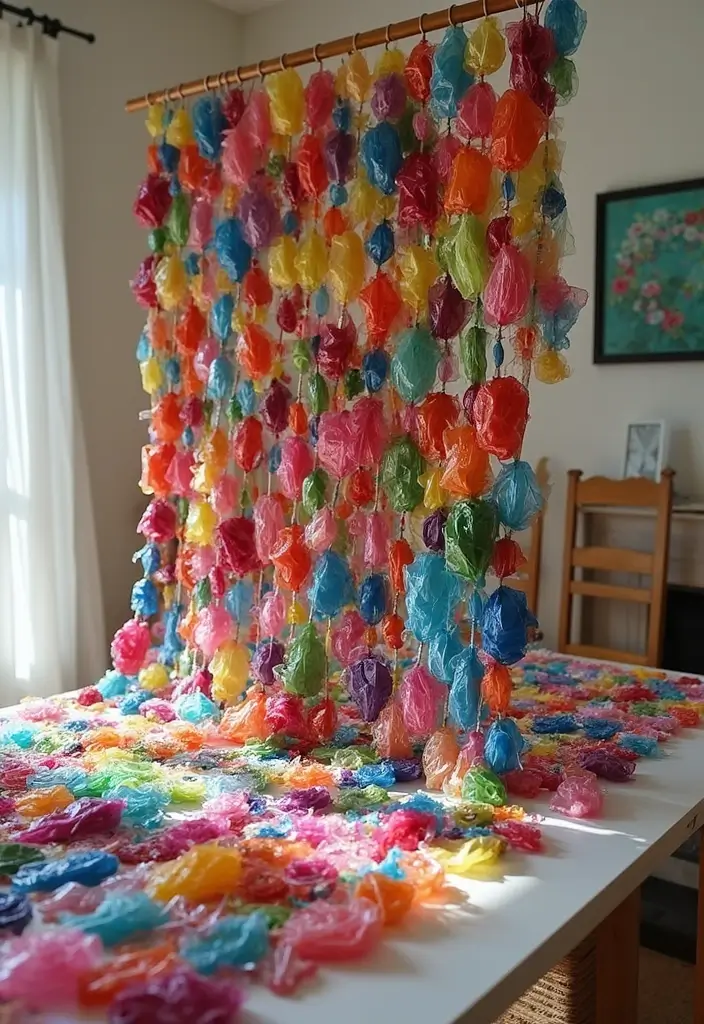
Are you looking for a kid-friendly craft that cuts waste and builds real skills? Here is why this works: it turns old bags into bright mats and small baskets with a simple loom or sturdy cardboard frame.
What you’ll make
– Colorful mats you can use as plates, door decor, or gift boards
– Small baskets to hold cards, rocks, or small toys
How to do it
– Gather old bags, scissors, and a loom or cardboard frame
– Cut bags into long strips, about 1 to 2 inches wide
– Attach strips to the loom to form the base layer, then weave over and under to build up rows
– Tie off the ends and trim loose threads when you reach the size you want
Tips to shine
– Use many colors for a bold look
– Mix bag textures for extra depth
– Lay the loom flat and work slowly to keep the pattern tidy
Learning aspects
– You learn patterns, counting, and texture
– You see upcycling in action and get a useful item at the end
Next steps
– Pick a color plan and start weaving today
This project is quick to finish on a weekend and easy to adapt for different ages.
@media(max-width:480px){
28. Upcycled Jewelry from Old Buttons

Here is why you should turn old buttons into jewelry. It clears a stash and gives you a fresh way to wear color. You get a quick project that teaches reuse.
– Materials Needed: Old buttons, string or elastic, a needle or safe blunt tool, scissors.
– Setup: Sort buttons by color and size. This helps you pick pieces fast and stay excited.
– How to make pieces: Decide if you want a necklace, bracelet, or earrings. Thread the string through the buttons. Tie a secure knot or stitch with the needle. For a bracelet, make a short chain and knot the ends. For a necklace, thread longer rows. For earrings, pick pairs and add a small loop at the end.
– Finishing touches: Tighten knots, trim excess string, and check the fit. Add a small charm or bead for extra flair. Mix shapes and colors to create bold designs.
– Tips and safety: Use a plastic or blunt needle for kids. Have an adult help with sharp tools. Keep tiny pieces away from younger children.
– Care and reuse: Store favorites in a tidy tray. Save worn buttons for other crafts like garlands or mosaics.
This upcycled jewelry from old buttons fits many kid projects. It sparks creativity and helps the planet.
Conclusion
Embracing eco creativity through recycled kids crafts opens the door to fun learning experiences while nurturing a love for the environment.
These 28 projects not only allow kids to unleash their imagination but also teach valuable lessons about sustainability and resourcefulness.
Encourage your little crafters to explore these ideas and share their creations with family and friends!
Note: We aim to provide accurate product links, but some may occasionally expire or become unavailable. If this happens, please search directly on Amazon for the product or a suitable alternative.
This post contains Amazon affiliate links, meaning I may earn a small commission if you purchase through my links, at no extra cost to you.
Related Topics
recycled kids crafts
eco-friendly activities
upcycled art projects
sustainable crafts
creative recycling
nature crafts for kids
DIY kids projects
easy crafts
budget-friendly crafts
environmental education
fun with recycling
hands-on learning