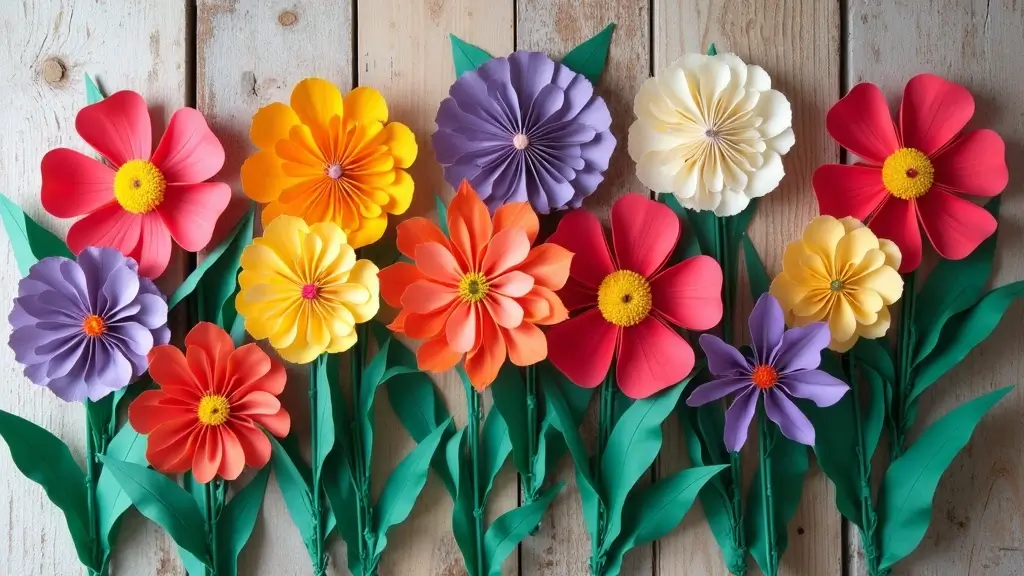
This season has me craving flowers that stay bright without wilting. I love fresh blooms, but time and care can trip me up. That’s why I created 30 Paper Bouquet DIY Ideas That Last Forever. These bouquets use paper, glue, and a little wire so they stay colorful for months. If you want pretty decor you can reuse for holidays, birthdays, or everyday space, this post is for you.
Why I made this post. I kept looking for a no wilt option because life gets busy. I also wanted an affordable way to bring color to rooms that suits any season. So I gathered 30 ideas that are simple, playful, and sturdy enough for real homes.
Who it’s for. If you decorate a dorm, apartment, or home with a small budget, this is for you. If you plan parties or weddings and want a personal touch that lasts, this is for you. If you love crafts but hate fiddly projects, you will find these friendly and quick.
What you’ll get. Thirty different paper bouquet ideas in styles from modern to rustic. Step by step instructions you can follow in an afternoon. Tips on picking papers, colors, and textures that stay colorful. Ideas for making sturdy stems and arranging them so they look real.
Next, you can start with one small bouquet and build from there. These projects use simple materials like colored cardstock, crepe paper, scissors, glue, and tape. You can tweak colors to match a room, wedding color scheme, or gift wrap. The guide focuses on practical how tos you can implement today.
Ready to turn paper into long lasting petals. Let’s dive in. You will find confidence as you finish each bouquet. Picture a shelf or table bright with a bouquet that never fades. If you share photos, I would love to see how you styled them.
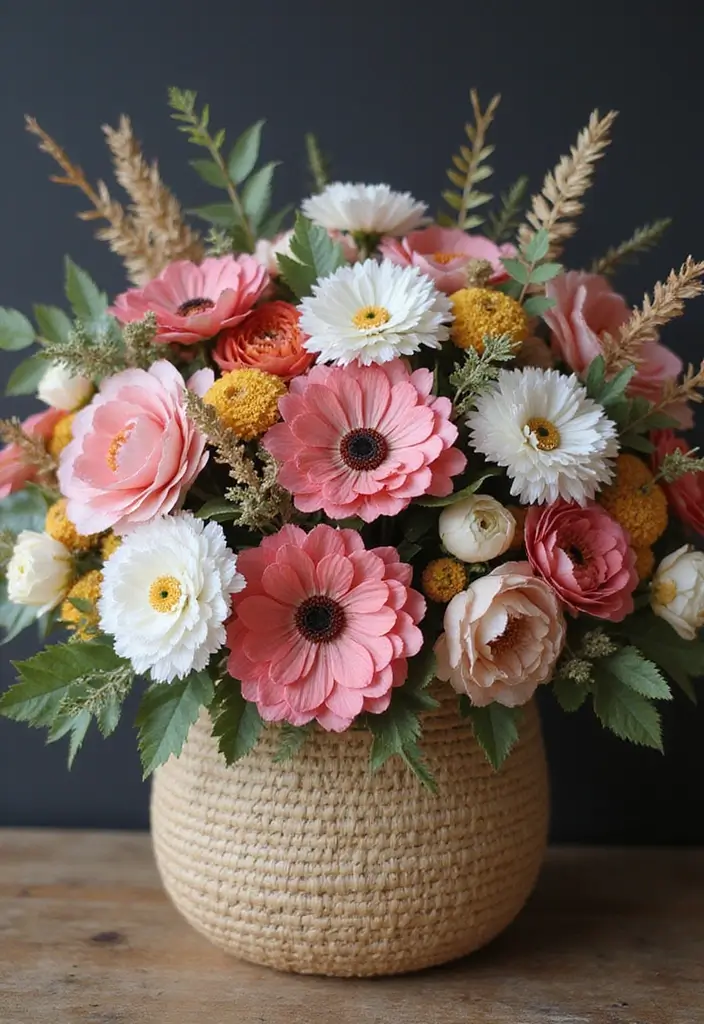
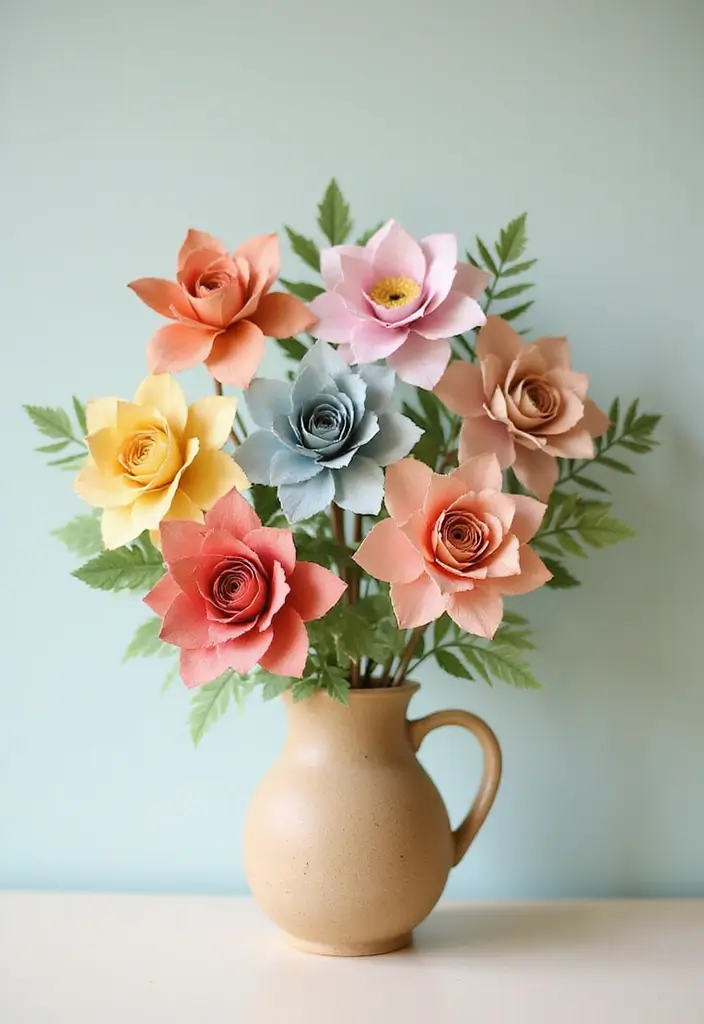
1. Classic Crepe Paper Roses
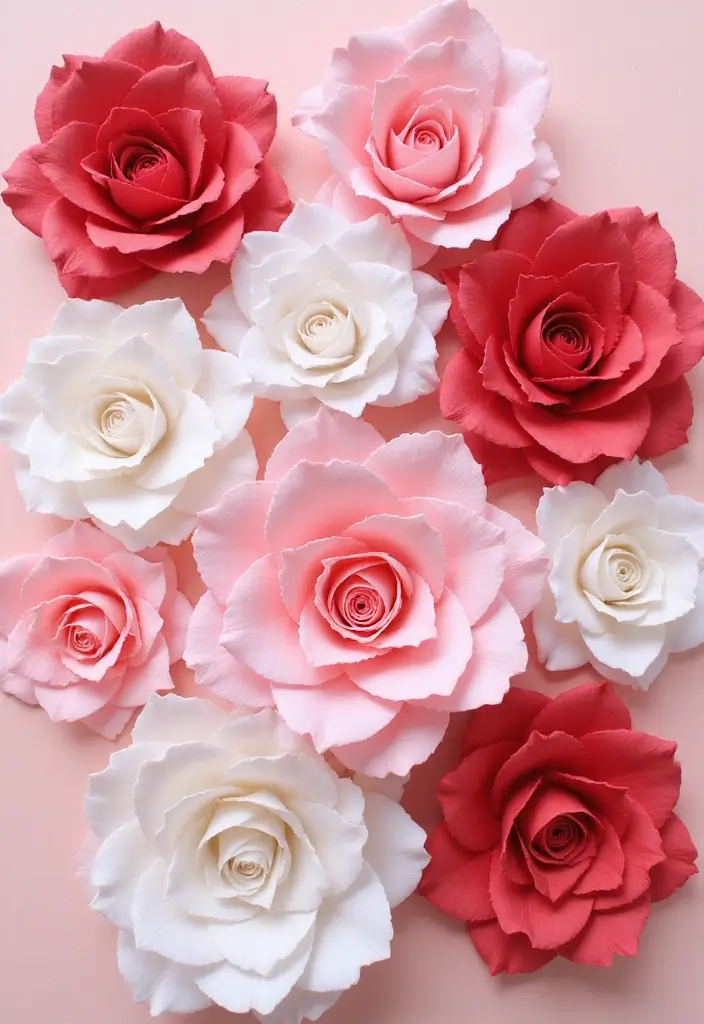
You want a bouquet that lasts and still feels fresh. Classic crepe paper roses give that kind of charm. They stay bright, and you can tailor colors to your room. Here is a simple, practical way to make them.
Tools and materials
– Crepe paper in two or three shades.
– Scissors.
– Floral wire.
– Glue.
– Floral tape.
– Optional: use paint or markers to tint the edges.
Why these help: crepe paper is easy to shape, and wire makes a sturdy stem. Tape keeps the bloom tight.
Make the bloom
– Cut petal shapes in two or three sizes from the paper.
– Mix sizes for depth.
– Curl the petal edges with your fingers to form natural curves.
– Create a tiny center from crumpled paper; secure it to a short bit of wire.
– Layer petals around the center and fix each layer with a touch of glue.
Color and finish
– Lightly tint the petal edges to add life.
– Let the color dry fully.
– Wrap the stem with floral tape from base to tip.
– Add a leaf if you like.
Pro tips
– Use two to three rose tones for a rich look.
– Vary petal sizes to keep it lively.
– Practice on a sample bloom before you make a full bouquet.
– For a softer look, mix in smaller petals with the larger ones.
Display ideas
– Display them in a tall vase for a bold look.
– They stay flawless for months with light dusting.
@media(max-width:480px){
Recommended Products
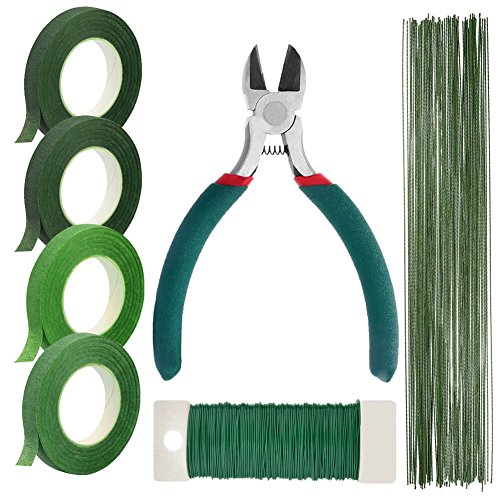
FLORAL ARRANGEMENT TOOLS INCLUDED – 100 pieces green stem wire 26 gauge, 114 feet green paddle wire 22 gauge, 4 rolls green floral tape and 1 pair wire cutter. These supplies are all you need for DIY flower arrangements, bouquets, and boutonnieres etc.

Value Package: you will receive 10 rolls of colorful Crepe paper in different colors, 28 paper flower templates in 4 different shapes and sizes, 100 green floral wire poles, 3 floral tape in different colors, and a pigment set, enough for you to DIY different paper flowers or share with others
Materials included in this kit: Petals - 144 qty Sepal - 24 qty 12 inch floral stem wire - 24 qty Floral Tape 30 yard- 1 qty Double sided tape - 1 qty
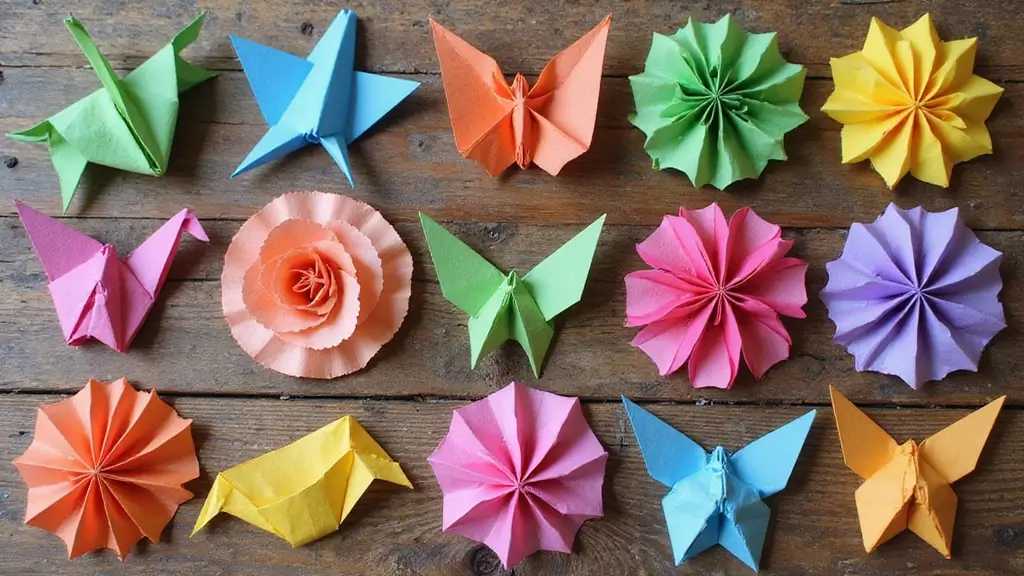
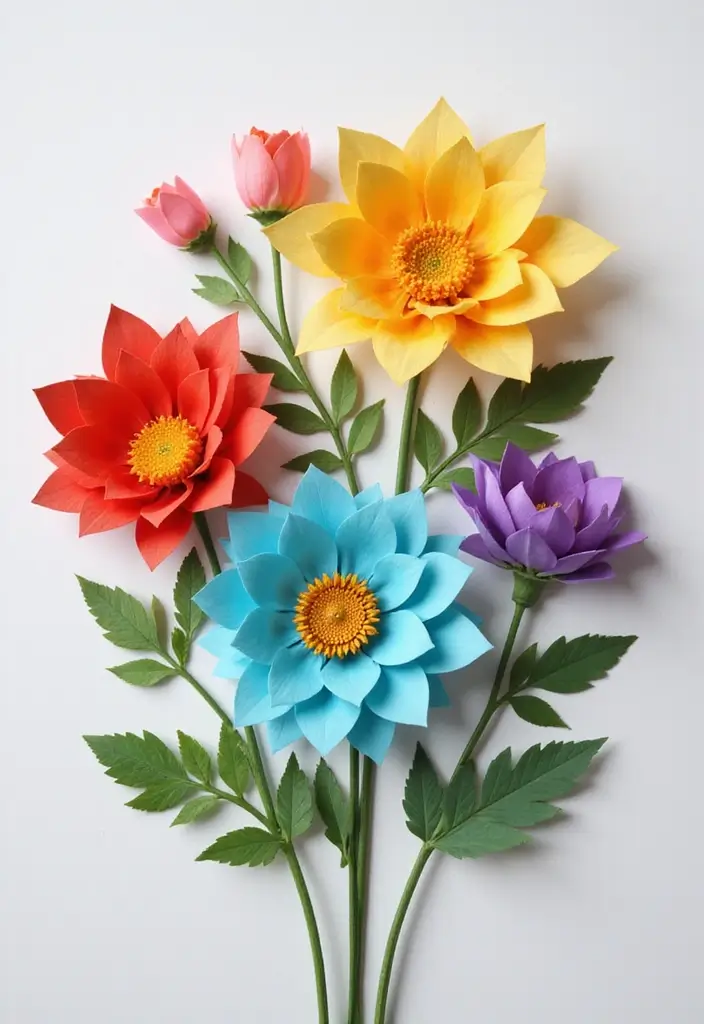
2. Vibrant Origami Flowers

Looking for a bouquet that lasts forever? Colorful origami flowers give you petals that stay perfect without water. Mix different shapes and colors to fit any room or mood.
Here is why this idea works. Origami blooms stay crisp in a clear glass vase, travel well, and you can fold many blossoms in a small space. They are easy to customize, so you can match season, color schemes, or gifts.
Tools you’ll need
– Origami paper
– Scissors (optional)
– Crafting mat
– Quick note: choose sturdy paper for bigger designs so the petals keep their shape. For smaller blooms, regular origami paper works great.
Practical tips
– Edge it up with a touch of glitter. A light dusting along the fold lines makes the edges sparkle.
– Keep folds sharp by creasing folds firmly with your fingernail or a soft tool.
– Practice a few sample folds on scrap paper before making the real bouquet.
Display ideas
– Pair your origami flowers with a simple glass vase so the colors steal the show.
– Mix several small blooms in one vase for a playful, eclectic look.
– Create a mini bouquet in a shallow bowl for a desk centerpiece.
Next steps
– Gather your papers, a mat, and scissors if you want. Then start with a few easy shapes and build up.
– Remember, steady hands and patience pay off. Put on music, fold, and watch your bouquet grow.
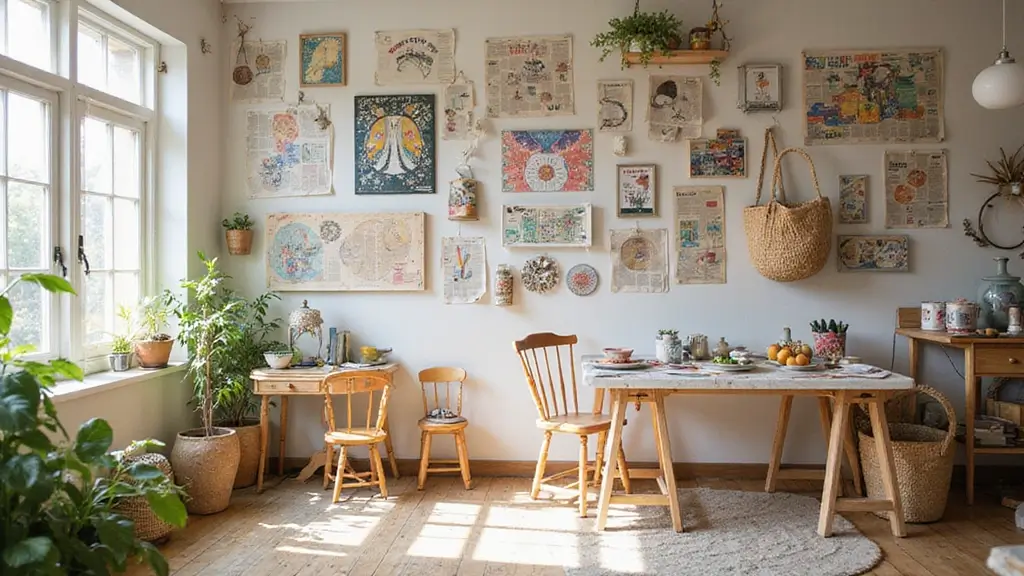
3. Eco-Friendly Newspaper Bouquets
You want a bouquet that lasts and helps the planet. This DIY uses old newspapers to create a chic, long-lasting arrangement. It cuts waste and adds a fun, easy project to your decor.
– Tools needed: Old newspapers, twine, scissors. Optional: glue, coffee grounds, dried leaves, or small twigs for texture.
– What you’ll make: A rustic paper bouquet that fits a casual party or cozy home display.
– Steps:
1) Plan your blooms. Decide how many flowers you want and the stem length.
2) Tear pages into strips. Make them about 1 to 2 inches wide for easy rolling.
3) Roll petals. Start with a tight center and wrap longer strips around to form petals.
4) Build the bloom. Layer several petals around the center until you like the fullness.
5) Add color and texture. Lightly dust with coffee grounds for a warm, earthy look.
6) Bind the stems. Wrap twine around the base and twist to secure. Trim the ends.
7) Add foliage. Slip in dried leaves or small twigs to give depth.
– Finish and care: Tie the bouquet together with one more loop of twine. Display indoors away from direct sun to help it last. If you want extra protection, a light spray of clear sealant can extend life.
4. Whimsical Tissue Paper Blooms
Want a playful, budget-friendly decor idea? Tissue paper blooms fit the bill. They are light, colorful, and easy to make.
Here is why they shine. They take few supplies and come together fast.
Stack tissue in your chosen colors. Keep a small bloom and a larger one for bold looks. Fold the stack into an accordion, pinch the center, then twist.
Gently pull the layers to reveal fluffy petals.
Create blooms in different sizes. Cluster them for a table centerpiece or scatter for whimsy. They work for parties, weddings, or brightening a corner.
Attach stems with floral wire. Wrap the wire with tape to secure the bloom. Tie a ribbon around the base for a festive touch. They’re light and easy to place in jars or hang from ceilings.
Color tips: pick colors to match your theme. Try a soft pastel mix for romance or bold contrasting hues for a lively look. Repeat a few tones across blooms for cohesion.
Tools needed: Tissue paper, floral wire, scissors.
– Vary bloom sizes to add depth.
– Next steps: gather colors and start layering for a bright display.
@media(max-width:480px){
5. Elegant Paper Daisies
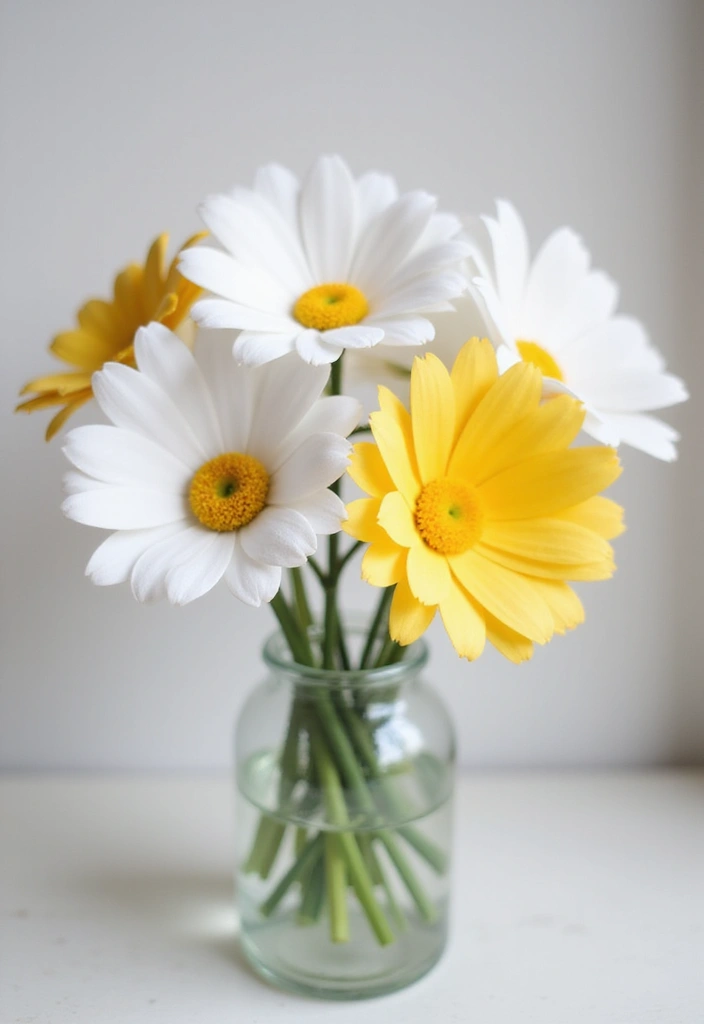
You want a flower that lasts and still looks fresh. Elegant paper daisies can give you that. Let’s break it down.
What you’ll need
– Cardstock in white or your chosen color
– Scissors
– Small brads for the center
– Optional: yellow paint or marker, clear sealant
How to build each daisy
– Cut several petal shapes from stiff cardstock. Make a mix of small and larger petals.
– Layer the petals in circles, offsetting each ring. This creates a full, natural look.
– Secure the center with a brad. Leave the petals loose enough to bend slightly for texture.
– Add a bright center. A yellow dot of paint or marker works, or use a gold brad for shine.
– If you want extra depth, add another ring of petals and re-bend the tips.
Finish and display
– Space the petals a little as you place them. That makes the bloom feel real.
– For longer life, coat a light layer of clear sealant or Mod Podge on the petals. Let it dry.
– You can make these daisies stand alone or turn them into a bouquet. Attach stems or toothpicks for easy placement.
Smart tips
– Paint the petals with a light wash for a subtle color shift. It adds character without losing the daisy look.
– Use yellow centers to keep the classic feel. White petals with yellow centers read as fresh and cheerful.
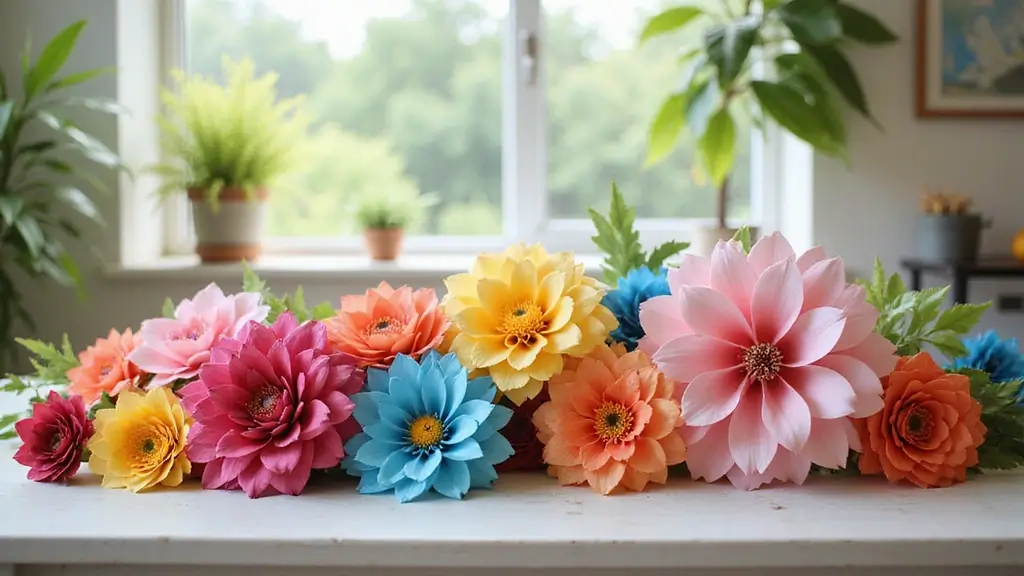
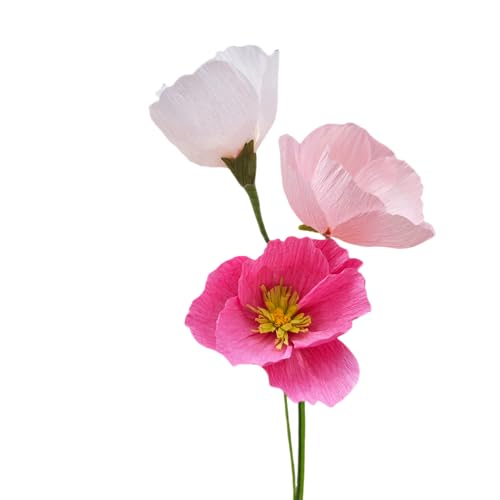
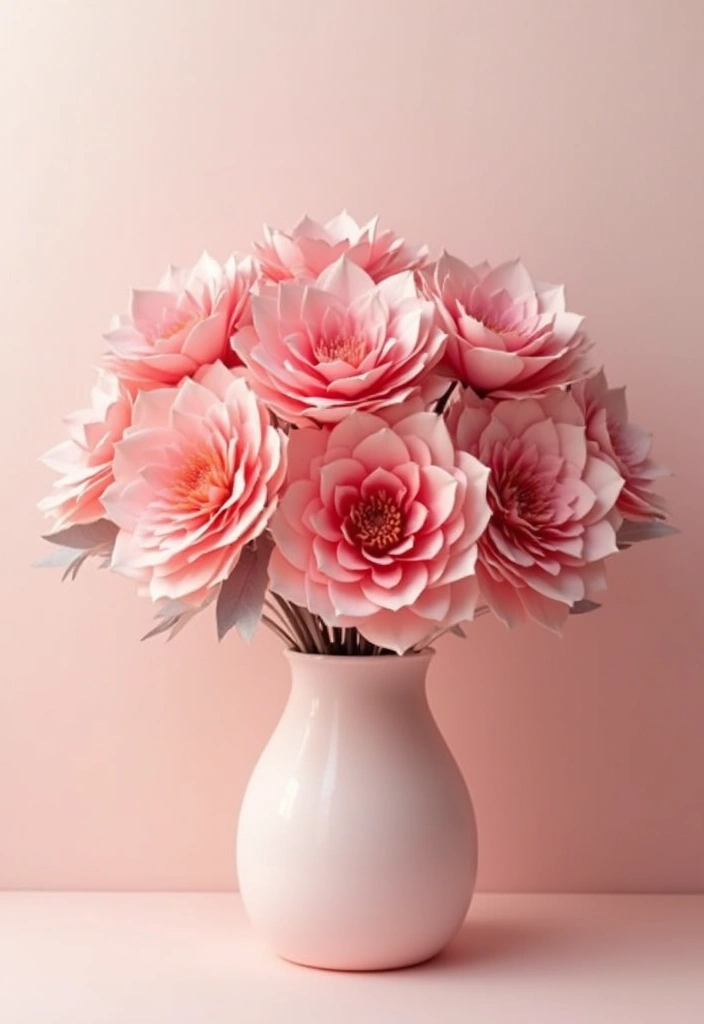
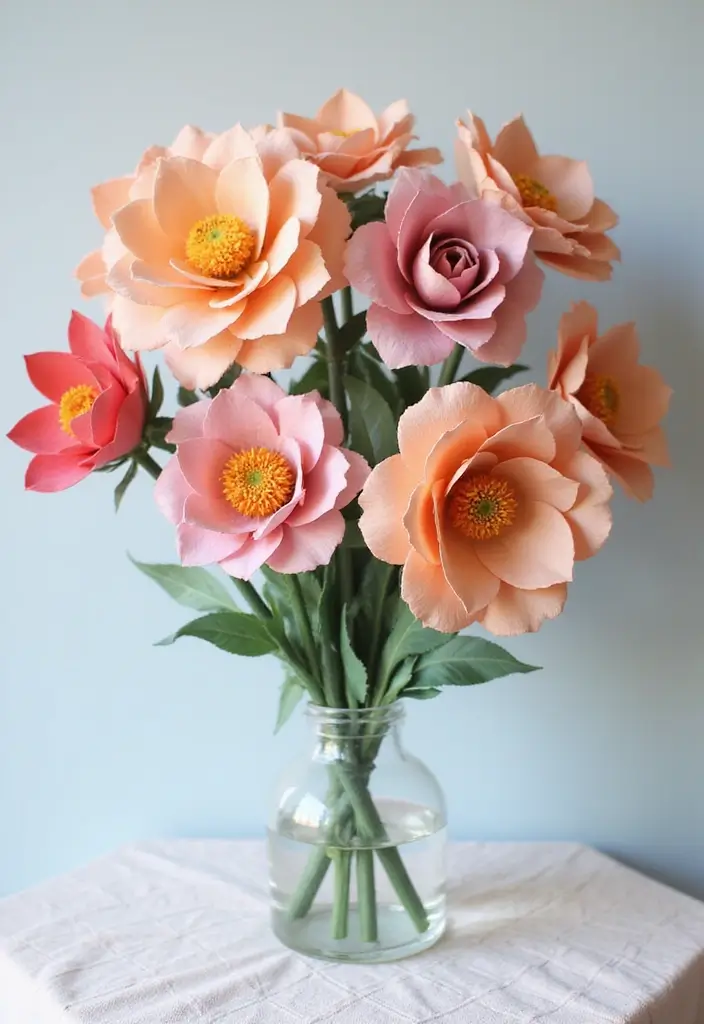
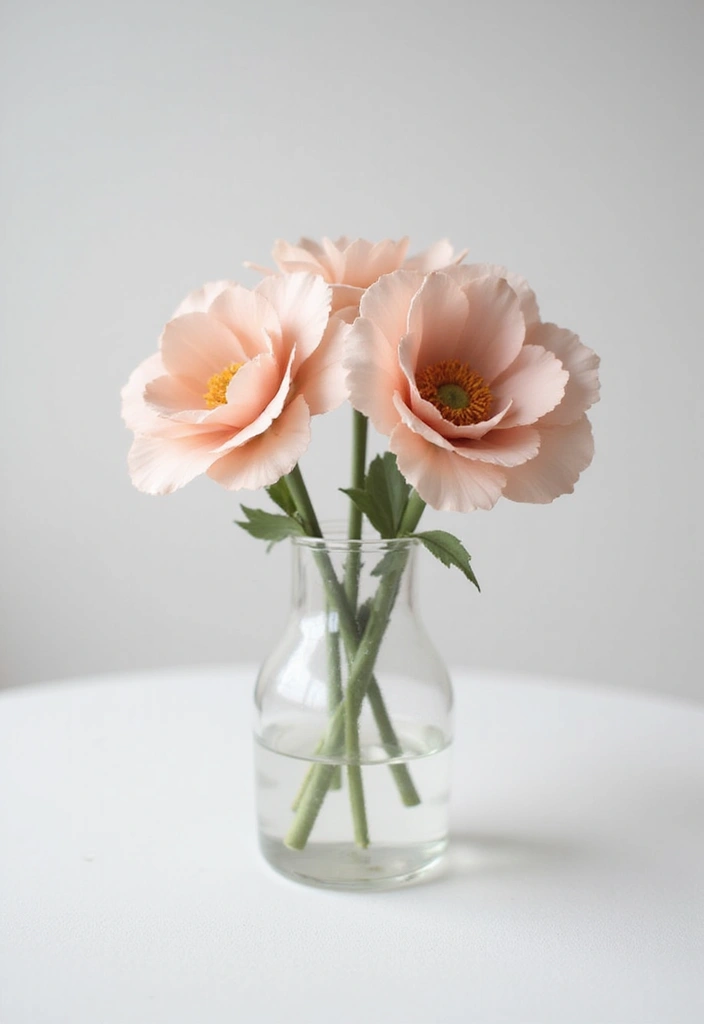
6. Stunning Paper Peonies

Stunning Paper Peonies
You want a bloomy centerpiece that lasts. Paper peonies give you that. They look plush and real, but they stay perfect for ages. Here is why they work: big petals, soft curves, and a touch of drama.
Let’s break it down.
– Tools you need: crepe paper in your chosen colors, scissors, and floral wire. A bit of glue will help hold pieces in place.
– Color plan: pick two or three shades of the same color. Lighter centers and darker edges create depth.
– Petal making: cut round shapes in three sizes. Curl the edges with your fingers to add life.
– Build the bloom: start with the smallest circle as the core. Layer larger petals around it. Space them a little so the flower looks full, not flat.
– Center details: tuck a few small petals in the middle. You can dab glue and press a tiny cluster to mimic a real peony’s center.
– Attach to a stem: wrap or twist the floral wire to create a sturdy stalk. Add a touch of tape if you like.
– Finish as a bouquet: use a few stems in one vase. Vary their heights for a natural look.
– Glam tip: glue a tiny sequin in the center for a hint of sparkle.
Next steps: place your peony flowers where guests will see them, and enjoy your lasting beauty.
Recommended Products

Abundant to Use and Share: you will receive 28 pieces of paper flower templates totally, including 24 pieces of petal templates in 4 shapes, 6 pieces each shape in 6 different sizes, 2 piece of bottom templates in round and hexagon shapes respectively, and 2 pieces of leaf templates in 2 sizes, enough for you to DIY different paper flowers or share with others

Flower Money Bouquet Kit - You will get 20 sheets black floral wrapping paper, 24pcs butterfly decorations, 100pcs floral pins, 1 roll of 1.5" wide satin ribbon and 90pcs wooden sticks for flower bouquets
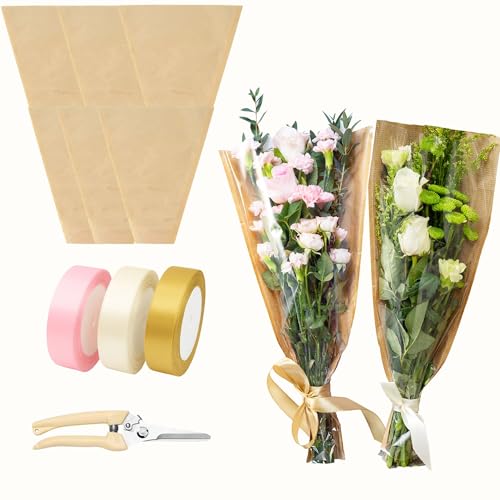
Easy to use for beginners: you can wrap flowers neatly in minutes even if you’ve never done it before, and this all-in-one kit helps you create clean, simple bouquets without special skills or tools. Includes 50 kraft flower sleeves, 3 satin ribbons, and 1 pair of scissors
7. Charming Felt Flowers
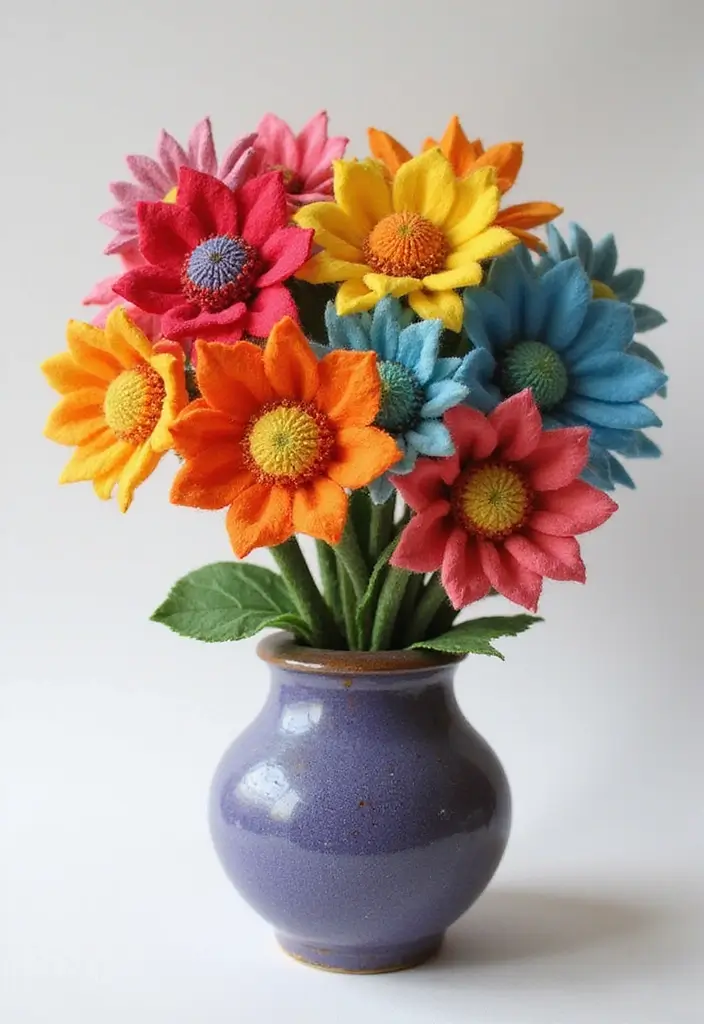
Want a bouquet that lasts and feels warm to touch? Felt flowers give a soft, cozy look that stays bright. You can pull off many styles, from tiny tulips to big sunflowers. Here is why this works: it’s sturdy, kid friendly, and easy to customize.
– Tools you need: Felt sheets, scissors, hot glue gun
– Extras: sticks or floral wire for stems, and green felt for leaves
To build each bloom, keep it simple:
– Cut basic shapes from bright felt. Layer petals by stacking smaller pieces over larger ones.
– Add a center. Use a small circle of contrasting felt or a bead for texture.
– Attach the bloom to a stem. Glue the bottom of the bloom to a stick or wire so you can insert it into a vase.
– Finish with leaves. Cut leaf shapes from green felt and glue them at the base of the flower.
Here is a quick idea: mix felt petals with paper leaves for a mixed-media bouquet. The combo adds depth and a touch of whimsy.
Benefits in brief: these flowers are durable, safe for kids, and great as gifts or desk decor. Try tulips, daisies, or sunflowers and vary colors.
Next steps: make a small bundle for a friend or a gift. Store dry, dust-free to keep colors bright.
@media (max-width: 600px) {
.visual-quiz-iframe { min-height: 995px !important; height: 1100px !important; }
}
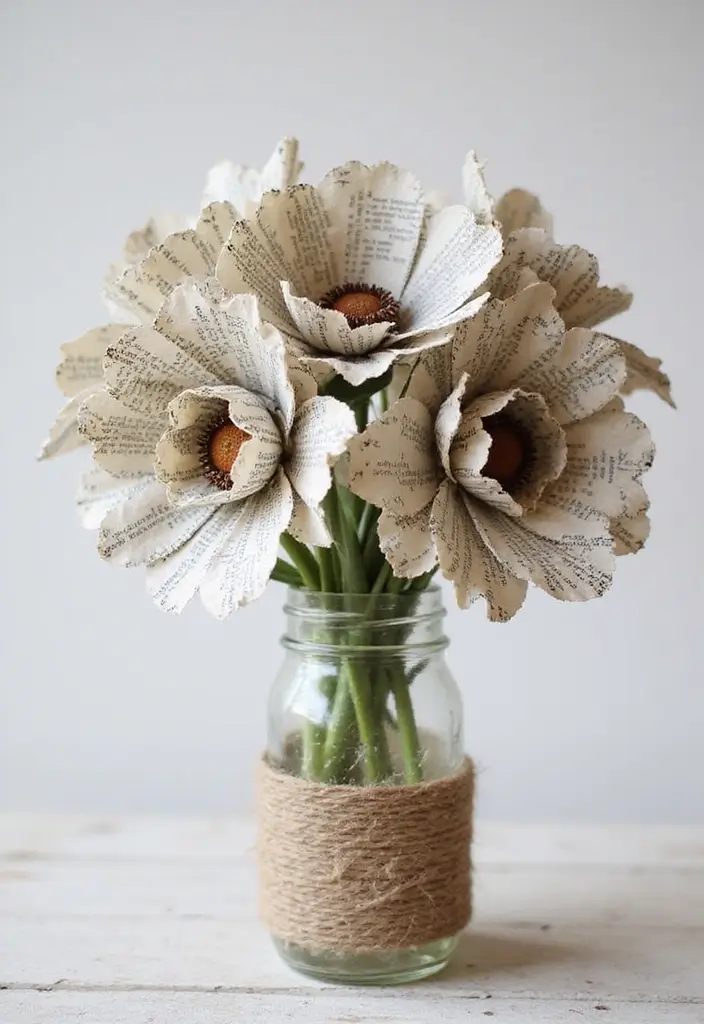
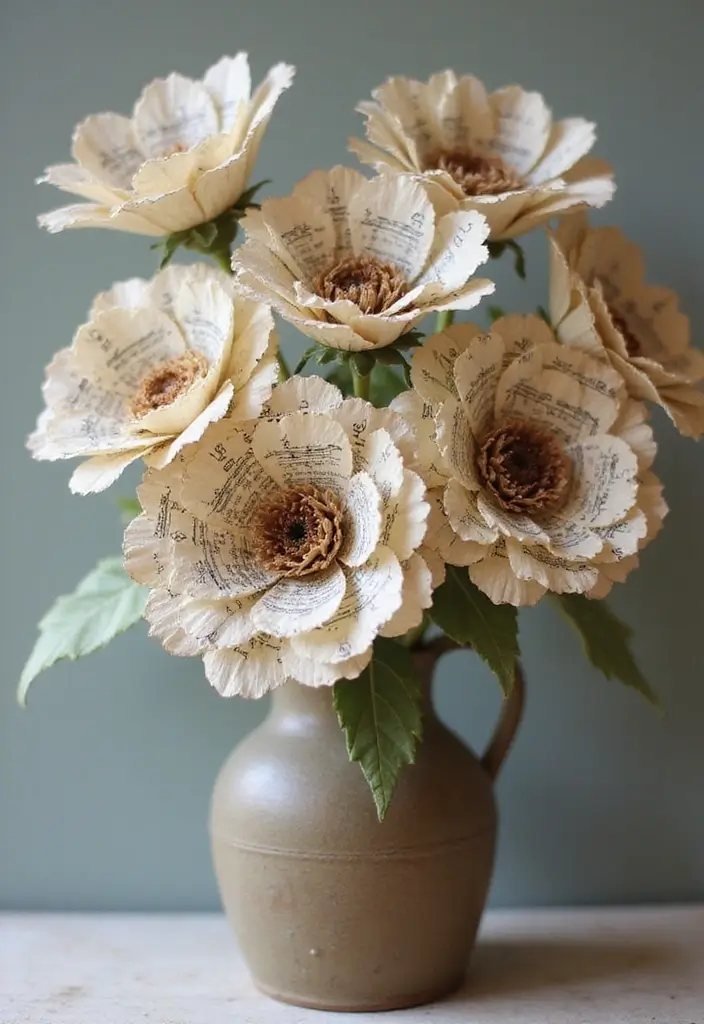
8. Beautiful Book Page Blooms
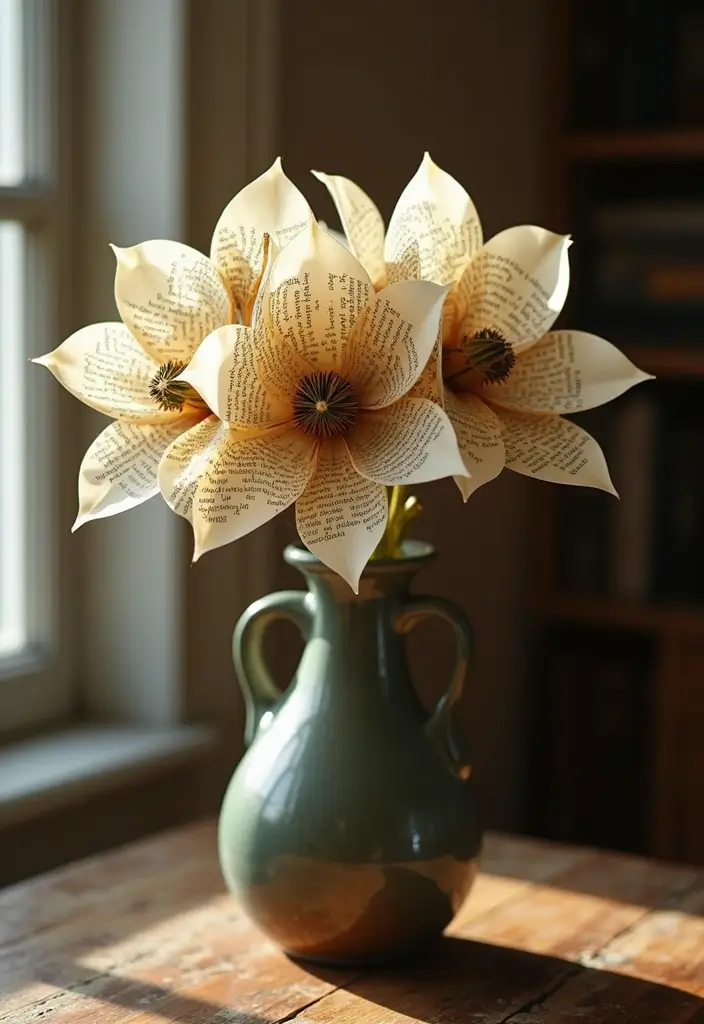
You want a keepsake that looks special and lasts. Beautiful Book Page Blooms give you that. Turn old pages into flowers that stay bright in your home.
– Tools needed: Old books, scissors, brads or glue.
– How to make them:
1) Tear out pages from books you won’t read again.
2) Cut each page into several petal shapes.
3) Layer petals around a small center piece.
4) Secure with a brad or a dab of glue.
5) Gently push petals to fan them open.
6) Add a wire stem if you want a true bouquet feel.
– Why it works:
The paper’s texture and color add real depth. Each bloom carries a tiny story from its page. They look great on a shelf, a table, or at a wedding.
– Quick tips for flair:
Use pages with colorful illustrations for extra pop.
Mix pages from different genres for an eclectic look.
Try poetry pages or old maps for unique vibes.
– Where to display:
Mantel displays, glass vases, or a reading corner centerpiece suit these blooms well.
– Final note:
It costs little and lasts long. Keep the blooms dry to help them keep their shape.
@media(max-width:480px){
9. Festive Holiday Paper Flowers
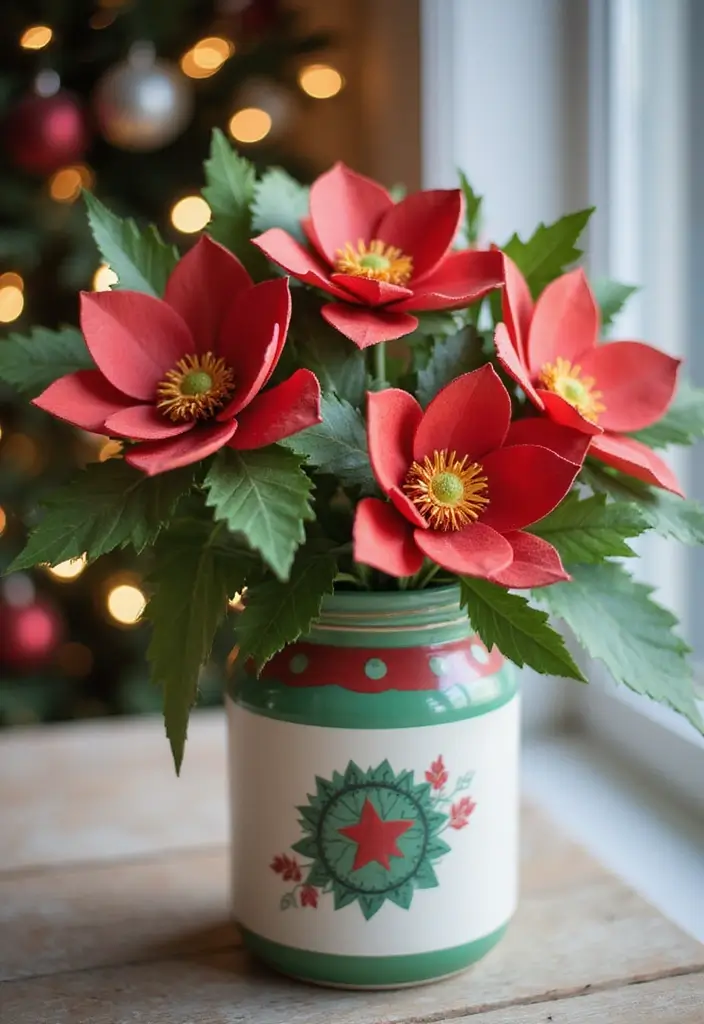
Festive paper flowers bring holiday cheer that lasts. You pick colors that fit the season. Reds and greens for Christmas, pastels for Easter, or gold and silver for New Year.
– Cut petals from colored paper.
– Shape them with your fingers and glue in layers to form blooms.
– Combine several blooms into a bouquet, a garland, or a table centerpiece.
Here is how to add drama: use glitter or metallic paper for a sparkling touch. Add a few faux leaves to fill out the arrangement.
Tools you need
– colored paper
– scissors
– glue
Optional extras
– glitter
– metallic paper
– faux foliage
– Create a small bouquet to brighten gift wrap.
– Make taller stems to stand in a vase.
– Mix sizes for depth and interest.
Next steps: plan where you will display the flowers. They work on mantels, dining tables, and entry tables.
Unique insight: trim the paper blooms small to make cute gift decorations or mini centerpieces.
Here is why this helps your party: they cost little, last long, and can be reused year after year.
10. Personalized Monogrammed Bouquets

You want a personal touch that lasts. Monogrammed bouquets give you that. They’re easy to make and great as gifts for weddings or anniversaries, or as bold wall art at home.
Here is how to build one:
– Choose the initials you want to feature. Pick the couple’s shared initial or one letter for a striking set.
– Cut each letter from sturdy paper. Use a clean, readable font so it shows well from afar.
– Make a backdrop. Cut a larger shape in a color that matches the letters.
– Add blooms. Cut tiny paper flowers in colors that match each letter. Mix flower shapes for texture.
– Attach the letters to the backdrop with a hot glue gun. Press and hold a few seconds until it sticks.
– Display. Frame it, mount it on a canvas, or hang it on a wall. For home decor, try a very large initial on a gallery wall.
– Seasons and color ideas. Use spring pastels, summer brights, autumn tones, or winter icy shades.
Tools and tips:
– Tools you’ll need: sturdy paper, scissors, and a hot glue gun.
– Unique twist: Create themed sets for different seasons to match your decor.
@media(max-width:480px){
Recommended Products

Versatile Floral Embellishment Kit: This set includes 20 sheets of high-quality wrapping paper in a stylish assortment of colors, ensuring you have the perfect backdrop for any floral arrangement. With an additional 24 pieces of 3D butterfies, and 5 romantic greeting cards, this kit is a florist's dream come true. Plus, 1 roll of satin ribbon,1 DIY Letter Sticker, 1 DIY Rhinestone Sticker add the finishing touch to your bouquets

Ideal Dimensions for Customization: Each sheet of wrapping paper measures approximately 58 x 58 cm / 22.8 x 22.8 inches, providing ample space for a single bouquet or multiple smaller arrangements. The paper's lightweight nature and foldability make it easy to trim, pack, and store, ensuring you're always prepared for any floral project

All-in-One Florist Starter Kit: Stop buying separately! Includes 50 sheets flower wrapping bouquet paper in 10 colors, 36pcs 3D gold butterfly decor, 100 pearl pins, 15Pcs Greeting cards, 6 pcs mini crowns and 2 rolls of ribbons.
11. Rustic Twine-Wrapped Bouquets
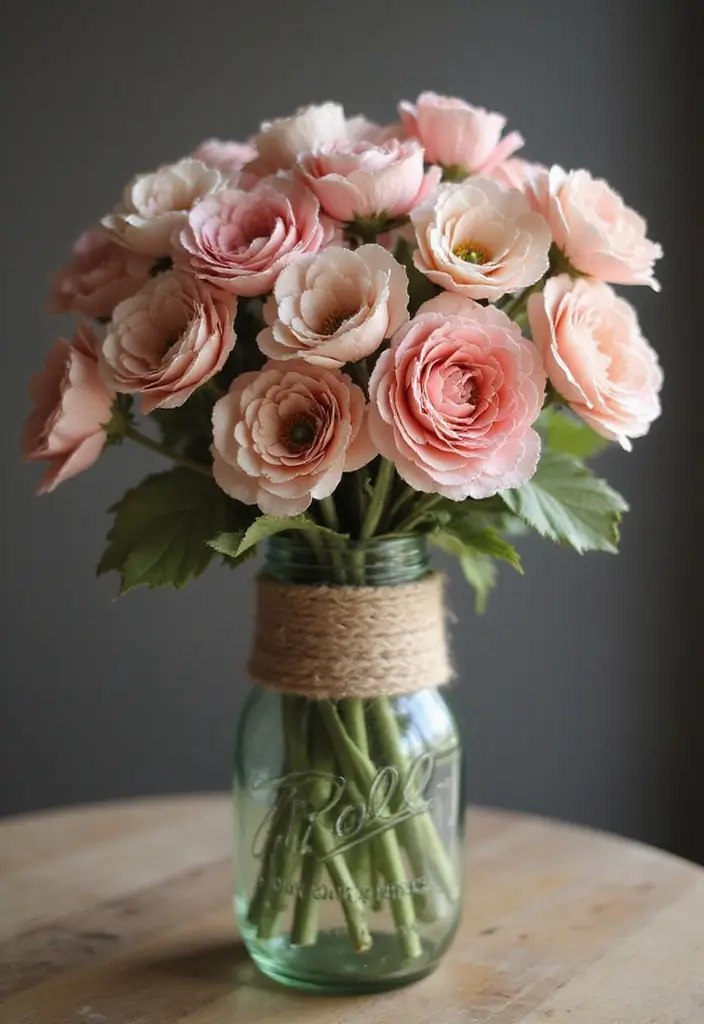
You want a rustic look that lasts. A twine wrap adds warmth with little work. This small touch makes ordinary paper blooms feel like a farmhouse centerpiece.
– Materials you need:
– Paper flowers
– Twine
– Scissors
– Optional: dried sprigs, small charms or tags
– Step by step:
1) Line up the stems so the bouquet sits neat.
2) Start at the base and wrap with twine. Keep it snug but not tight.
3) Work upward. Tie a firm knot and trim the ends.
4) For extra charm, tuck in a dried leaf or a herb sprig.
– Style tips:
– Pick natural or muted flower tones to glow with the twine.
– Use brown or linen twine for a farmhouse vibe.
– Add a name tag or date for a personal touch.
– Why it works:
Here is why it works: It adds texture and a handmade feel. It hides glue and creates a cohesive look.
– Practical notes:
Keep the bouquet dry. Avoid direct sun. Store flat to prevent bending.
– Where to use:
Great for weddings, dinner tables, or home shelves.
– Fast variations:
Try different twine colors. Add a ribbon for a festive touch.
Next steps: place the bouquet where you want it and enjoy the rustic charm.
@media(max-width:480px){
Recommended Products


【Value Flower Binding Wire 】Package included one roll flower binding wire, each of contains 656 feet of 26 gauge paper coated bind wire, each roll individually packed and sealed.The floral stem wire is great for floral arrangements, wreath making, flower crowns, wedding bouquets, Christmas garlands and other craft projects

Material: flower binding twine is paper wire made from paper fibers, providing a serviceable yet easy to use bind wire for your floral and craft projects, the color can camouflage very well with natural stems
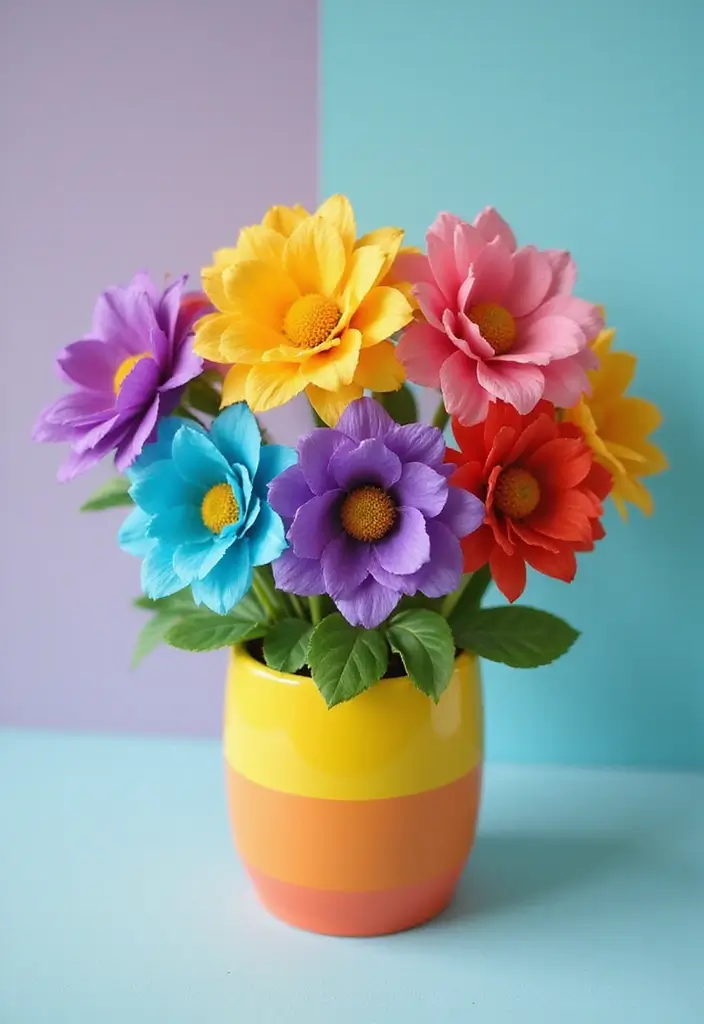
12. Playful Color-Blocked Blooms
Need a fresh way to lift a room or party? Color-blocked paper blooms do the job with a clean, modern vibe that lasts.
Here is why this approach shines: bold blocks catch the eye, and paper stays crisp far longer than real petals.
Let’s break it down into simple steps you can follow.
What you need
– Colored paper in 3 to 4 shades.
– Scissors and glue.
– Optional: a small paintbrush and edge paint.
Pick your palette
Choose colors that fit your space. Try two contrasting shades plus a neutral, or go for a calm monochrome look.
Cut and shape
– Cut petals in different shapes and sizes from each color.
– Layer petals around a tiny center piece to form full flowers.
Add texture
– Glue petals at the base to hold their place.
– Curl the edges slightly with your fingers to create movement.
Finish with a pop
– Paint the petal edges in a bright shade for extra pop and light catching.
Assemble and display
– Make a small bouquet or attach blooms to a paper backing for a wall display.
– Set them in a tall vase or mount them on a wall to make a photo backdrop.
Next steps
– Tweak colors to fit your room. Add green paper leaves for a touch of realism.
13. Vintage Paper Bloom Bouquets
Want a vintage feel that lasts? These paper blooms give you old charm that lasts. Use old sheet music or patterned paper to craft flowers that look aged.
Tools you need
– Old sheet music or patterned paper
– Scissors
– Glue
– A thin floral wire or wooden skewer
– Floral tape
– Optional: lace, ribbon, or a small button for the center
How to make them
– Step 1: Cut petals in three sizes. Small, medium, and large. Keep the cuts clean.
– Step 2: Layer petals to form flowers. Glue the center first, then add petals in circles to build depth.
– Step 3: Add a stem. Tape a wire or skewer to the back with floral tape. Bend gently for a natural shape.
– Step 4: Mix papers for texture. Try music paper with a map page. Use different colors to give each bloom character.
– Step 5: Finish with a vintage touch. Wrap the stems with lace or ribbon and tie a small bow.
– Step 6: Arrange. Five to seven blooms look nice in a vase or tied as a hand bouquet. Make a themed set for anniversaries.
Care tips
– Press fragile paper flat before you start. Store in a dry place away from direct sun.
They look timeless.
– Share your finished bouquet to inspire others.
– You can mount the bouquet on a photo frame for display.
– It makes a great gift.
14. Dainty Miniature Bouquets

Want décor that feels delicate but lasts long? Dainty miniature paper bouquets give that charm and stay bright all year at home.
Make tiny clusters of paper flowers. They sit well on desks, shelves, or as a small table centerpiece. These mini bouquets make sweet party favors or thoughtful gifts. Display them in small vases or jars. Mix bloom shapes and colors for a fresh, lively look. These DIY paper flowers stay vibrant without water.
Here is how to start.
– Tools needed: Colored paper, scissors, small vases.
– Step 1: Cut tiny petals from colored paper.
– Step 2: Shape stems with a thin wire or rolled paper.
– Step 3: Glue blooms into a small bouquet.
– Step 4: Set in a vase or jar.
– Pro tip: Personalize each bouquet with a handwritten tag.
– Display tip: Pick a soft or bold color palette to match your space.
These mini bouquets last long, stay tidy, and fit small spaces. You can reuse jars after the flowers fade. Try shifting colors for seasons and switch vases for different tones.
Keep these tiny blooms away from direct sunlight to prevent fading. Store extra petals and spare stems flat in a folder so they stay crisp for your next project. Have fun crafting today.
@media(max-width:480px){
15. Creative Layered Petal Bouquets
Here is why layered petals work. They add depth and make a paper bouquet look bigger without extra work. You can use one color in several shades to build a full, soft look.
– Pick a color family and gather 3 to 4 shades.
– Use petal shapes that vary in size. Try large rounded petals with small narrow ones. This mix adds texture and interest.
– Build the bouquet in layers. Start with large petals as the base, then tuck smaller layers on top. Offset each layer slightly to avoid a flat look.
– Add leaves or fern cutouts between layers. A touch of green makes the colors pop and brings a real feel.
– Create a gradient effect. Blend light to dark across petals, working from the outer edges to the center for depth.
– Tools you’ll need: crepe paper or card stock, sharp scissors, glue, and a bit of tape to secure stems.
– Quick tip: run a dab of lighter color along petal edges for a soft highlight. It reads as sunlit edges in a real bloom.
Next steps: glue layers together, poke a simple paper stem, and arrange in a vase or wrap with ribbon.
With careful layering, your bouquet lasts longer too.
@media(max-width:480px){
16. Seasonal Flower Bouquet
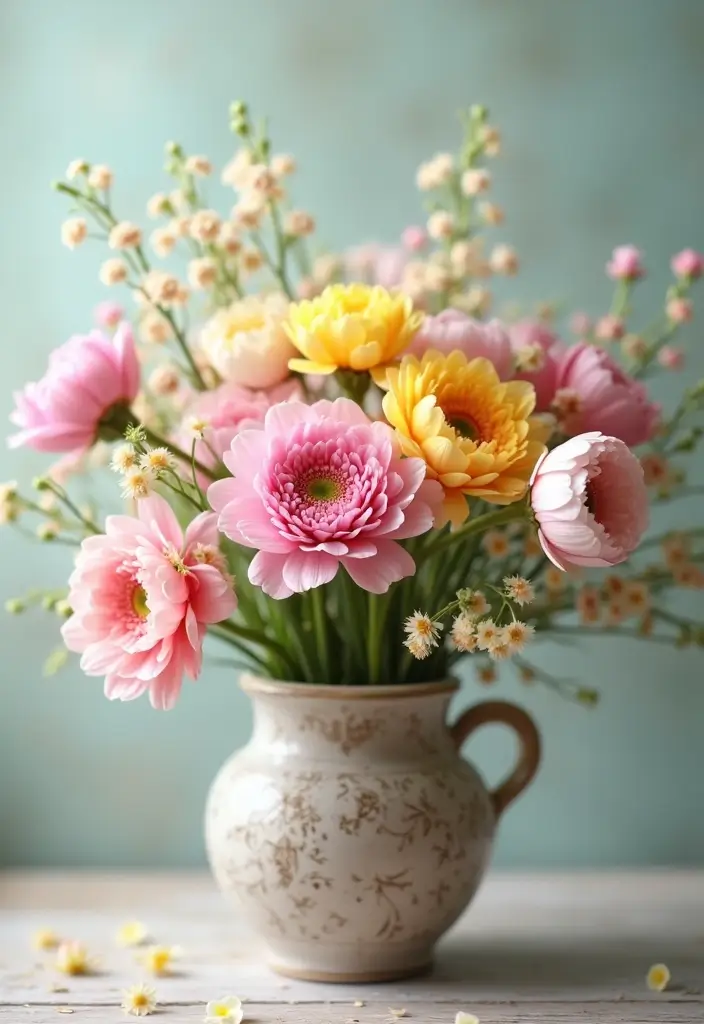
Want a look that changes with the seasons, but you hate buying fresh flowers every month? A seasonal paper bouquet helps. It uses color and simple shapes to echo spring, summer, autumn, and winter indoors. It lasts, and you can swap it out anytime.
Here is why it’s worth it: paper blooms stay bright, fit any space, and never wilt. You choose the size and color to fit your room.
What you need
– Colored paper
– Scissors
– Glue
– Floral tape
– Thin wire or pipe cleaners
Seasonal palettes
Spring offers soft pastels. Summer brings bold brights. Autumn uses warm rusts and greens with leaf accents. Winter favors cool blues and whites, with a hint of metallic.
How to build
1) Cut simple petal shapes.
2) Layer petals to form blooms.
3) Wrap stems with tape and add wire for sturdiness.
4) Make 5–7 blooms and clip them into a tight cluster.
5) Bind with a paper band.
Display ideas
– Put the bouquet in a tall vase on a table.
– Hang a few blooms on a frame for wall art.
– Create a small seasonal centerpiece. Swap the look each month.
Care tips
Keep dry and away from moisture. Store flat when not in use to prevent curling.
Next steps
Gather colors you love, cut a few petals, and start your first seasonal bouquet today.
17. Boho Style Paper Bouquets
Want a boho bouquet that lasts? You can craft a free‑spirited paper arrangement that shines on a shelf for years.
Boho style paper bouquets mix wildflower shapes, feathers, and textured papers. Pick earthy colors like sand, sage, terracotta, and dusty pink. Layer rough edges with soft fibers to get a laid‑back, natural feel. Your bouquet becomes a colorful expression of your own vibe.
Tools and materials
– Various colored papers
– Scissors
– Glue or tape
– Braided twine
– Lace strips or fabric scraps (optional)
– A small wooden dowel or sturdy straw for a stem
Here is why this approach works: paper holds its shape, and you can mix textures to mimic real stems and petals. It stays lightweight and easy to tweak as you go.
Step by step
1) Cut several flower shapes from paper. Try daisies, bells, and simple stars.
2) Curl the edges with a pencil to give life.
3) Layer pieces and glue them to form buds and clusters.
4) Wrap a short section of twine at the base to create a stem grip.
5) Add a strip of lace or a fabric scrap for depth. Optionally tuck in a dried herb for scent.
6) Attach the finished blooms to a wooden dowel with more twine.
Finishing tips
– Lightly seal the back with a clear spray to help colors stay bright in sunlight. Test on a scrap first.
– Tie the whole stem with extra twine for a rustic look.
Care and display
– Keep the bouquet dry and dust with a soft brush.
– Store in a cool, dry box away from direct sun.
– Use it as table décor, a gift, or a wall piece to boost a boho room.
Next steps: try this with feathers, dried herbs, or lace to match your space. Your unique boho bouquet awaits.
@media(max-width:480px){
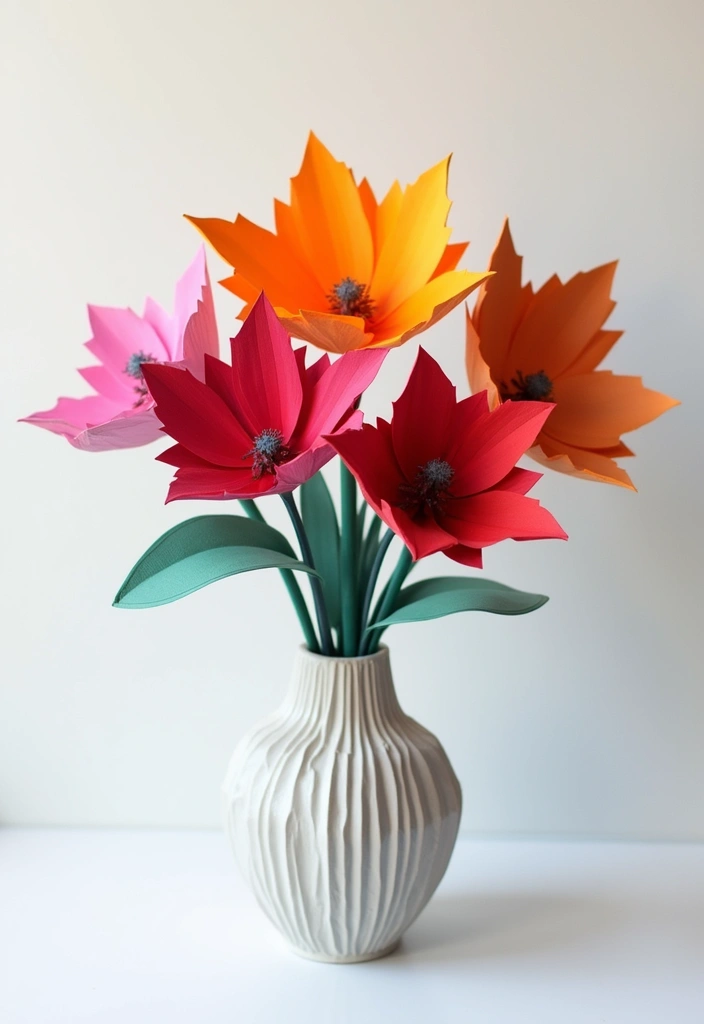
18. Geometric Flower Arrangements
Geometric Flower Arrangements
Geometric flower arrangements give a clean, modern look that lasts. You cut shapes instead of soft petals, then build a bouquet that stays fresh for years.
Here is why this works: sharp edges catch light and hold color. Change the mood by swapping shapes or colors.
Let’s break it down.
– Cut your paper into hexagons or triangles.
– Layer the shapes to form small, faceted blooms.
– Glue the pieces so they stay put. Some flowers stay flat, others get a light stack for more depth.
Color ideas: mix bright hues with soft pastels for bold contrasts. If you want a calm, sleek feel, use a monochromatic palette with different shades of one color.
Display tips:
– Use a clear vase so the shapes shine.
– Place the tallest pieces in back, the shorter ones in front.
– Vary height and spacing to create movement.
Tools you’ll need:
– Colored paper
– Scissors
– Glue
Next steps: try hexagon petals for a modern look, or triangles for crisp edges. Work in one color family for cohesion, and you’ll have a striking, long-lasting bouquet.
Keep the glue neat to avoid bumps. Dust gently with a cloth. They work well on shelves, desks, or a coffee table all year long.
@media(max-width:480px){
19. Fun and Funky Flower Collages

You want a collage that pops and lasts. Fun and funky flower collages give you both. You layer shapes, sizes, and colors to build a living look on paper. The result is a mixed-media bouquet you can hang or gift.
Here is why this method works. Layers add depth you can see and feel. You can mix paper flowers with fabric petals or torn patterns for texture.
Here are steps to get it done.
– Tools and materials: Colored papers, patterned papers, fabric scraps, glue, scissors, and a sturdy base like cardstock.
– Planning: Lay out blooms first to test balance and flow.
– Building: Glue large blooms first, then place smaller ones on top to fill gaps.
– Finishing touches: Add texture with fabric bits, vellum, or washi tape. Sprinkle in stickers or tiny buttons for personality.
– Variations: Use a single color family for calm art or a bold palette for a punchy look.
– Color ideas: Mix warm tones for energy or cool tones for a soothing scene.
– Texture tips: Layer fabric, ribbon, and torn paper edges to add feel.
– Durability tips: Seal borders with a slim coat of clear glue so pieces stay flat.
– Display ideas: Frame it, mount on foam board, or hang with string as wall art.
– Uses: Make a quick wall piece, a decorative card, or a flat keepsake to mail.
Here are quick next steps. Frame it, gift it, or tuck it in a scrapbook. Your paper bouquet collage will last and bring a smile.
20. Unique Petal-Shaped Bouquets
Here is why unique petal shapes can boost your paper bouquet. They create movement and a fresh look that ordinary circles can’t match. You cut your paper blooms into curved petal shapes. Then you arrange them so the petals flow in a natural, wave like line. This makes the bouquet feel alive, even though it is made of paper.
Choose a color plan. You can use bold contrasts to highlight each petal, or pick a single color family for a calm, cohesive look. Either way, the color choice guides the eye and adds style.
Settle the stems in a vase with floral foam. The foam holds the shapes at the right height and keeps the petals from sagging. A stable base also makes the bouquet easier to handle and display.
– Tools needed: colored paper, scissors, floral foam, glue.
– Tip: mix in feathers or beads between layers for extra texture and sparkle.
Next steps: make a small sample first. Adjust petal sizes, spacing, and color mix. Then build a bigger bouquet for a gift or decor.
– Try sizes.
– Tiny petals give a delicate look, big petals make a bold statement.
– This is easy to redo if you want a new vibe.
@media(max-width:480px){
21. Botanical Paper Art Bouquets
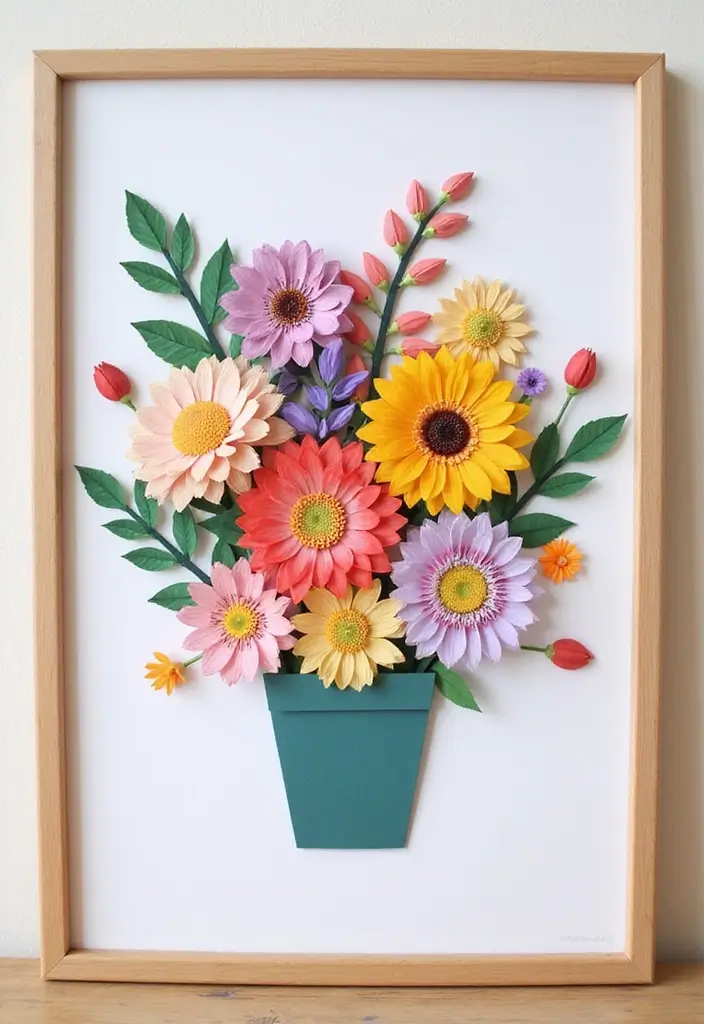
Why turn a bouquet into wall art
Turn your paper bouquets into wall art you can enjoy year round.
Here is why this works. It blends well with modern and rustic looks. Framing adds a real art feel. The deep shadow box creates depth so petals cast soft shadows. You get a striking focal point instead of a plain bouquet.
Plus, you can change one piece when you want a fresh vibe. It’s easy to start.
What you need
– Colored papers in several shades
– Scissors
– Glue or double-sided tape
– A shadow box or deep frame
No special tools are needed.
How to create a botanical paper art bouquet
1) Pick a color scheme that fits your space. Soft pinks with greens or bold reds with golds work well.
2) Cut petals in a few sizes. This adds natural depth.
3) Build 3 to 7 blossoms. Add green paper leaves for stems.
4) Mount pieces on a backing mat. Leave a little space between blooms.
5) Slip the artwork into the shadow box. Seal behind the glass.
Tips for longevity and style
– Use acid-free glue to avoid yellowing.
– Frame with glass or a clear cover to keep dust out.
– Create a small seasonal collection and swap colors as the year goes by.
Next steps
– Try a 5-flower setup this weekend.
– Frame it in a deep box and hang it in a living room or hallway.
– Experiment with color mixes and different flower shapes.
@media(max-width:480px){
22. Playful Pop-Up Flower Cards

You want a card that lasts and feels personal. Pop-up flower cards do that. They turn a simple message into a small experience.
Here is why pop-up designs work
The flowers unfold when you open the card. It adds a playful surprise and makes the moment memorable.
What you need
– Tools: Cardstock or thick blank cards, colored paper, scissors, glue.
– Tip: Use heavier paper for the card base to support the pop-up.
Step-by-step
1) Prepare the base. Fold a heavy sheet in half to make a sturdy card.
2) Build the bloom. Cut petals that lie flat when the card is closed and spring up when it opens. Try 2-3 petals for a simple look, or 5-7 for fullness.
3) Attach a pop-up mechanism. Use small glue tabs on a thin strip that folds with the card.
4) Add a personal touch. Write a short message at the bottom or on the inside flap.
Optional touches
– Add a small paper stem and leaf behind the pop-up bloom for a garden feel.
– Use a cohesive color scheme to keep the card elegant.
– Include a short, warm message printed or handwritten inside.
Unique insight
Experiment with different flower sizes. A tiny bud beside a large bloom adds depth.
Next steps
Test the pop. Open and close a few times to ensure it rests flat when closed and pops evenly when opened.
Enjoy the blooming moment with friends.
@media(max-width:480px){
@media (max-width: 600px) {
.normal-quiz-iframe { min-height: 570px !important; height: 570px !important; }
}
23. Minimalist Paper Flower Decor
Minimalist paper flower decor lets your space breathe. You get calm and elegance with just a few blooms. Simple lines, clean shadows, soft textures. It feels modern and timeless at the same time.
To make this work, pick 2 or 3 flower types and 2 colors. Monochrome petals with one accent hue keep the look sharp. Let negative space do the talking. A quiet core lets each bloom stand out. This setup makes your room feel easy to love.
– Tools you need: colored paper, scissors, tape or glue, a plain vase.
– Quick rule: start with larger blooms, add one or two smaller ones for balance.
– Tip: this keeps your space calm and easy to update.
Placement matters. Place blooms where they can be seen from several angles. Avoid clutter. A clean cluster on a low shelf or a lone stem in a tall vase can feel powerful. Change lighting to shift mood.
Why it lasts: paper flowers don’t wilt. They stay crisp and neat for seasons. Swap a color or add one new bloom to refresh the look without a full redo.
Tips for best results: use single-tone petals, cut clean edges, and avoid overlapping too much. Keep lines straight and tidy.
Next steps: trim your paper, test a few arrangements, and keep a spare color on hand for quick updates.
@media(max-width:480px){
24. Personalized Family Flower Tree
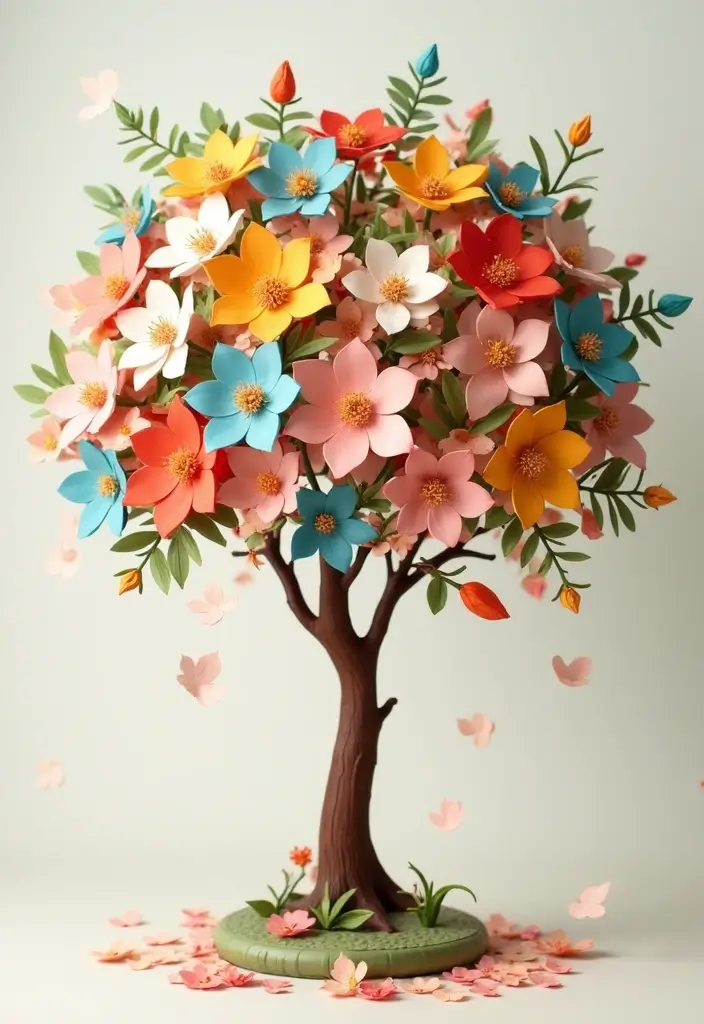
You want a keepsake that lasts. A paper flower tree fits that goal. Each bloom stands for one family member. Colors and shapes show their personality. This piece stays bright on display and holds memories you can touch.
Here is how to build it.
– Tools and materials:
– Various colored papers
– Scissors and glue
– A sturdy base such as foam, thick cardboard, or a small wooden block
– A stem source like wire or painted skewers
– Decorative stones or pebbles for weight
– Tiny name tags or labels
– Plan and create:
1) Plan one bloom for each relative.
2) Pick colors and petal shapes that fit their style.
3) Cut petals, assemble flowers, and add a name tag.
4) Attach a stem and insert it into the base.
5) Add stems until the tree looks full and balanced.
6) Scatter stones around the base for extra stability.
7) For a bigger tree, add a second tier of blooms higher up.
8) Use a thicker base if you want more height.
– Personal touches:
– Slip a tiny family photo into the center of each bloom.
– Add nicknames beside names with simple letter stickers.
– Display and care:
– Place the tree where it won’t tilt in a draft.
– Let glue dry fully before moving.
– Keep it out of direct sun to stop colors fading.
– Dust lightly and check for loose petals every so often.
– Why it matters:
– This craft invites family time and becomes a lasting keepsake you can treasure year after year.
Next steps: customize colors, add photos, and start your personalized family flower tree today.
@media(max-width:480px){
25. Creative Flower Wreaths
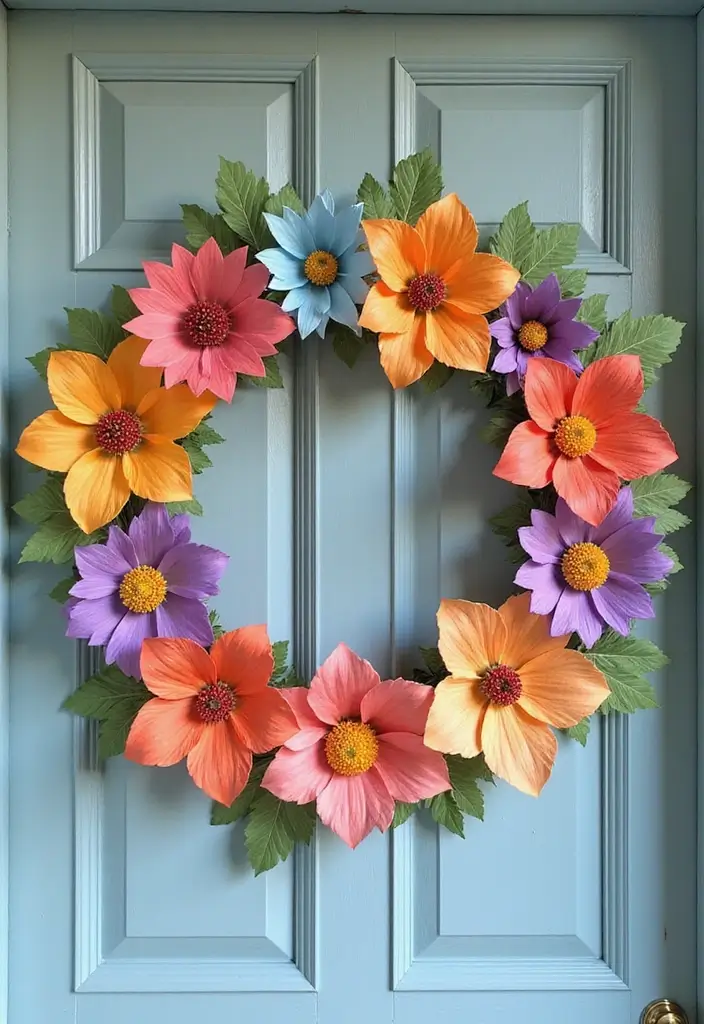
Here is why a paper flower wreath works. It lasts longer than real blooms and fits any decor. You can swap colors for the season in a flash.
Tools you need
– Cardboard or a wire circle for the base
– Colored papers in a variety of hues
– Scissors
– Glue
– Tape
Let’s break it down
1) Build the base. Cut a clean circle from cardboard or set up a sturdy wire frame. Make it strong enough to hold many blooms.
2) Make the flowers. Cut petals from colored paper. Curl the edges slightly to give depth. Glue petals into small clusters.
3) Attach and layer. Start at the edge and work toward the center. Layer blooms to create a full look. Add a few green leaves for a fresh touch.
4) Add finishing touches. Tie a ribbon or bow at the top. Pick a color that pops against your wall or door.
Seasonal ideas and care
Change colors to match spring pastels, bold summer brights, autumn tones, or winter reds and greens. Keep the wreath dry and store it flat when you’re not using it. With a little care, your wreath stays bright and inviting for many seasons.
Next steps: hang it on your door or wall, tweak colors as seasons shift, and enjoy a welcoming, handmade focal point.
@media(max-width:480px){
26. Garden-Themed Paper Bouquets

Do you want a garden vibe that lasts without any care? Garden-themed paper bouquets bring bright blooms inside and stay fresh all year.
Here is why this works: you control color, size, and texture. You can recreate a real yard or imagine a new floral scene.
– Tools you need: colored papers, scissors, glue. Optional extras: craft wire, green paper for stems, a small vase.
– Unique touch: mix petal sizes to imitate a real garden. Put taller flowers in the middle and shorter ones around the edges so the bouquet looks full from every angle.
First, pick a simple color plan. Choose three or four colors that feel like a real garden. Think soft greens, sunny yellows, rosy pinks, and gentle blues. Then cut a few flower shapes in different sizes. You can make round blooms, teardrop petals, or star-like edges.
Next, add greens. Use long green strips for stems and leaf shapes to act as fringe or ferns. Layer greens behind flowers to give depth. Don’t be afraid to mix textures—matte paper beside a touch of glossy paper makes the bouquet interesting.
Assemble carefully. Start with a tall center flower, place medium blooms around it, and finish with little blossoms tucked in. Place a few stones or pebbles in the vase for an earthy feel.
Keep the bouquet where light colors shine. Store it away from moisture to keep the papers crisp. When done, you have a garden that lasts forever.
@media(max-width:480px){
27. Artistic Layered Flower Panels

Looking for a decor piece that lasts? Layered paper flower panels create a vivid 3D wall or table decor. Here is how you make them.
– Tools you’ll need: colored paper, scissors, glue, foam tape, and a shadow box or canvas.
– Plan your panel: choose a size and a light background to let colors pop.
– Cut and group: make three sizes of flowers. Use two or three color tones.
– Arrange first layer: place flowers on the panel to test balance before gluing.
– Build depth: glue the base layer flat. Elevate some flowers with foam tape for shadows.
– Finish touches: add leaves or small buds. A tiny center bead adds sparkle.
– Display tips: hang on a wall or set on a shelf. Keep it out of direct sun.
Here is why this works: the flat base plus lifted blooms create real depth. Next steps: mix shapes and colors to make a small series for a bigger display.
With practice, you can build a small set in an afternoon.
@media(max-width:480px){
28. Interchangeable Flower Vases
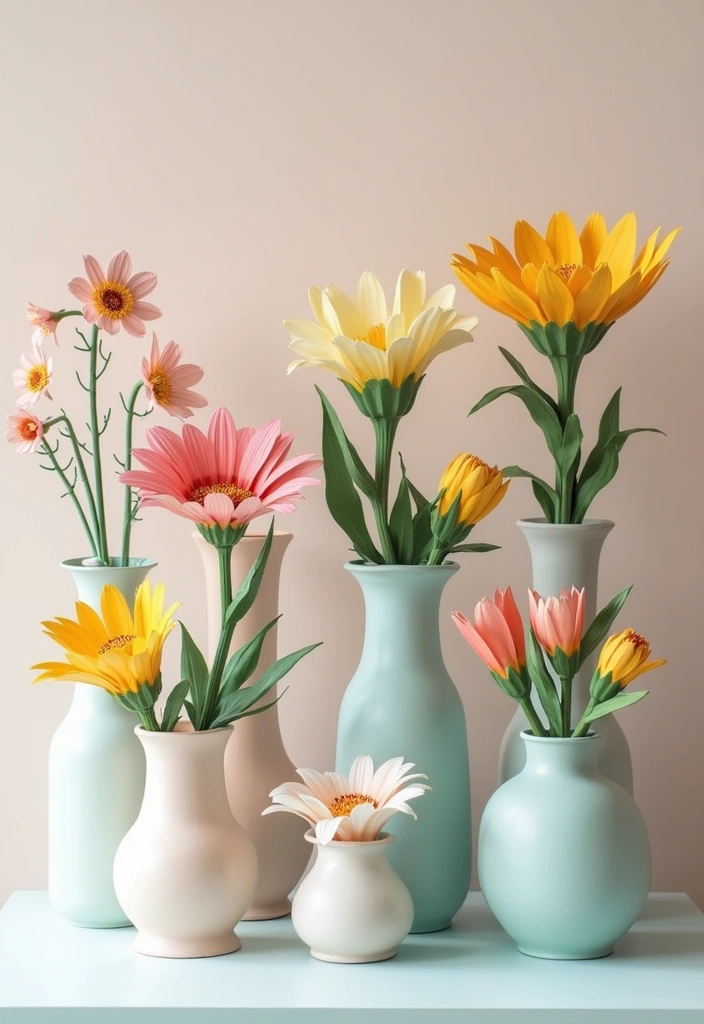
You want flowers that stay fresh in style, not a pile of vases. Interchangeable flower vases give you many looks from one core setup. A modular design keeps your shelves tidy and your bouquets flexible.
Tools and setup
– Tools you need: varied colored papers, scissors, and several vase bases that share the same neck size.
– How it works: a simple collar or sleeve fits over the neck. It lets you slide in a new bouquet fast.
– Color-code for quick swaps: color sleeves by season or event so you grab the right look in a hurry.
Make it happen
1) Pick 3–4 vase bases. 2) Cut thin paper collars in colors for seasons. 3) Attach tiny color-tags to mark the event. 4) Swap by pulling off one collar and snapping on another.
Seasonal ideas
Frame a spring bouquet in pale green, summer blooms in sunny yellow, autumn reds, and winter whites. Keep the vase bodies clean and let the flowers take the center.
Tips and extras
– Keep designs clean and simple so flowers stay the focus.
– Add little seasonal touches like pine sprigs, seashells, or ribbons to the collar.
– Store sleeves flat in a bin; they come out cleanly next time.
Limitations
This setup is light and quick to swap. It may not hold heavy, tall blooms as well as a solid vase.
Common questions
– Will it hold big bouquets? If you plan, pick tall bases and wide collars.
– How do I store the sleeves? Fold flat and keep in a box.
@media(max-width:480px){
Recommended Products


Send Love with Every Bouquet: Wrap your flowers in ourFlower Bags for Bouquets with cream-white ribbon. The warm, rustic brown hue adds a heartfelt touch—perfect for birthdays, Valentine's Day, Mother's Day, or weddings

Package Includes - You will receive 50 pieces of flower bags for bouquets, the quantity is enough for your daily and party decoration, and you can also share it with your friends and colleagues
29. Nature-Inspired Paper Bouquets
You want a bouquet that lasts and still feels like nature. This nature-inspired paper bouquet gives you that wildflower look without wilting. It brings simple beauty to any room. It’s kid-friendly and easy to adjust.
Here is why it works. You get color, shape, and texture that mimic a meadow. Mix light and dark tones, round and pointy petals, and tiny buds to add depth. You can keep a fresh feel through the seasons. You can swap colors to match a room.
Let’s break it down.
– Tools you need: colored papers, scissors, glue.
– How to make: cut petal shapes in several sizes and glue them in layers to a small center. Roll a strip of paper for a stem or use a thin wire for support. Add dried twigs or leaves for a natural touch.
– Put it together: arrange the stems in a small bouquet, then tie with twine or wrap with ribbon. A little tissue hides glue.
Next steps and tips. Display the bouquet in a jar or vase. Gift it to a nature lover. Try a seasonal twist: pastels for spring, warm browns and golds for autumn. Keep away from direct sun to avoid fading. This keeps it simple.
@media(max-width:480px){
30. Unique Shadow Boxes with Paper Flowers
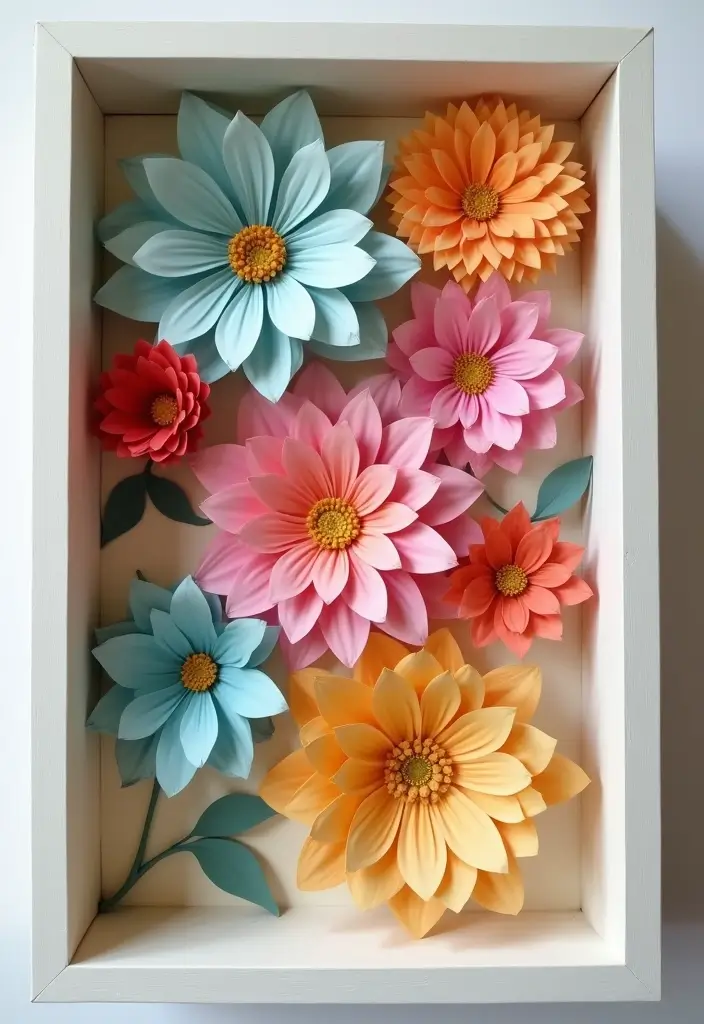
Want decor that lasts? A shadow box with paper flowers adds color. It also gives depth you can see from every angle. You can hang it on a wall or set it on a shelf.
Here is why this works: the 3D petals catch light and shadows. Layered flowers add life. You can add photos or tiny keepsakes to make it truly yours.
Tools you need
– Colored paper, a shadow box, scissors, glue, a craft knife, and a ruler.
Great for walls or shelves, you can finish this in an afternoon.
Step by step
1) Plan your theme. Decide if it is a memory, season, or favorite place.
2) Cut petals in several sizes. Add a few leaves for detail.
3) Build each flower by layering petals with glue dots.
4) Arrange pieces inside the box to get a balanced look.
5) Add a photo, charm, or small keepsake for a personal touch.
6) Seal, then hang on a wall or place on a shelf.
Care tips
Keep acid-free paper and glue. Avoid direct sun to stop fading. Dust gently with a soft brush.
Next steps
Try one small box first. It makes a warm gift or a special room accent. Share your box online and inspire others.
@media(max-width:480px){
Conclusion

Creating paper bouquets is more than just a DIY project; it’s an art form that allows you to express your creativity and sustainability.
Choose any of these ideas to brighten your space and share the joy of handmade floral decor with your loved ones.
Don’t forget to explore your unique style as you dive into the world of paper flower crafting!
Note: We aim to provide accurate product links, but some may occasionally expire or become unavailable. If this happens, please search directly on Amazon for the product or a suitable alternative.
This post contains Amazon affiliate links, meaning I may earn a small commission if you purchase through my links, at no extra cost to you.
Related Topics
paper bouquet diy
eco-friendly crafts
handmade paper flowers
sustainable decor
flower arrangement tutorial
beginner friendly
seasonal decor
creative floral designs
vintage style
minimalist decor
easy crafts
colorful paper flowers