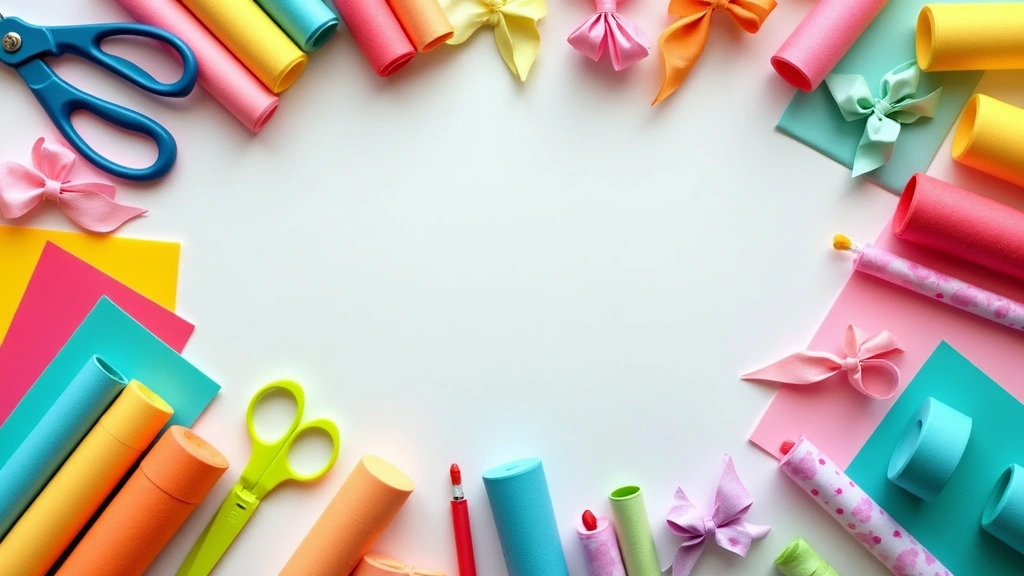
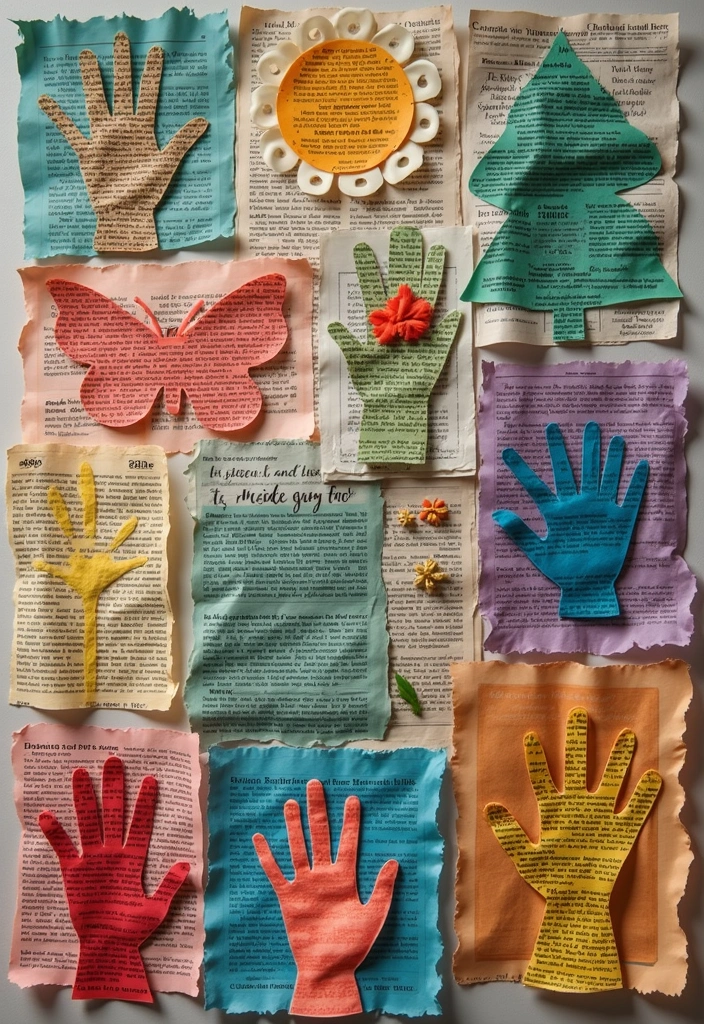
This season has me obsessed with giving new life to old newspapers. I made this post to show that recycling can be playful, colorful, and useful. If you like simple crafts you can finish in a day, this one is for you. I pulled together 25 DIY newspaper crafts that are easy to start, satisfying to finish, and perfect for a rainy afternoon, a classroom project, or a weekend gift idea.
Who it’s for If you’re a parent looking for quick, kid friendly activities, you’ll find something here. If you’re a maker who loves upcycling, this post is also for you. You don’t need fancy tools—just a little space, some glue, and a splash of imagination.
What you’ll get You’ll find clear, step by step ideas you can start today. Each project includes plain supplies and practical tips to fit your time and space. You’ll learn how to prep pages, mix textures, and seal finished pieces so they last.
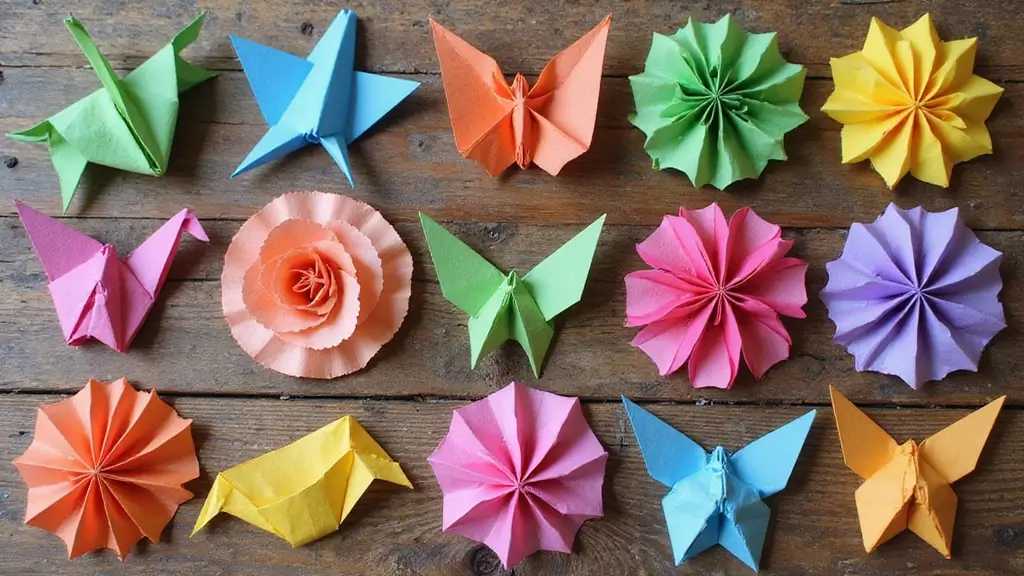
Think paper mache bowls that hold a few tiny treasures, woven placemats that catch the light, beads you string into shimmering jewelry, or wall art that looks like cloth but is made from pages. You’ll also find small notebooks, gift tags, and cards that feel special even though they begin as newspaper scraps. These options show how many looks you can get from one material.
Some notes before you dive in. Newspaper ink can smudge if you scrub with too much water. Start with white glue or a light decoupage glue and let layers dry. A thin coat of acrylic varnish or sealant keeps colors from fading and helps pieces last. Pick projects that match your space and time, then build from there.
Ready to start? Pick a project that fits today and give it a try. The ideas here are friendly for beginners and flexible enough for you to add your own style. By the end, you’ll see how a simple sheet of paper can become art you can touch, hang, or share with friends.
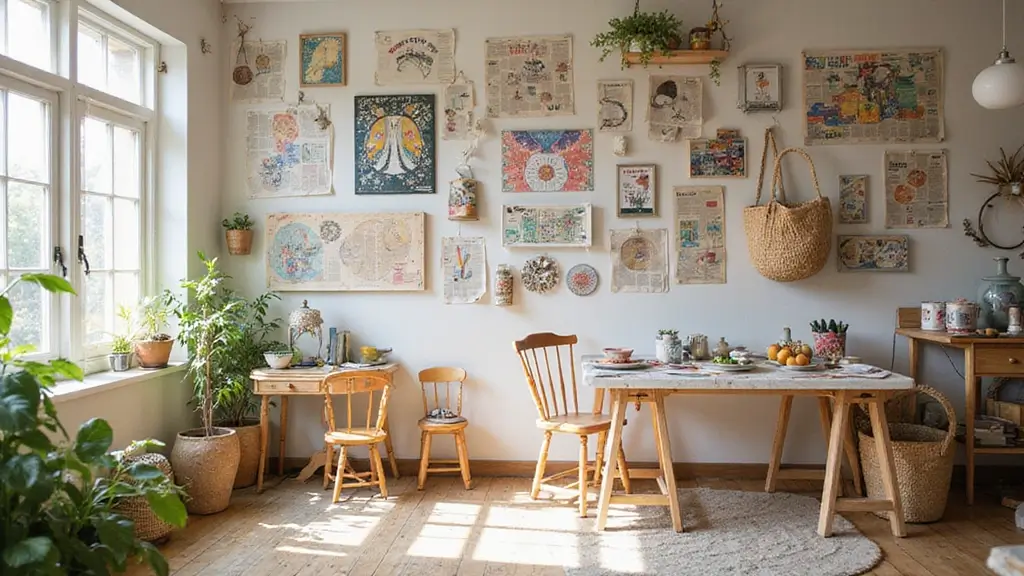
1. Newspaper Wall Art
You want walls that feel personal. Newspaper wall art lets you use old pages to make that happen.
– Gather pages from your old newspapers and a few magazines. Look for big images, bold headlines, or bright color blocks.
– Cut pages into shapes you like. Play with squares, circles, or long strips to add rhythm.
– Plan your layout on a flat surface. Move pieces around until you see a story or a nice color mix.
– Glue pieces to a sturdy base. Use a canvas, a thick board, or even mount them on a wall for a bold statement.
– Add a colorful touch. Mix pages with richer color from magazines to punch up the piece.
– Finish with care. Frame the art for a clean look, or keep it loose for a casual vibe.
– Seal and protect. A light coat of Mod Podge keeps glue neat and adds a bit of shine.
– Layer for depth. Overlap edges and mix textures to give the piece dimension.
Here is why it helps. You control the look. You recycle your own supplies. It’s easy to refresh when you want a new mood.
Next steps: choose a wall, pick a base, and start cutting.
@media(max-width:480px){
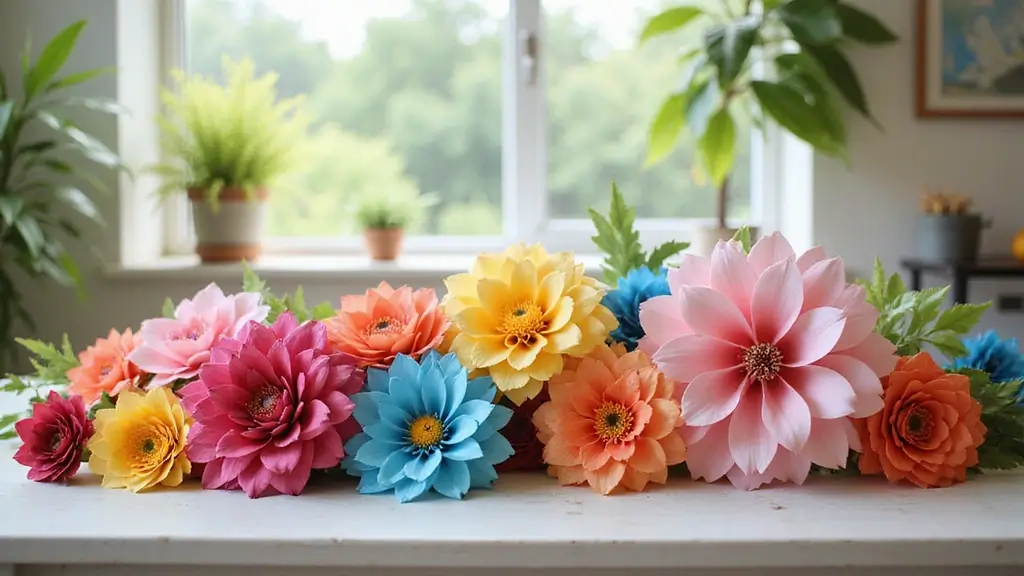
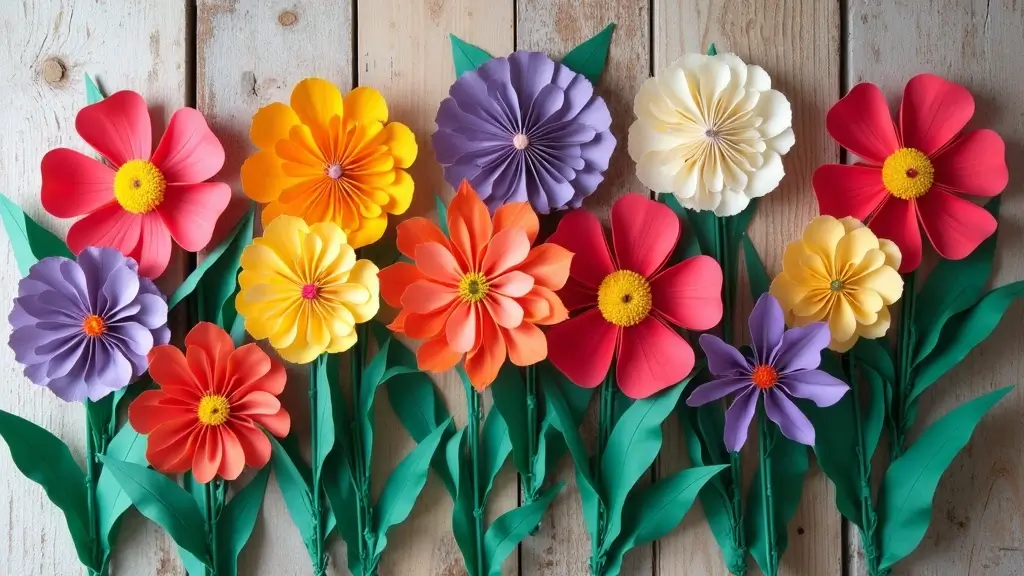
2. Recycled Paper Flowers
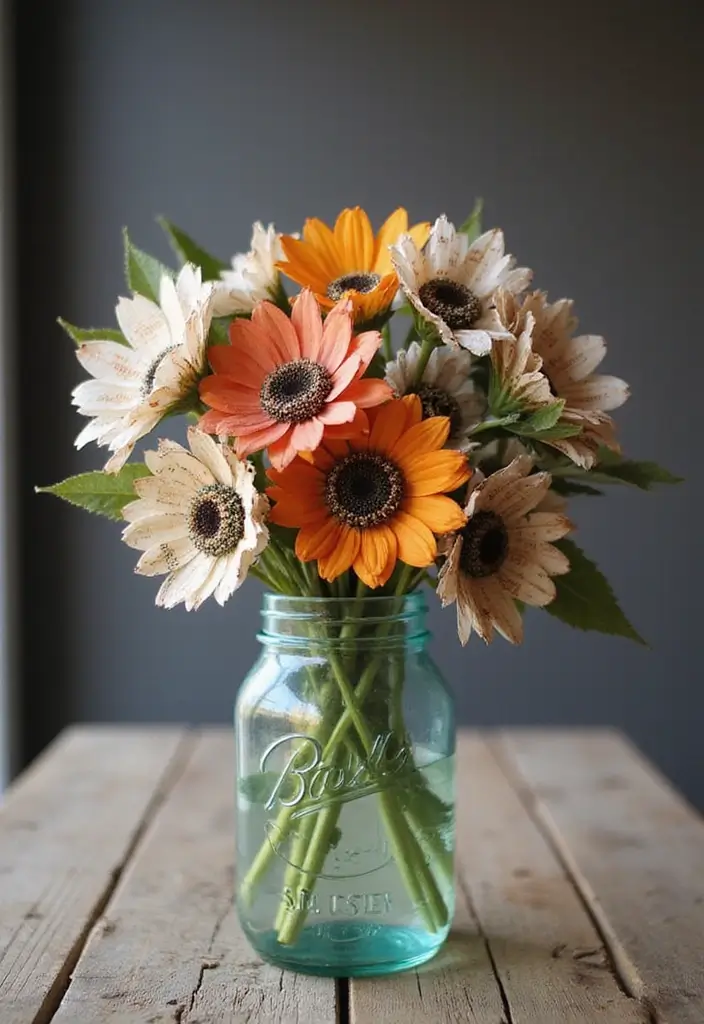
Recycled Paper Flowers
You want décor that is easy and green. These flowers come from newspaper and lift any room. They keep a natural look without wilting.
Here is a simple way to make them.
Here’s what you’ll need: old newspaper, scissors, craft glue, a thin wire or wooden stick for a stem, and twine for a rustic wrap.
– Cut petals. Clip newspaper into petal shapes. Mix colors by using different sections.
– Arrange petals. Layer them in a circle and press the center to form a bloom. Glue keeps them in place.
– Attach a stem. Thread a wire or stick through the base. Shape the wire for a natural bend.
– Finish the stem. Wrap the lower part with twine for a rustic feel.
– Display or gift. Put the flowers in a vase or wrap them as a handmade gift.
– Care note. They stay fresh looking as long as they stay dry and out of direct sun.
– Next steps. Try new color mixes or stack several blooms for a fuller look.
– Tip: A light spray of essential oils gives a gentle scent.
– Trick: Tint the paper before cutting with a bit of food coloring for brighter petals.
Enjoy the soft, homemade look.
@media(max-width:480px){
@media (max-width: 600px) {
.visual-quiz-iframe { min-height: 995px !important; height: 1100px !important; }
}
3. Upcycled Newspaper Baskets
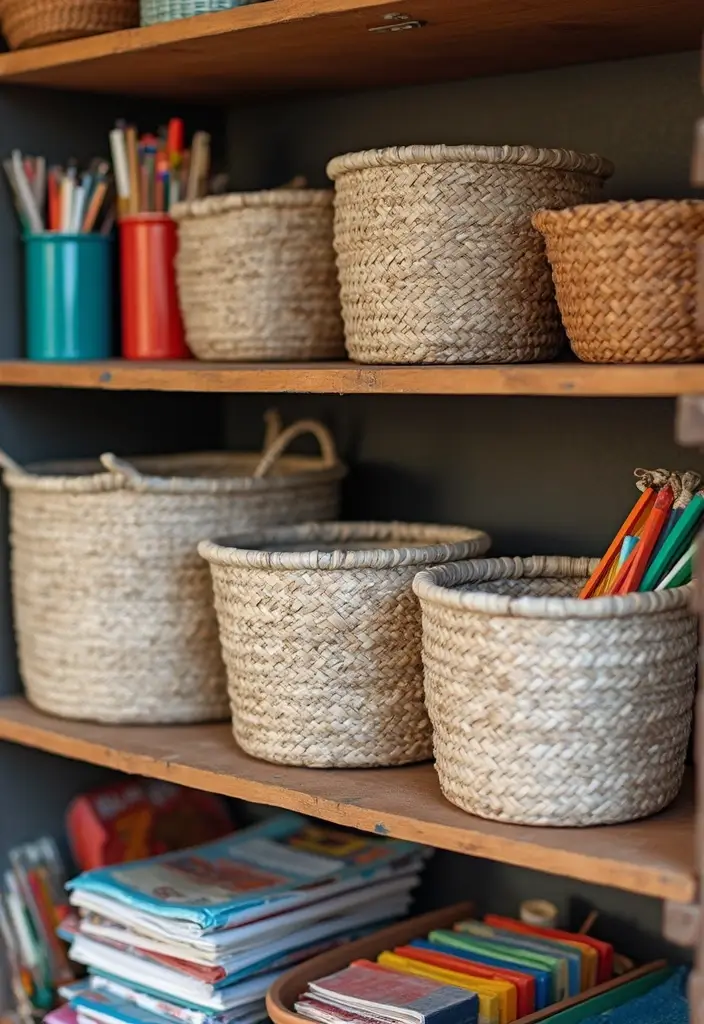
You want a practical, cheap way to turn old news into art. Upcycled newspaper baskets give you stylish storage and a decorative piece all in one. Here is how to do it.
What you need
– Old newspapers
– Craft glue or white glue
– Scissors and a small bowl for glue
– A ruler or pen for spots and lines
– Paint, stain, or clear varnish (optional)
– A weight or cloth to press shapes flat while drying
Step by step
1) Roll strips of newspaper tightly. The tighter the roll, the stronger the basket.
2) Shape a circular bottom by wiring or gluing a few rolls into a tight ring. Add more rolls around it to grow the wall.
3) Build the sides by layering rolls in alternating direction. Glue each layer in place. Keep the wall even and straight.
4) Let it dry completely. Then paint or seal for a finished look.
Tips and ideas
– Mix colored pages with black-and-white for a lively pattern.
– Make baskets in different sizes to form a nested set. They stack neatly when empty.
– Lightly weigh the finished basket as it dries to keep the sides from warping.
Next steps: use your basket for magazines, craft supplies, or small blankets. Wipe with a damp cloth to clean. Don’t soak it; water can weaken the glue.
@media(max-width:480px){
Recommended Products

Deli Wax Paper - Professional quality, grease-resistant, food safe deli papers are ideal plastic basket liners; They stay strong when wet and keep condiments and grease from leaking through

Archival Protection for Folded Newspapers: This newspaper topload holder is made from rigid, acid-free PVC to protect folded newspapers from bending, and handling damage. Safe material contains no plasticizers or stearates for long-term preservation.
4. Newspaper Gift Wrap
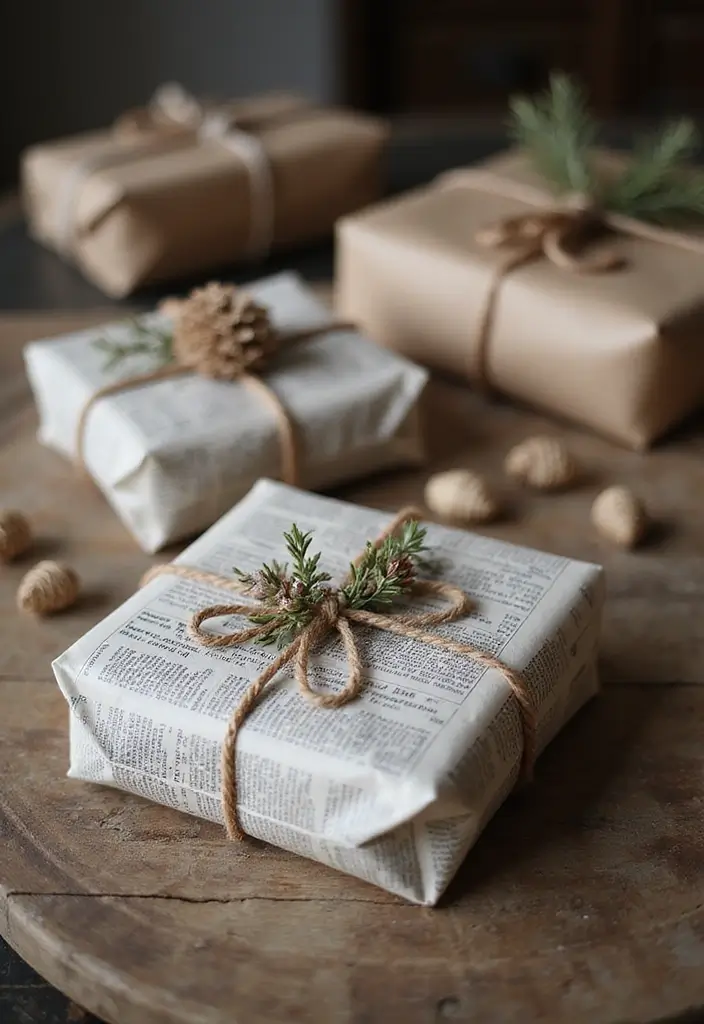
You want gift wrap that doesn’t waste money or space. Newspaper gift wrap can do that and still look special. It turns simple paper into a story you tell with every gift. Here is why it works: it uses recycled paper, it has unique patterns, and you add your personal touch.
Let’s break it down.
– Choose the right pages. Pick clean sections with bold images or big headlines. Skip anything with personal details. If you want color, use glossy magazine pages as accents.
– Wrap the gift. Lay the gift on the paper, fold like usual, and tape. The print becomes part of the design.
– Add natural touches. Tie with twine or a thin ribbon. Add a dried flower, a sprig of pine, or a cinnamon stick for aroma.
– Personalize with art. Doodle a note, draw a tiny doodle, or stamp a simple image. Plant-based ink works best on newsprint.
– Finish with a tag. Make a small kraft paper tag to label who it’s for.
– Tips: doodles or stamps add charm. Use colorful magazine pieces to brighten the look.
Next steps: try different newspaper mixes and keep it simple. Your gift wraps waste less and feels thoughtful.
@media(max-width:480px){
5. Newspaper Beads
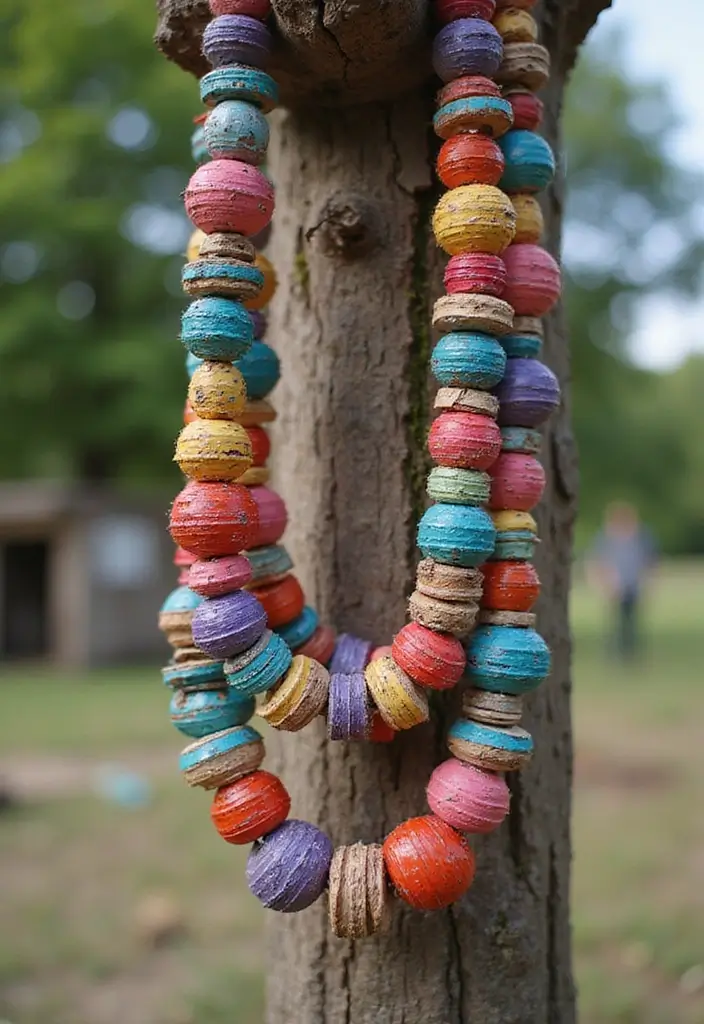
You want a fast, satisfying craft that uses old paper. Newspaper beads fit that need. They make bright jewelry, colorful decor, and playful gifts. Here is a simple way to turn scrap ads and headlines into something you can wear or display.
Steps to make newspaper beads
– Step 1: Cut newspaper into small triangles, keeping edges neat.
– Step 2: Roll each triangle tightly around a thin stick or skewer to form a tight bead.
– Step 3: Seal the roll with a coat of mod podge to lock the shape.
– Step 4: Let dry, then decorate with markers for extra color.
– Step 5: Slide beads off and thread them into necklaces, bracelets, or garlands.
Tip: Use thinner paper for lighter beads.
These beads wear well for casual days.
Here is why this works: glue and paper harden as they dry, giving you sturdy beads you can wear.
Next steps: mix in larger and smaller beads to create contrast.
Tips
– Vary bead sizes for a lively pattern.
– Mix in wooden or clay beads for contrast.
What you can do with them: wear a simple strand for casual days, or add a few beads to gifts for a personal touch. They also make cheerful home accents when strung into a garland.
Store leftover beads in a jar so you can grab them anytime.
Recommended Products


30 COLORFUL SLIMES: 30 colorful crystal slime in this kit, you can make your own slime. It’s also the most slime in slime kit on Amazon. Eco-friendly material, Washable, Easy clean-up and Safe. WARNING: Do not eat this slime and recommend for ages 6 and up.
6. Newspaper Coasters
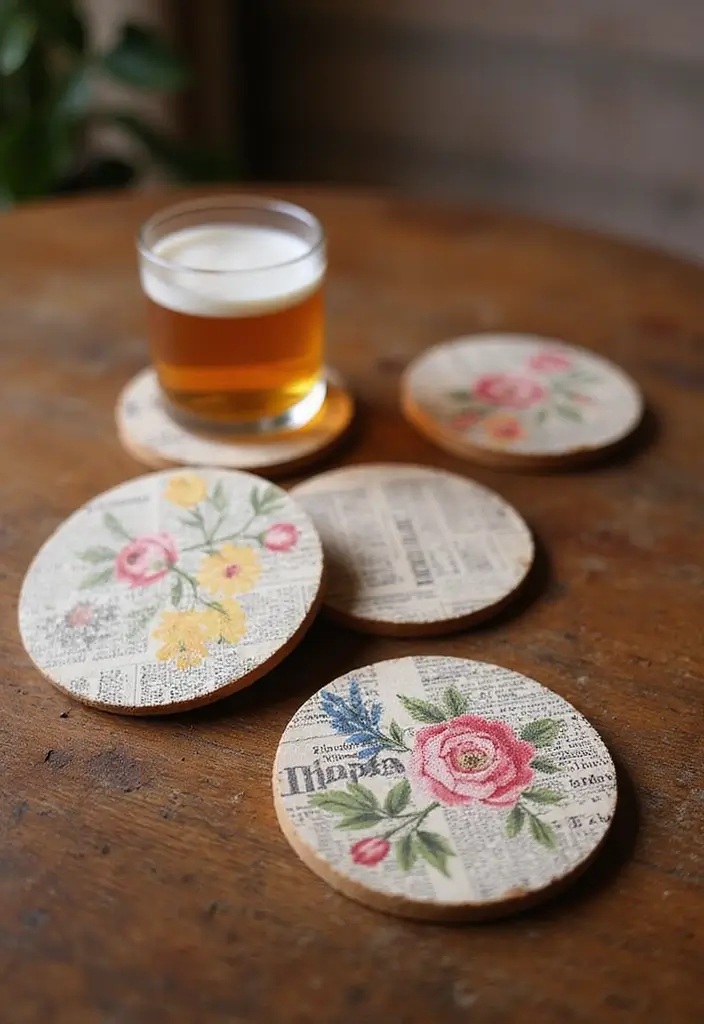
You want a simple, eco friendly way to protect tables. These coasters fit the need and add a quirky touch.
Here is why they work: they recycle old paper, cut waste, and stay sturdy when you seal them right.
Next, make them in steps you can follow tonight.
– Step 1: Cut your newspaper into shapes you like. Choose squares, circles, or ovals.
– Step 2: Glue several sheets together. Use 4 to 6 layers for a solid base. Press flat and let dry.
– Step 3: Seal for water resistance. Apply a clear waterproof spray or a thin coat of varnish. Test on scrap first, then coat evenly. Let dry completely.
– Step 4: Add a protective bottom. Glue a small felt pad or cork disc to the underside.
– Step 5: Personalize. Show off bold headlines, color blocks, or borders. Use different shapes in one set for variety.
– Step 6: Care tips. Wipe with a damp cloth. Do not soak.
– Tip: Use a cutting mat for clean edges and exact shapes.
– Trick: Mix sizes for a lively coaster collection.
Here is a quick bonus: the set stores flat and stacks neatly. You can swap colors or shapes to match the room.
@media(max-width:480px){
7. DIY Newspaper Wall Clock
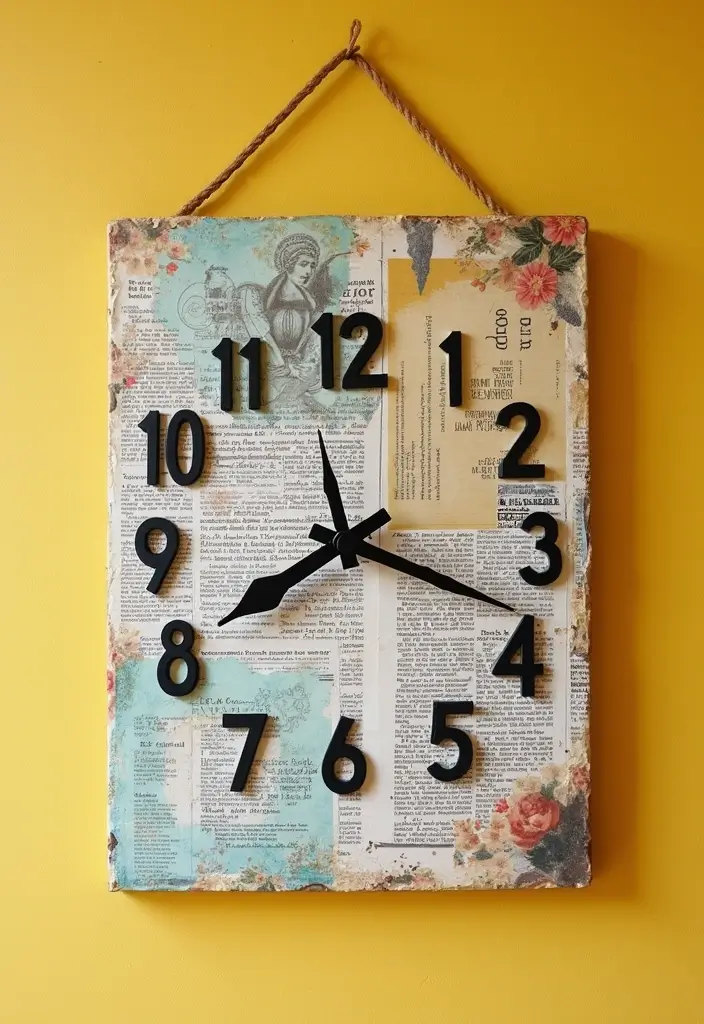
Bring some charm to your home with a DIY newspaper wall clock! This functional art piece combines practicality with creativity.
Start by choosing a sturdy base for your clock, such as a wooden circle, and then cover it with newspaper. You can decoupage different sections for a vibrant look. Add clock hands and a mechanism to keep time while brightening your wall.
Customize it further by incorporating numbers made from cut-out articles or images that inspire you. This isn’t just a timepiece—it’s a conversation starter!
– Tip: Use a non-toxic sealant for a finished, durable surface.
– Insight: Consider adding photos or drawings underneath the clock face for a personal touch that reflects your style.
8. Newspaper Photo Frames

Are you looking for a cheap way to show off memories with a personal touch? Newspaper photo frames are the answer. They mix old paper with new memories to create something warm and unique. Here is why they work: they’re easy, quick, and make your photos the star.
What you need
– Newspapers in a mix of black and white and color
– A sturdy backing piece (cardboard or thin wood)
– White craft glue or a glue stick
– Scissors or a craft knife
– Paint, ink, or a brush for edge touches
– Optional embellishments like buttons or dried flowers
How to make it
– Start with a photo size in mind. Cut a window from the backing so the photo fits snugly.
– Tear or cut strips from newspaper. These strips will become the frame layers.
– Glue a first layer around the window. Place strips side by side or overlap them for texture.
– Add 2–4 more layers. Let glue dry between each layer.
– Trim any rough edges. You should see a clean edge around the photo window.
– Paint or stain the outer edge if you want a finished look.
– Attach the frame to the backing and add your photo. Add a hanger or stand if you plan to display it.
Tips and ideas
– Tip: Use a mix of black-and-white and color pages for a dynamic look.
– Creative insight: A small set of framed memories grouped on a wall looks like a tiny gallery.
Practical uses
– Create a family memory wall with several sizes.
– Give handmade frames as thoughtful gifts to friends and loved ones.
Next steps
– Try different frame thicknesses for variety.
– Experiment with natural edges or paint to match your room.
9. Newspaper Table Runner
Want a table runner that turns old newspaper into charm? A newspaper table runner can bring a warm, eco-friendly touch to your meals. It’s easy to make and fits any table size. You control the color, style, and trim. Best of all, you reuse paper you already have at home. Here is how to do it, step by step.
– Materials – Gather newspaper strips, white glue, a brush, scissors, and a ruler.
– Style – Decide on a flat glued look or a woven texture for more depth.
– Assembly – For a flat runner, glue strips end to end into a long, continuous strip.
– Finish – Paint or stain the surface if you want color, then add lace or fabric trim for flair.
– Size – Measure your table and trim the piece to fit snugly.
– Care – Keep the runner away from water and heat to avoid warping.
– Tips – Use a mix of articles and ads to create visual interest and a lively look.
– Pairs – Pair it with matching coasters for a complete eco-friendly dining set.
Next steps: place your finished runner on the table, wipe it gently as needed, and enjoy a unique, handmade centerpiece.
@media(max-width:480px){
10. Newspaper Magnets

You want a quick, fun project that reuses old newspaper. Newspaper magnets do the job. They’re cheap, playful, and perfect for the fridge.
What you’ll need:
– Newspaper scraps
– Thin cardboard or a cereal-box piece
– Small magnets
– Craft glue or white glue
– Scissors
– Optional: Mod Podge or a clear sealant
Here is how to make them:
– Cut out simple shapes or little figures from newspaper.
– Glue the cutouts onto the cardboard for a sturdy base.
– Trim the edges so you have clean, neat magnets.
– Glue a magnet to the back and let it dry completely.
– If you want a longer life, brush on a coat of Mod Podge and let it dry.
Next steps:
– Try a themed set for seasons or holidays. You could have animals, stars, or letters to spell names.
– Add a personal touch by snapping in small photos or memories into the design.
– Display a color family set so they look like a tiny gallery on your fridge.
Tips and cautions:
– Use a strong, even layer of glue so shapes don’t peel.
– For heavier notes, consider larger magnets or a double magnet setup.
– Keep a few extra shapes on hand for quick gifts or party favors.
With these simple steps, you get unique fridge magnets that recycle newspaper into art you can touch every day.
@media(max-width:480px){
11. Newspaper Jewelry Box
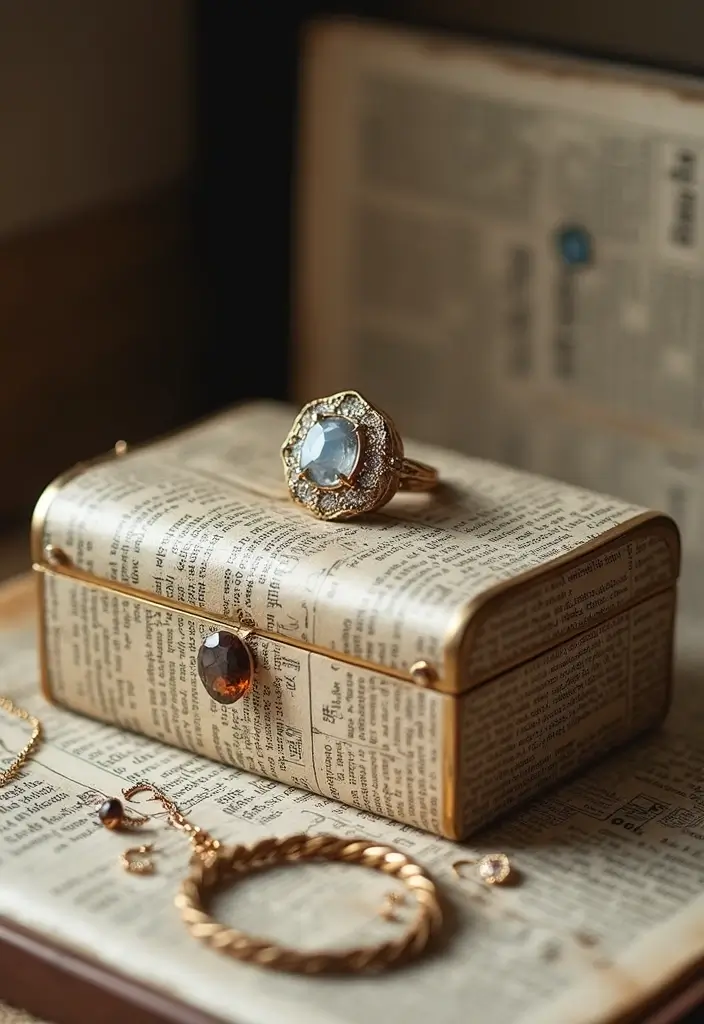
If you want a stylish place to tuck rings, earrings, and small keepsakes, try a newspaper jewelry box. It blends form and function without wasting paper from your recycling bin. You get a unique box that looks good on a dresser and feels good to use.
What you need
– Newspaper strips, or sheets torn into long, even pieces
– White glue or PVA glue
– A small box or sturdy cardboard for a frame
– Scissors and a ruler
– Light paint or varnish for a polished look
– Soft fabric or felt for lining
– Optional: buttons, fabric scraps, colored paper for decoration
How to make it
1) Start by rolling newspaper strips into tight tubes. These become the walls of your box.
2) Glue the tubes along the base frame to form the sides. Build up to the desired height.
3) Seal the outside with more paper strips and glue so the surface is smooth.
4) Paint or clear coat the exterior. A couple of thin coats work best.
5) Line the interior with soft fabric. Cut it to fit and glue it in place.
6) Personalize with small details like buttons, scraps of fabric, or a colorful newspaper pattern.
Tips and variations
– Use different color newsprint to create a striped or patchwork look.
– Add a tiny latch or a ribbon handle for a cute finishing touch.
– Make a set in several sizes to hold different items.
Next steps
– Try a satin ribbon inside for a luxe touch.
– Gift it to a friend who loves handmade, recycled gifts.
@media(max-width:480px){
Recommended Products

Abundant Quantity: ample supply for your needs; The package includes a generous quantity of 100 jewelry gift boxes; Whether you are a jewelry retailer or someone who loves collecting jewelry, these Valentine's Day jewelry boxes will meet your diverse needs; Furthermore, the abundance of jewelry cardboard boxes allows you to share them with your friends and family, making it a delightful gift for your loved ones

Jewelry Storage: Wooden jewelry box includes a mirror inside the lid and removable compartments for organizing rings, earrings, bracelets, and keepsakes.

100% Brand new, made by top quality cardboard paper. 25 boxes per order. Variety of sizes you can choose. Classic Kraft Paper in Matte Brown.
12. Newspaper Pillows
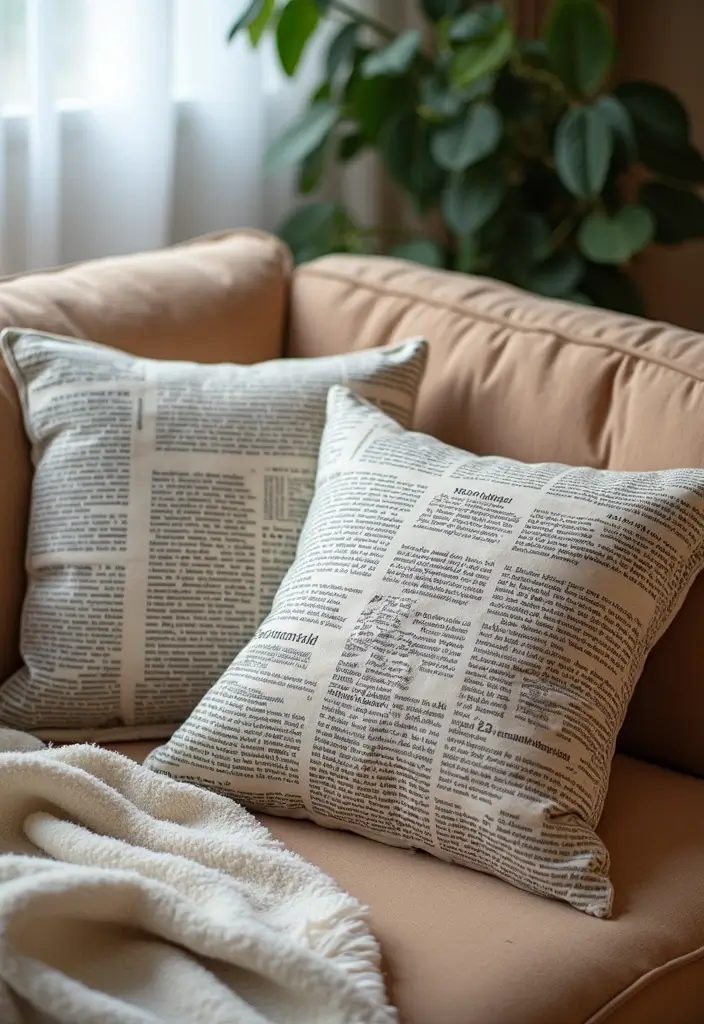
Looking for a comfy, eco‑friendly way to dress up a room? Try newspaper pillows. They feel soft, add a quirky vibe, and use paper you already have. Here is a simple, practical way to make them.
Here is why this works. Paper can be turned into a sturdy, fabric‑like sheet when you glue layers together. Sew small pieces or a whole panel, stuff it, and you have a unique cushion that’s easy to tweak.
What you’ll need
– Old newspapers
– White glue or liquid starch
– Water
– Scissors
– Needle and strong thread or a sewing machine
– Stuffing such as foam, batting, or old pillow scraps
– Optional: fabric paint or stencils
– Optional: clear spray sealant
Steps
1) Make a paper fabric. Mix glue with a little water to a runny paste. Dip newspaper strips and press them onto a flat surface. Layer until you have a thick panel. Let it dry completely.
2) Cut your pillow shape. Take the dry sheet and outline a rectangle or square. Cut it out with clean edges.
3) Sew the pillow. Place two panels together with the wrong sides facing. Stitch around the edges, leaving a small opening.
4) Fill the pillow. Slip in stuffing through the gap. Add enough to feel soft but not poofy.
5) Close and finish. Sew the opening shut. Press the pillow flat and check for loose spots.
Decorating and care
Paint simple designs with fabric paint or use stencils for a personal touch. Let the colors dry before use. For easy cleaning, add a removable fabric cover over the paper pillow and machine wash it when needed. If you prefer a tougher look, seal the surface with a light clear spray to resist moisture.
Tips
– Mix different newspaper patterns for an eclectic look.
– Consider a removable cover for easy cleaning and quick changes.
– Use a light sealant to help the pillow last longer without making it stiff.
13. Newspaper Candle Holders

Here is why you should try them. They use recycled paper and bring warm light to a room. You can keep them simple or paint them for a pop of color.
Materials you need:
– clean newspaper strips
– glue or craft glue
– thin paint and a brush
– sealant spray (optional)
– glass or metal inner containers
First, roll slim strips of newspaper into tight tubes. Glue as you go so each tube holds its shape. Bundle several tubes and press them together to form a cylinder. Let it dry completely. Leave the surface natural or add color with basic paint. A thin seal keeps the color from rubbing off.
Safety note: place a glass or metal container inside each holder to hold the candle. This protects the paper from heat and catches wax drips. If you prefer less risk, use an LED candle. Choose a container with a tight fit so the candle stays centered.
Where to use them: a cozy dinner table, a shelf, or an entryway vignette. Create a small set of different heights for an eye-catching centerpiece. Vary the colors for extra charm.
Tips: scented candles add a gentle aroma. For a personal touch, switch two colors on alternating tubes.
Next steps: gather supplies, roll and glue, dry overnight, and then place your inner containers. Enjoy the soft glow and the recycled look.
@media(max-width:480px){
14. Newspaper Plant Pots

If you want a cheap, eco friendly way to start plants, try newspaper plant pots. They use recycled newsprint and break down in soil. No plastic, less waste. They work well for herbs or small plants.
Materials
– Newspaper sheets
– A small mold (cup or can)
– Non toxic glue or tape
– Scissors
– Optional: paint or twine
Steps
1) Wrap a sheet around the mold. Overlap slightly and press to seal.
2) Remove the mold. The tube stays round.
3) Poke 3–4 holes in the bottom for drainage.
4) Fill with potting soil. Plant seeds or a small seedling.
5) Let the pot dry, then plant it in the ground or in a bigger pot.
Why this works
– Biodegradable. The pot rots and feeds the soil.
– Simple and cheap. No extra pots to store.
– Good for small plants: herbs, lettuce, tiny flowers, succulents.
Care tips
– Water lightly. Do not flood the soil.
– If roots fill the pot, transplant with the pot into a bigger bed.
Decoration ideas
– Paint the outside or wrap with twine for a rustic look.
Tips
– Mix colors from different newsprint sections.
– Let pots dry completely before planting to keep their shape.
@media(max-width:480px){
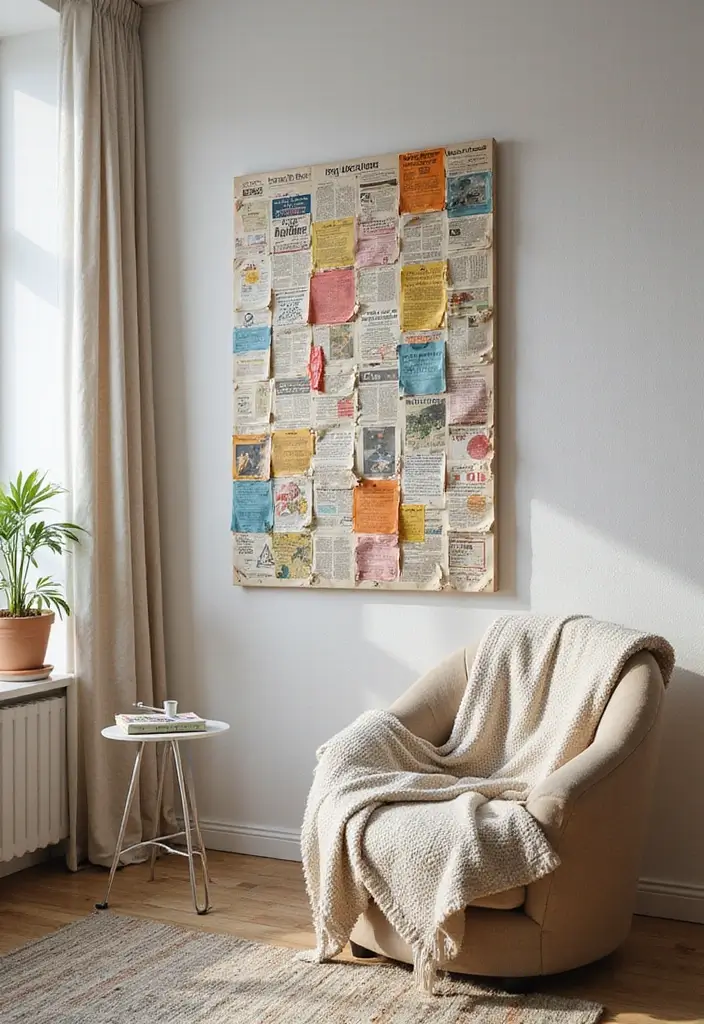
15. Newspaper Collage Art

If you want a quick, satisfying art project that uses old news, newspaper collage is for you. It turns scraps into color and story. You can finish in one afternoon. Here is how to start.
What you need
– Newspapers from different sections such as comics, sports, and headlines
– A sturdy base like poster board or a small canvas
– Scissors and glue or a matte medium
– Optional extras: paint, markers, fabric scraps, washi tape
Steps
1) Choose a mood or theme for your collage. You will pick pieces to fit it.
2) Tear or cut pieces into shapes that feel right. Edges can be neat or rough.
3) Start with a background. Place large shapes first to set the scene.
4) Layer pieces to add depth. Add text blocks, images, and color step by step.
5) Glue pieces one by one. Press firmly and smooth to avoid bubbles.
6) Add texture. Try a thicker glue for raised layers or a light spray for a soft hold.
7) Finish your piece. Frame it for a clean look or leave rough edges for a raw vibe.
Tips
– Use different adhesives to create varied textures on the surface.
– Mix in fabric scraps, paint, or tape to widen the look.
– Try tearing some edges for a natural feel and pair with clean-cut lines for balance.
Let the piece dry fully before framing or hanging.
@media(max-width:480px){
16. Newspaper Dream Catchers

Looking for a simple, affordable decor project that uses old paper? Newspaper dream catchers turn plain newsprint into art you can hang. They add soft lines and a light feel to any room. It is easy for beginners and can be done in an afternoon. You can do this with kids or on your own.
Here is why this works. The web catches light and adds texture without a heavy look.
Materials
– newspaper strips
– a hoop or ring
– glue
– string or twine
– beads or feathers
– optional: a small clothespin to hold ends while you glue
If you want a sturdier frame, use a metal hoop.
Steps
1. Cut long strips from newspaper.
2. Weave the strips around the hoop to form a circle. Keep the weave loose at first.
3. Create a simple pattern or web as you go. Let the pattern breathe.
4. Add beads, feathers, or charms along the strands.
5. Tie a loop of string at the top to hang, and let the glue dry before you hang.
Decor ideas
– Paint strips for color before weaving.
– Use three sizes for a wall group.
– Hang near a sunny window to catch light and glow.
– Wrap a ribbon around the hoop for a finished look.
Next steps
Show your new art to a friend and plan where you want to place it for a calm, handmade touch.
@media(max-width:480px){
17. Newspaper Scrapbook
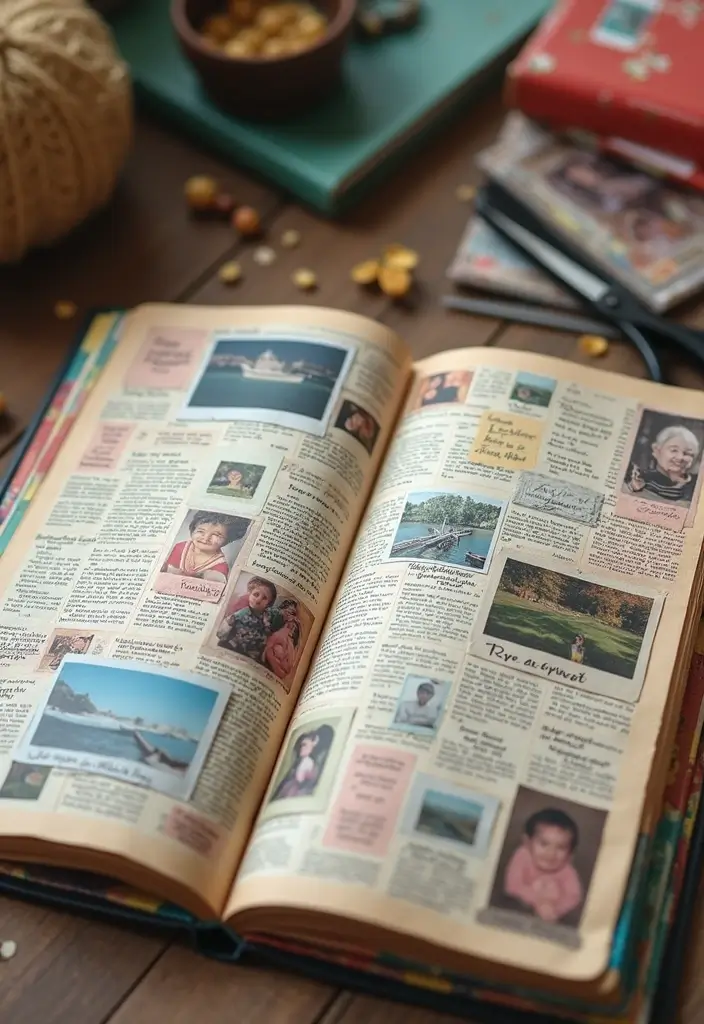
You want a memory book that is kind to the planet. A newspaper scrapbook lets you reuse old papers and keep your moments safe. This project pairs photos with clippings and stays simple. You can finish a page in a quiet afternoon. It feels calm to make and gentle on the Earth. It helps you slow down and reflect.
What you’ll need
– Old newspapers, a few photos, and colored paper backgrounds.
– Acid-free glue or photo-safe glue sticks.
– Scissors, a ruler, and a pencil.
– Fabric scraps for texture.
– An album page or plain backing board.
A little patience makes the pages look neat.
Steps to make
– Pick newspaper clippings that remind you of a memory.
– Place a photo next to the clippings on the page.
– Glue everything in place and let it dry flat.
– Trim edges neatly with a ruler.
– Add a short caption under the photo.
– Use colored backing to make the layout pop.
– Bind the pages in a simple album or folder.
– Let the page dry completely before turning the page.
Tips
– Try different background colors to keep pages lively.
– Keep captions short and clear.
Gift idea
– This makes a thoughtful, eco-friendly present for friends and family.
Next steps
– Gather memories and start your first page today.
– Share the pages with someone you love.
@media(max-width:480px){
18. Newspaper Wall Organizer

Here is why this DIY newspaper wall organizer helps you. It turns recycled paper into a practical storage piece you can hang on any wall. You get less clutter and a warm, handmade look. It scales from a tiny kitchen nook to a big office wall.
What you need
– Old newspapers
– Glue (craft glue or a glue gun)
– Scissors
– Ruler
– Thick cardboard or a wooden board as backing
– Paint, markers, or colored tape
– String or twine for hanging
How to make it
1) Roll newspaper into tubes about the width of your finger. Seal each tube with a dab of glue.
2) Glue tubes side by side to form small pockets. Build several rows on the backing to make a pocket grid.
3) Add color. Paint or draw on the pockets. Let it dry before you move on.
4) Mount the grid on the wall. Use nails or strong tape. If you want, thread a loop of twine at the top for extra easy hanging.
Ways to use it
– Store mail, coupons, or receipts in the pockets.
– Keep craft tools like scissors and glue close at hand.
– Place it in an entryway, kitchen, or home office for a handy display.
Tips
– Mix different newspaper patterns for a fun look.
– Try colored string to hang your organizer for a small pop of color.
Next steps: grab supplies and start small. This project is quick and friendly for beginners and can grow with your space.
19. Newspaper Picture Mats
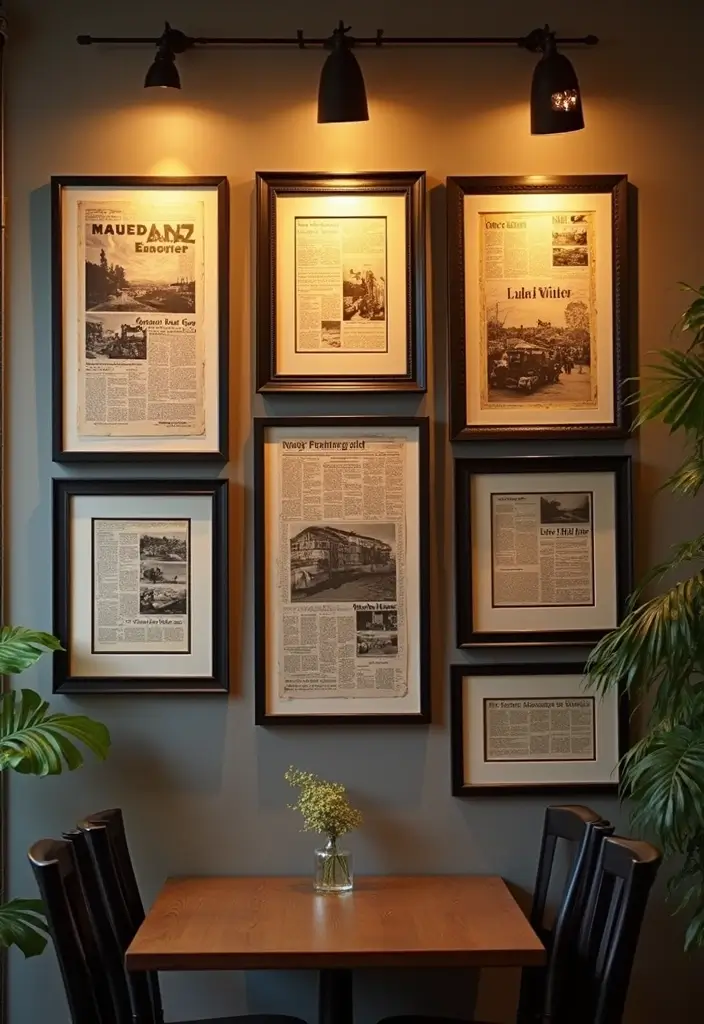
You want a quick, affordable way to dress up photos. A newspaper mat uses recycled paper and adds a personal touch.
What you’ll need
– Use newspaper sheets for the border.
– Use mat board or thick craft paper as the base.
– Keep scissors handy.
– Have a ruler for straight edges.
– Take tape, preferably double-sided.
– Have your photo ready.
Step-by-step
– Measure the photo and cut newspaper larger than the image window.
– Choose a layout. One clean border or overlapping strips both work.
– Place the photo on the base and wrap the newspaper border around it.
– Secure with tape and trim any excess for a neat edge.
– If you make several, trim mats to fit each frame size.
Tips
– Add a short quote or line from a memorable article related to the moment.
– Use different newspaper tones to create contrast.
Finish and display
– Slide the mat into the frame and hang or stand it on a shelf.
– The result feels warm and handmade, yet uses items you already have.
Here is why this works: it saves money, recycles paper, and makes your photos tell a story. What’s next: try a collage layout or mix in color for variety.
@media(max-width:480px){
20. Newspaper Ornaments

Newspaper Ornaments
You want a simple, green way to decorate. You get color, style, and less waste. These newspaper ornaments do it all.
What you need
– Newspaper sheets
– Scissors and glue
– String or ribbon for hanging
– Stuffing like cotton scraps or fabric bits
– Paint, glitter, or colored markers for decoration
– Optional scent: small fabric pieces with a pleasant smell
How to make them
– Cut out shapes such as stars, hearts, or seasonal icons from newspaper. Keep some extra pieces for variety.
– Glue two shapes together, leaving a small pocket for stuffing.
– Tuck a light bit of stuffing inside. Seal the opening with glue.
– Decorate the front and back. Paint, add glitter, or draw details.
– Attach a loop of string at the top. Let the glue dry completely.
– Hang on a tree, a garland, or around a doorway.
Tips and ideas
– Use glitter or bright paint to add sparkle. It catches the light and looks festive.
– For a fresh scent, pop in a small scented fabric piece before sealing.
– Mix shapes and sizes for a quirky display.
Why this works
Here is why this works. You recycle paper and create unique decor at low cost. It’s easy, quick, and kid friendly. The result is eco-friendly and charming, not frilly or fussy.
@media(max-width:480px){
21. Newspaper Storage Boxes

You want storage that is affordable, neat, and easy to make. Your space might feel cluttered. Newspaper storage boxes offer a simple fix. They use recycled paper and fit on any shelf. Stack them to create a tidy, practical organizer. It is an eco friendly DIY newspaper craft.
Materials
– Newspaper sheets (a bundle works best)
– White glue or craft glue
– Scissors and a ruler
– Paint, fabric, or markers for decorating
– A brush or sponge for smooth coatings
Note that newspaper is cheap, light, and easy to recycle when you are finished.
Steps
1. Layer several sheets of newspaper to add thickness.
2. Fold them into flat panels.
3. Glue the edges to form a hollow box. Make a base and four walls.
4. Press firmly and let the glue dry completely.
5. Trim rough edges and decorate the outside as you like.
Decoration and labeling
Paint a solid color or wrap with fabric for a polished look. Cut small labels from newspaper strips and glue them on to mark what each box holds.
Why this works
These boxes are light, flexible, and cheap. They handle toys, office supplies, or craft bits. They’re easy to move, and you can make a whole set in different sizes. They work best for light items. Keep a small stash of boxes for quick organizing.
Next steps
Try a three-pack on a shelf for instant order.
@media(max-width:480px){
Recommended Products

【Premium Pine Wood Build for Library Book Box】 This Library Book Box is handcrafted from high-quality pine wood, ensuring durability and resistance to outdoor wear. Its transparent door design lets you quickly spot your next read, while the sturdy build provides a reliable storage solution for book lovers—perfect for keeping shared literature safe in yards or communities.

Safely store newspapers containing important family and historical information before they start to deteriorate
Built to Beat the Weather – Outdoor Library Book Box Stays Dry This little free library kit comes with a waterproof iron roof and water‑resistant solid wood panels. Paint your design on the surface, then add an extra coat of sealant – your little library box outdoor will last for years.
22. Newspaper Wall Hanging

Want a wall piece that feels fresh and kind to the planet? A newspaper wall hanging fits. It uses scraps and adds texture to any room. You can finish it in a weekend afternoon and tailor it to your style.
What you need
– Newspaper strips cut from recycled pages
– A wooden dowel or a sturdy driftwood rod
– Twine or thick thread
– Scissors and a ruler
– Beads or tassels for a little flair
– Glue or tape for quick fixes
Step by step
1) Cut strips about 1–2 cm wide and 25–30 cm long. This size is easy to work with.
2) Attach strips to the dowel. Tie each strip to the bar, leaving long ends to form a fringe.
3) Start weaving. Take a new strip and lay it across the vertical strips. Weave over one, under the next. Repeat left to right to build a simple pattern.
4) Finish the piece. Trim uneven edges for a neat shape. Add beads or tassels along the bottom edge if you like. Use a loop or extra string at the top to hang.
Tips and variations
– Vary strip widths for bold or delicate looks.
– Tint edges with a light tea bath for a warm, vintage feel.
– Try alternating over-under patterns to create different textures.
Hanging and care
– Hang on a sturdy hook or nail. Place away from high humidity.
– Gently dust with a soft brush. Store flat if you must put it away.
@media(max-width:480px){
23. Newspaper Notebooks

You want a simple, eco-friendly notebook you can make at home. This newspaper notebook does the job. It’s cheap, quick, and kind to the planet.
What you’ll do
Here is how to turn old newspaper into a writing pad.
– Gather 8 to 12 clean newspaper sheets. Keep the ink light on pages you plan to write.
– Fold the stack in half to make a spine. Crease firmly so the pages stay together.
– Make a cover. Use decorative paper, fabric, or a larger sheet of newsprint.
– Bind the book. Staple along the fold, stitch with a running stitch, or glue the spine. If you want a quick fix, clip with a bright rubber band.
– Add inner pages. For a greener touch, swap in recycled printer paper or blank newsprint.
– Finish with a personal touch. Tie a ribbon, add a label, or decorate the cover.
Why it helps you
You get a handy notebook for notes, sketches, or lists. It’s a small craft that saves paper and makes a personal gift.
Next steps
Try different sizes or colored covers. You’ll keep the project fresh and fun.
@media(max-width:480px){
24. Newspaper Sewing Projects
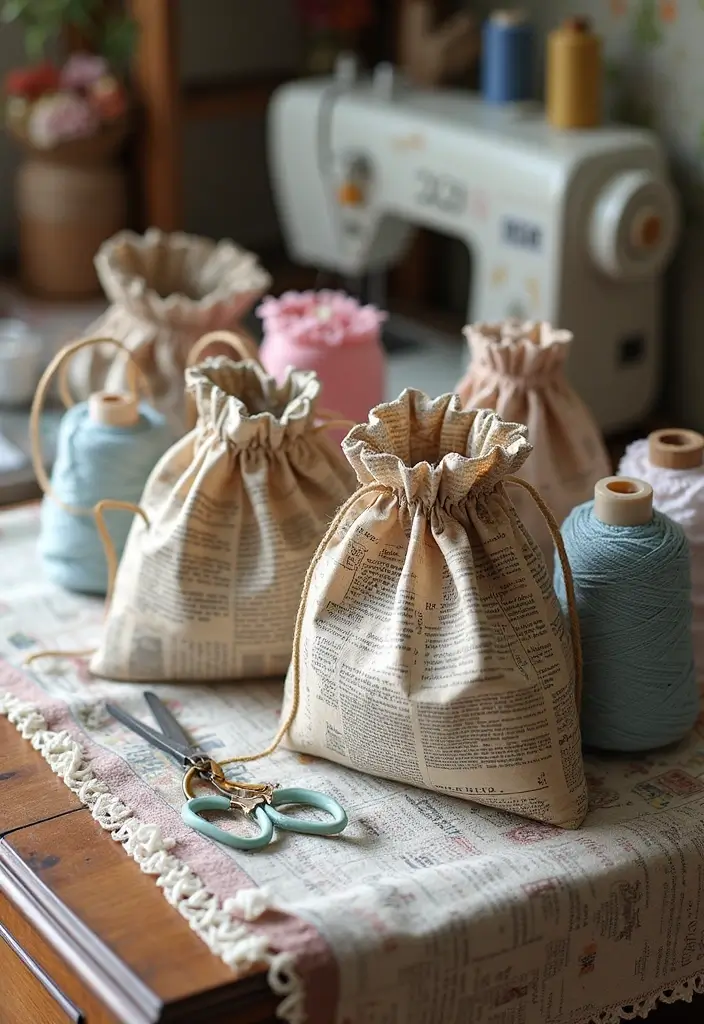
If you love sewing but want a new material, try newspaper. Old pages can become fabric you sew.
Here is how to make newspaper fabric. Stack four to six sheets and press with a warm iron until flat. A light starch spray helps hold the layers, but keep it light so the sheets don’t warp. When dry, cut your pieces like real fabric.
Now sew. Use a heavy needle and strong thread. Sew slowly and use a zigzag stitch so the edges bend a bit. Backstitch at the start and end of each seam for strength.
– Bags
– Aprons
– Decorative pillows
Add a lining for durability and comfort. Use a scrap of smooth fabric as the lining. Expect wrinkles and a rough feel from the paper. This works best in dry spaces and with light use. Do not soak in water; spot clean only.
Make it yours with art. Try stencils or fabric paint on the outside. You can also mix in fabric scraps as backing for more strength and a softer touch.
Next steps: This approach saves paper, teaches you a new skill, and expands what you can sew with. Gather pages, a sewing kit, and a small project to start.
@media(max-width:480px){
25. Newspaper Pet Bed

You want a comfy bed for your pet that uses recycled paper. A newspaper pet bed gives them a soft spot to rest and cuts waste at the same time. It is fast to make and cheap. Kids can join in.
Here is why this works.
Materials
– A sturdy base like a thick cardboard board or thin plywood for support.
– Rolled newspaper tubes or tightly folded sheets for the soft core.
– A warm fabric cover to wrap the core.
– Glue, tape, or staples to hold the fabric in place.
– A small blanket or old T-shirt for extra warmth.
– A name tag or patch for personalization.
Steps
1. Place the sturdy base on a clean surface.
2. Build the core by rolling paper into tubes and layering them to a comfy height.
3. Wrap the core with fabric and secure the edges with glue or staples.
4. Add the blanket and a favorite toy to boost coziness.
5. Personalize it by stitching or sticking a name patch on the cover.
Care and tips
– Use a removable cover so you can wash the bed easily.
– Keep the bed away from sharp edges and moisture.
Next steps: test it with your pet, adjust the height if needed, and enjoy a greener nap spot.
@media(max-width:480px){
@media (max-width: 600px) {
.normal-quiz-iframe { min-height: 570px !important; height: 570px !important; }
}
Conclusion: Embrace Your Creative Journey
Crafting with newspaper not only fosters creativity but also helps minimize our impact on the environment. Whether you’re making decor, functional items, or gifts, each project turns something ordinary into something extraordinary.
With these 25 DIY newspaper crafts, you’ve got plenty of options to explore, so why not grab those old newspapers and start crafting?
Every piece you make tells a story and showcases your unique style while contributing to a greener planet!
Note: We aim to provide accurate product links, but some may occasionally expire or become unavailable. If this happens, please search directly on Amazon for the product or a suitable alternative.
This post contains Amazon affiliate links, meaning I may earn a small commission if you purchase through my links, at no extra cost to you.
Related Topics
diy newspaper crafts
recycled paper art
eco-friendly crafts
upcycled newspaper ideas
creative paper crafts
beginner friendly
budget decor
sustainable projects
home organization
seasonal decor
quick crafts
fun family activities