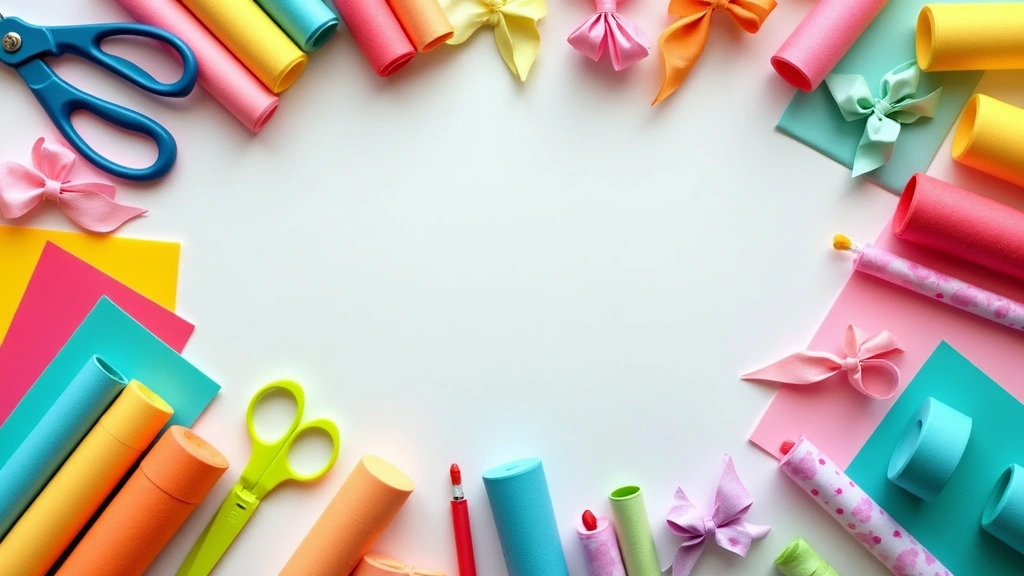
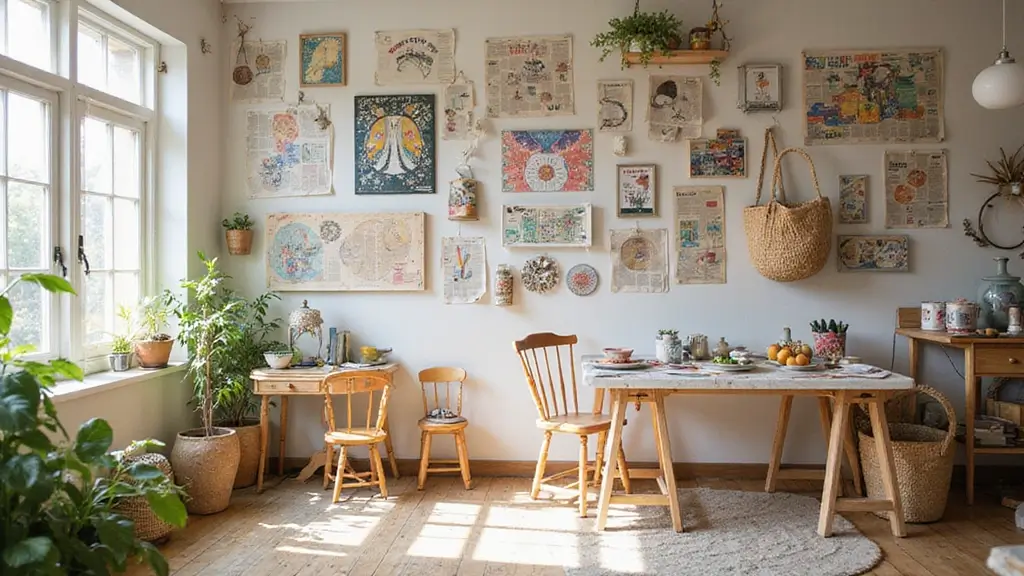
Spring has me craving color that lasts. I started this post because I want you to have bright decorations that stay put and don’t leak water. Paper flowers give you art that stays fresh, cleanup is a breeze, and they feel almost magical. In this post you’ll find 30 DIY Paper Flower Crafts that cover styles from soft rosettes to bold geometric petals.
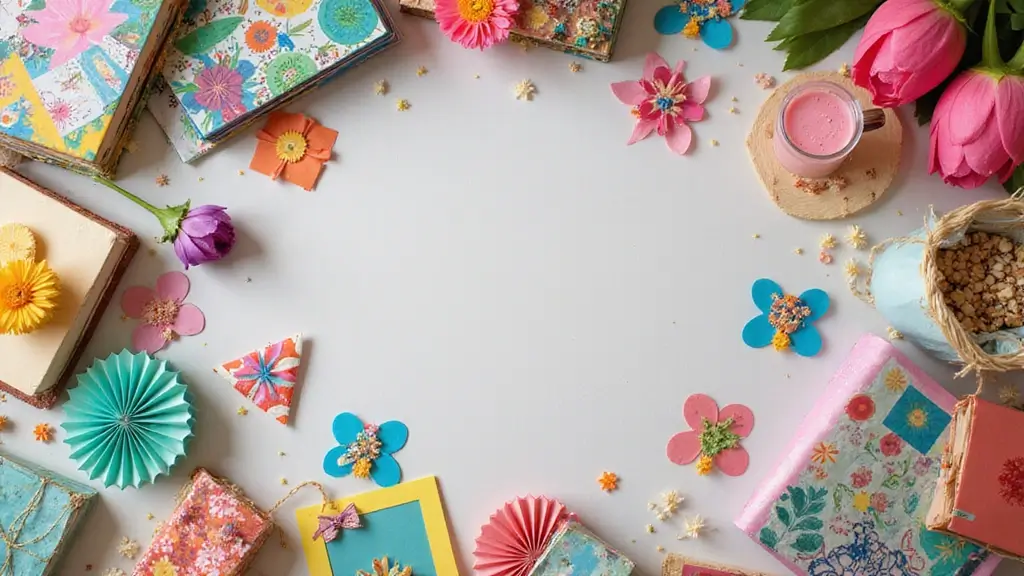
If you’re into home decor, party planning, or crafts you can do with kids, this one’s for you. You care about simple steps, affordable supplies, and results you can show off quickly. These ideas fit real life: quick to start, nice to finish, and easy to reuse for future events.
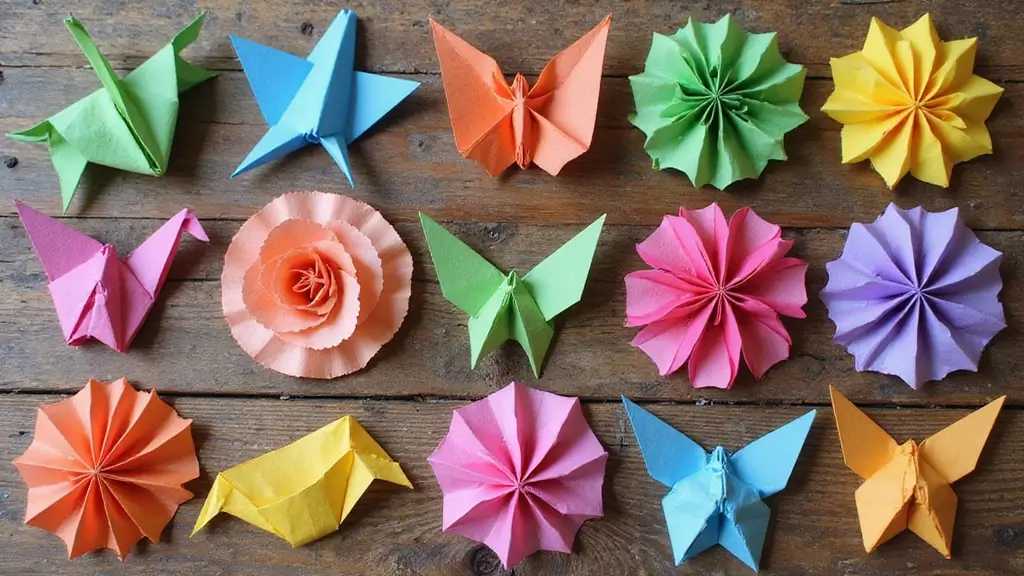
I pulled together 30 DIY Paper Flower Crafts that are easy to pick up and fun to finish. You’ll see projects for garlands, centerpieces, and cute little decorations. You’ll learn about papers you can use—from tissue to cardstock—and how to shape petals, curl edges, and layer colors for depth.
Here is why these ideas fit your life. You can scale from tiny petals for place cards to huge blooms for a wall display. You can make a weekend batch with friends or do this with kids after school. The steps are clear, and the tips help you avoid messy glue or torn petals.
Next steps are simple. Gather a few supplies: paper, scissors, glue, a pencil, and a small wire stem or pipe cleaner. Start with one easy project to get a feel for the technique, then move to a bigger piece if you want.
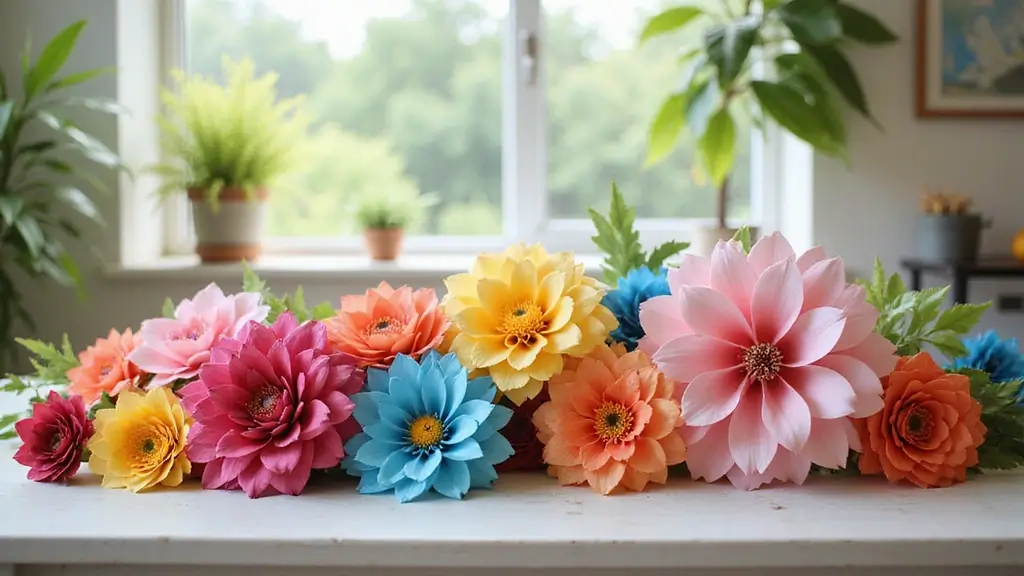
By the end you’ll have a pocket full of blooms you can arrange in a vase, hang as a garland, or use to brighten a party. This post is written for real people who want pretty decor without a big price tag or a big mess. So grab your colors and let’s bloom together.
1. Simple Crepe Paper Roses
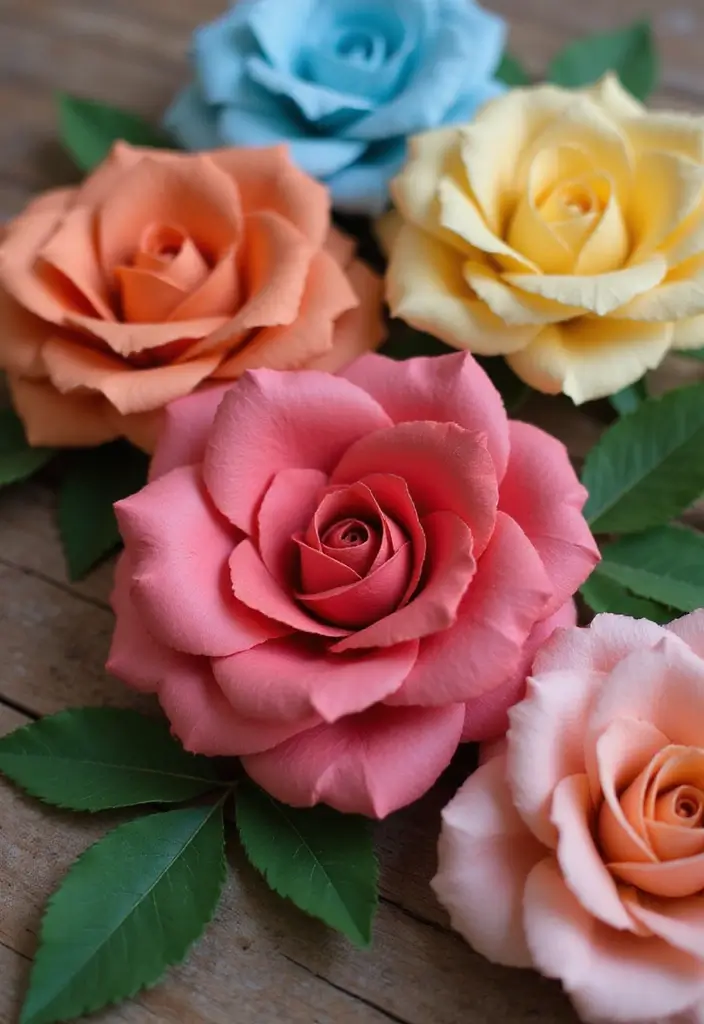
You want flowers that last and look real. Simple crepe paper roses can give you both. They’re easy to shape and cheap to make. With a few steps you can turn plain paper into a soft, lifelike bloom.
What you’ll need
– Crepe paper in colors you like
– Scissors and a hot glue gun
– Circular templates or a cup to cut petals
– Markers to shade edges
– Green crepe paper for leaves
Let’s make a rose
1) Cut petals from circles of different sizes. Mix small and large petals for a natural look.
2) Shape the petals by curling the edges with your fingers. A gentle twist adds life.
3) Make a tiny bud. Roll a short strip of paper and pin it tight.
4) Glue petals around the bud. Place the smallest first, then layer bigger ones. Give each petal a tiny twist so it sits a bit open.
5) Add leaves. Cut two leaf shapes from green paper and glue them near the stem.
Finish and care
– Color the petal edges with a marker for extra depth.
– If you want a stiffer stem, tuck a thin pipe cleaner or wire inside.
– Keep your bouquet dry and out of direct sun to prevent fading.
Tips for color and style
Try bold reds, soft pinks, or sunny yellows. A trio of roses makes a pretty mini bouquet.
@media(max-width:480px){
@media (max-width: 600px) {
.normal-quiz-iframe { min-height: 570px !important; height: 570px !important; }
}
Recommended Products

Value Package: you will receive 10 rolls of colorful Crepe paper in different colors, 28 paper flower templates in 4 different shapes and sizes, 100 green floral wire poles, 3 floral tape in different colors, and a pigment set, enough for you to DIY different paper flowers or share with others
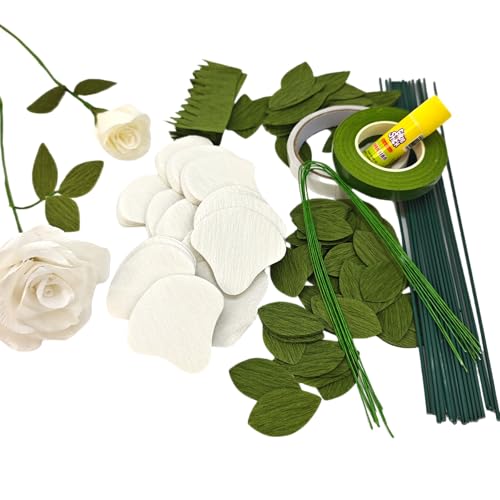
Materials included in this kit: Petals - 216 qty Leave: 28*56mm - 38 qty 23*42mm - 76 qty Sepal - 18 qty 14 inch paper wrapped floral stem wires - 9 qty Glue stick-1 qty 12 inch floral stem wire - 18 qty Floral Tape 30 yard- 1 qty Double sided tape - 1 qty

Abundant to Use and Share: you will receive 28 pieces of paper flower templates totally, including 24 pieces of petal templates in 4 shapes, 6 pieces each shape in 6 different sizes, 2 piece of bottom templates in round and hexagon shapes respectively, and 2 pieces of leaf templates in 2 sizes, enough for you to DIY different paper flowers or share with others
2. Giant Paper Flowers for Weddings

Giant paper flowers grab attention at weddings. They are bold and affordable. You can make them with simple materials and some patience. Here’s why they work: they create a wow moment and stay put through the night.
What you need
– Colored cardstock
– Scissors
– A circular template
– Hot glue
– A sturdy base like foam
– A thick dowel for a stem
– Optional: glitter or beads
How to build a tall bloom
1) Cut big petals using template. Aim for 6 to 8 per flower.
2) Curve the edges a little to add depth.
3) Layer petals from largest to smallest around a center circle. Glue as you go.
4) Attach the bloom to the stem and fix it to base so it stands tall.
Tips for impact
– Use two or three colors that fit your palette. A soft gradient looks nice.
– Add sparkle with glitter or beads, but keep it simple.
– Use the flowers as a backdrop, behind the ceremony, or as tall centerpieces.
Next steps
– Plan colors and sizes. Test one small bloom first.
– Transport carefully and secure the base. On arrival, fluff the petals and place it where guests will see it.
@media(max-width:480px){
Recommended Products

PAPER POM POMS DECORATIONS: Package includes: 6 pcs 10" white ,6 pcs 12" white paper pom-poms.

🌸TISSUE PAPER POM POMS FLOWERS Kit ! It’s all here! AMAZING VALUE ! A fun variety of dazzling hanging decorations

Package Includes: you will get 36 rose paper flowers, 20 small green leaves and 20 golden butterfly decorations, an ideal craft set for DIY greeting cards, scrapbooks, photo albums, memory books and other creative projects, especially for graduation cap diy for you special feeling
3. Elegant Paper Daisies
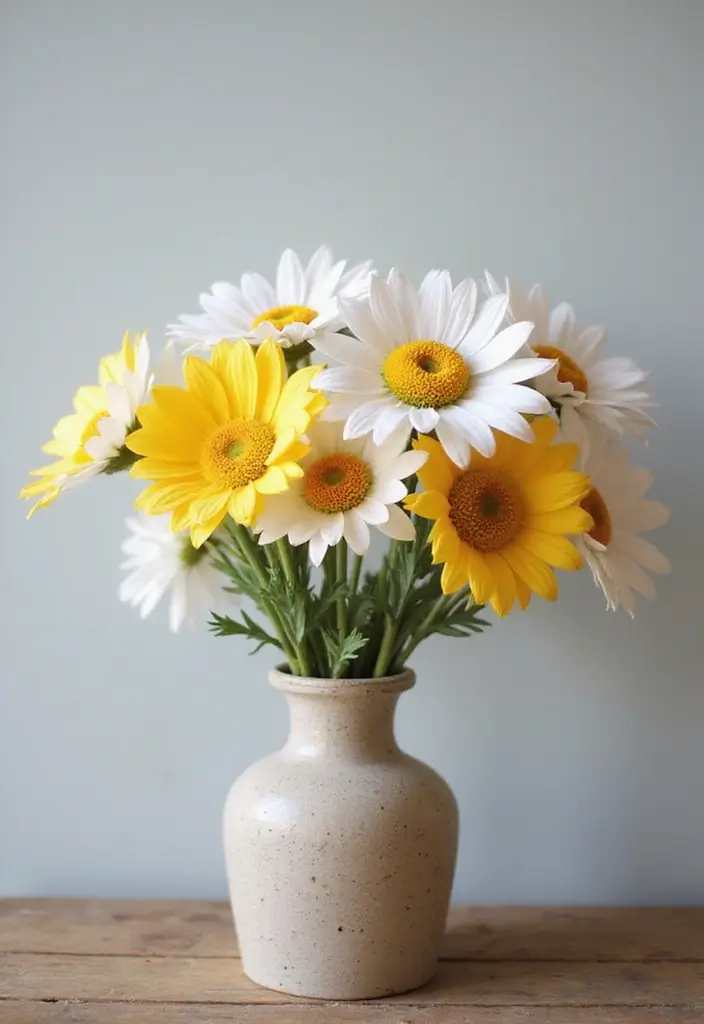
Elegant Paper Daisies
You want a simple, pretty flower that lasts. Daisies fit the goal. They feel clean and bright, and you can make them in minutes with common supplies.
Materials you need
– White cardstock for petals
– A bright yellow center piece
– Green paper for the stem
– Glue
– Optional fringe scissors for extra texture
Steps to assemble
Cut several teardrop petals. Stack them in layers to build fullness. Start with a small inner ring and add larger layers around it. Glue each layer firmly so the flower keeps its round shape. Create a yellow center by using a circle of paper or a crumpled disk, and place it in the middle. Attach the finished bloom to a green stem, bending it slightly for a natural look.
Tips to boost the look
– Use fringe scissors on the petal edges to add subtle texture.
– Layer different petal sizes for depth.
– Try color swaps, like pale pink petals with a yellow core, or all white petals with a pale center.
Ways to use
Set a small bouquet on a table, hang a garland along a wall, or add these daisies to gift wrap for a cute touch.
Next steps
Make a handful and arrange them in a vase or a jar. They’re affordable, charming, and easy to customize for parties or home decor.
@media(max-width:480px){
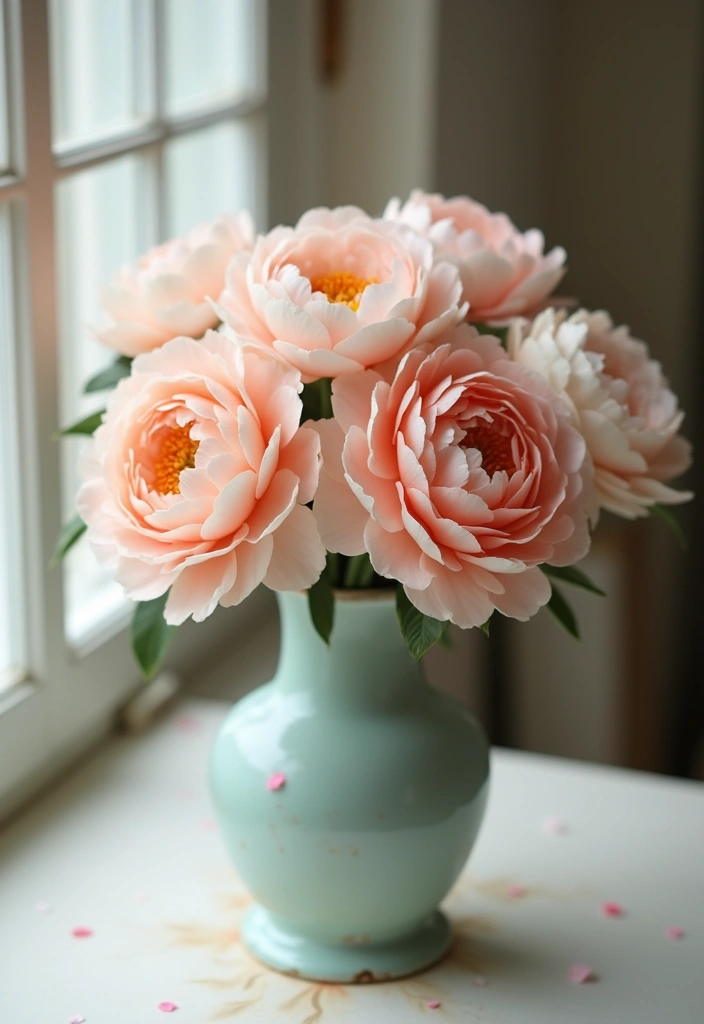
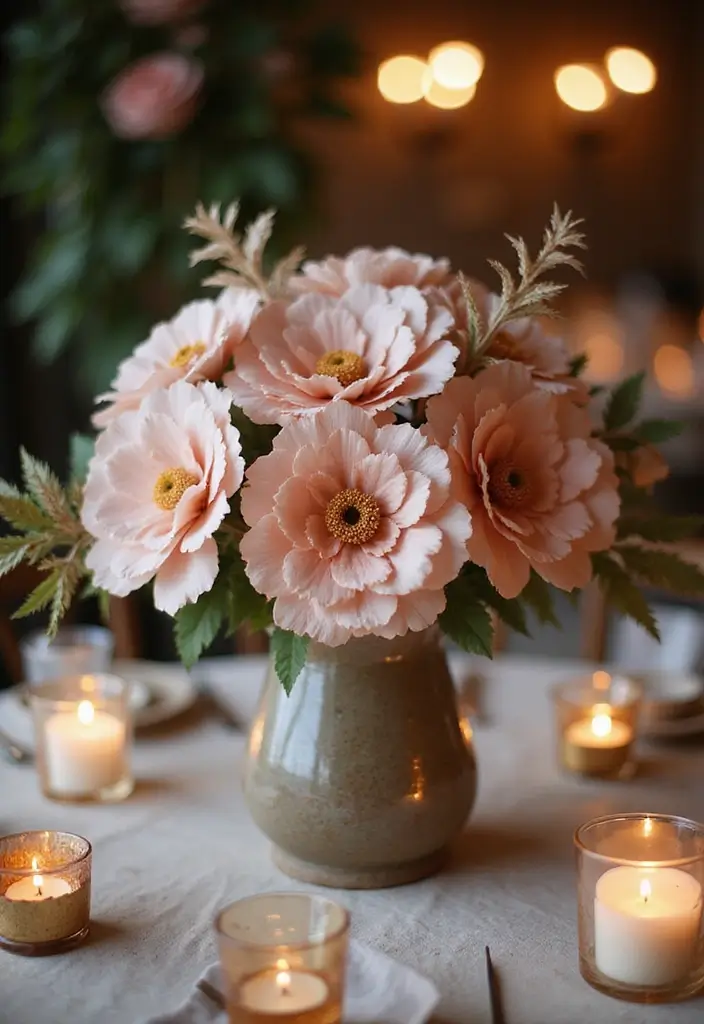
4. Vintage Paper Peonies
Materials
You want a soft vintage charm. Paper peonies give depth. Start with pastel papers for that aged look. Choose colors like pale pink, cream, or soft blue. You can start with one bloom.
Petal design
Cut petals in varied sizes and shapes, rounds and teardrops. Layer them from the center outward to build fullness. Mix sizes so the bloom has natural layers.
Stems and build
Use a thin wire for the stem and wrap it with green floral tape. This keeps the bloom steady in a vase. This makes the stem feel true.
Depth and finish
Curl the petal edges lightly with a pencil to create a natural bend. Paint the outer edge of some petals with a touch of a darker shade for depth. Practice on scraps first.
Assembly
Glue petals in place as you go. Build tight clusters near the center, then add layers outward until you reach your desired fullness.
Display ideas
Place in a tall, clear vase to show the stems. Try pale tones with a touch of greenery for contrast. Sometimes group a few stems for a fuller display.
Care tips
Dust gently and keep away from direct sun. If a petal tears, glue it back or replace that piece. A light spray of clear sealer helps them last.
5. Colorful Paper Sunflowers
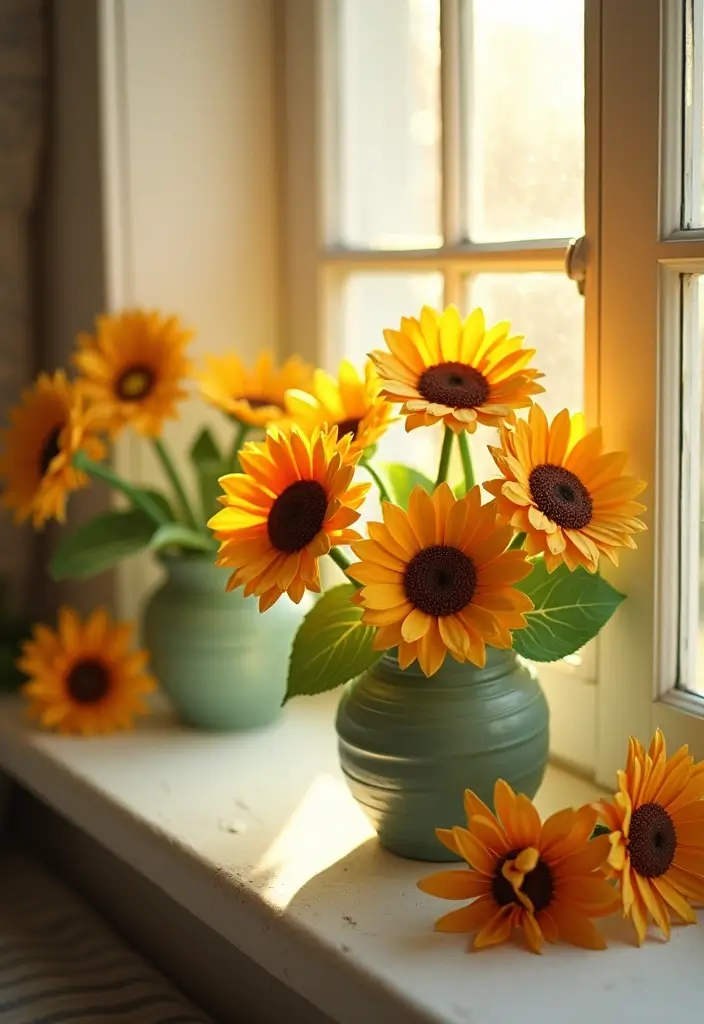
Want a sunny update for your space? Colorful paper sunflowers lift any room. They’re simple to make and look great with little effort.
Materials
– Yellow paper
– Brown paper
– Green straw or a wooden stick
– Scissors
– Glue
– Pom-pom or textured paper for the center
Steps
1) Cut about five to seven petals from the yellow paper. Keep them oval with pointed tips for a natural look.
2) Cut a circle from the brown paper for the flower’s center.
3) Add texture to the center with a pom-pom or a piece of textured brown paper.
4) Layer the petals around the center. Glue each petal in place one by one.
5) Attach the stem to the back using a dab of glue. Let it dry before you move it.
Ways to customize
– Mix shades of yellow to give depth to the petals.
– Curl the petal edges a bit for a lifelike touch.
– Use different petal sizes to create a field of sunflowers.
– Add green leaves cut from extra paper for fullness.
– Make several sunflowers at once to form a small bouquet.
Display ideas
– Put them in a mason jar or tall vase on a dining table.
– Use as a cheerful gift topper or as a table centerpiece.
– Create a mini bunch and arrange it as wall decor or a festive garland.
Next steps: gather your colors, cut the shapes, and bring a bright touch to your home. These sunflowers are friendly to beginners and quick to finish, yet they look delightful in any season.
6. Whimsical Paper Tulips
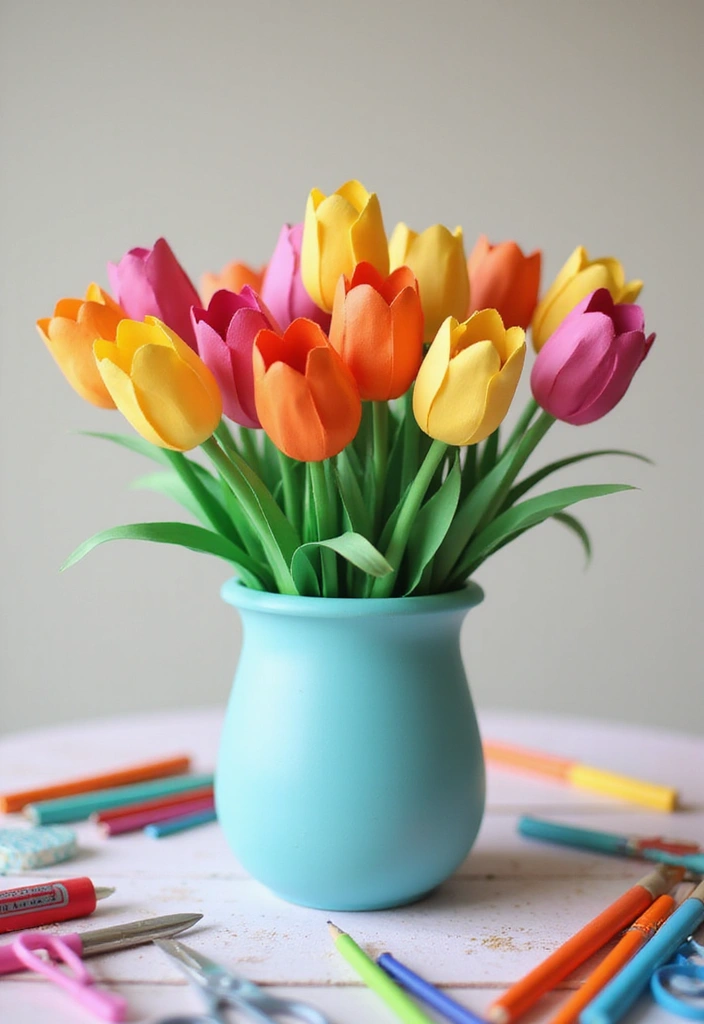
Want a playful splash of color in your home? Whimsical paper tulips are a quick, satisfying craft. They’re easy to make and fit every season. Bright hues shine in spring; softer tones work for autumn. Patterned paper can give each tulip a fresh twist.
What you’ll need
– colored paper (heavy enough to hold shape)
– scissors
– glue
– a green stem option (floral wire, a pipe cleaner, or a green straw)
– green tape to wrap the stem
– a small vase or a cardboard ring for a wreath
How to form each tulip
– Cut 6 to 8 petal shapes per bloom. Round edges for a natural look.
– Curl the petals slightly. A light roll with a pencil adds life.
– Attach petals to the top of the stem one by one, layering from smallest in the center to larger on the outside.
– Press the bottom of the bloom to secure and give a gentle pinch to create a soft cup.
Mix and match
– Create a mini bouquet by grouping 4 to 8 flowers in a vase.
– Combine colors and shapes for a lively arrangement.
– Try a single color per stem for a clean look, or go bold with a rainbow mix.
Wreath or display ideas
– Glue several tulips to a cardboard ring to form a bright spring wreath.
– Hang the wreath where it catches light to highlight the paper shine.
These tulips stay fresh-looking forever and brighten any room.
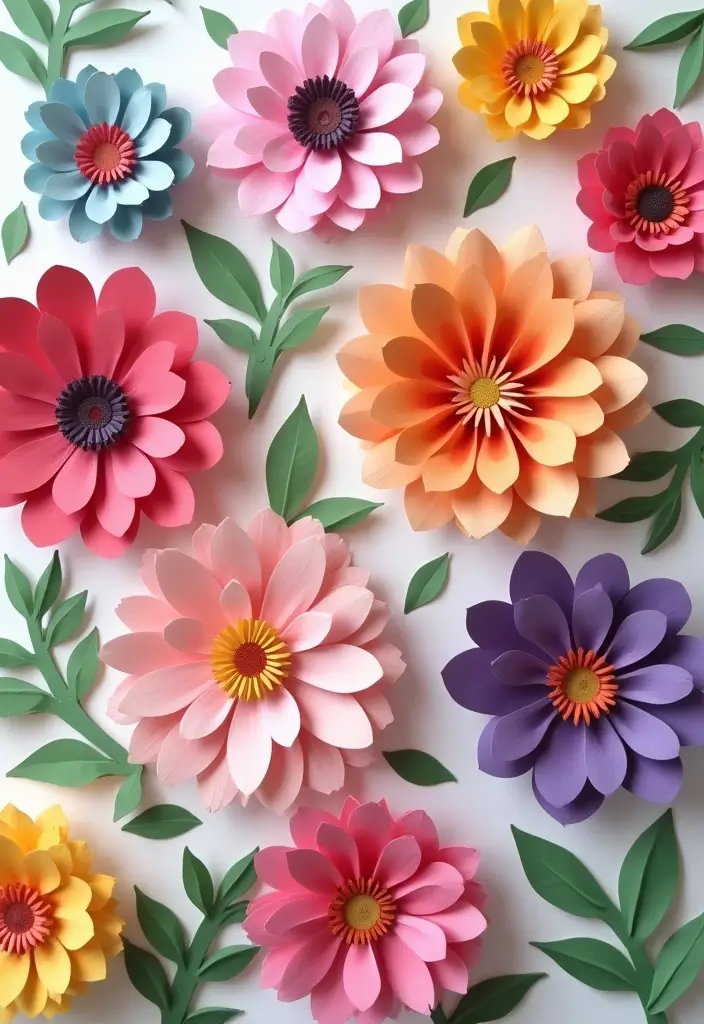
7. Layered Paper Hydrangeas
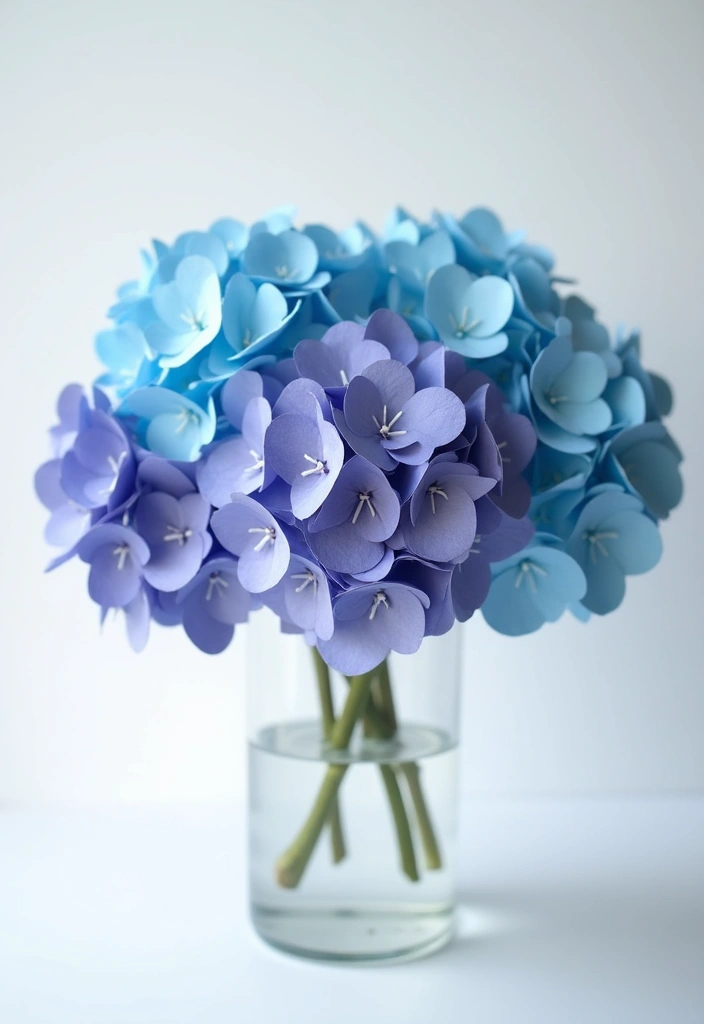
You want a soft, full hydrangea look made from paper. Layered paper hydrangeas give that effect with simple steps you can do at home. Use several shades to get the multi-toned look that hydrangeas are known for.
What you need
– Colored paper in 3–4 shades for depth
– A hydrangea petal template and scissors
– Glue gun or strong craft glue
– A foam ball, floral wire, or a sturdy stem base
– Green floral tape for stems (optional)
– A pencil or shaping tool for curling petals
Steps you can follow
1) Plan your colors. Pick a light center color and two darker edges for an ombre feel.
2) Cut petals from your template. Aim for 4–6 petals per shade to start.
3) Shape the petals. Lightly curl the edges with a pencil to add life.
4) Create the inner core. Glue a small cluster of petals into a tight ball.
5) Layer outward. Add more petals around the core in gentle, overlapping rounds.
6) Make several clusters. Each bloom needs multiple tiny groups to look full.
7) Attach to the base. Glue clusters onto the foam ball or along a stem in a round pattern.
8) Finish and place. Set the bloom on a table or group several blooms for a grand centerpiece.
Tips for a realistic look
– Try an ombre technique to deepen color toward the edges.
– Hold each layer a moment as glue dries for a neat finish.
– Lightly tweak petals for natural, uneven edges.
– Let the glue fully cure before moving the bloom.
Arrange a few of these layered paper hydrangeas together to make a striking centerpiece or a bright wall display.
@media(max-width:480px){
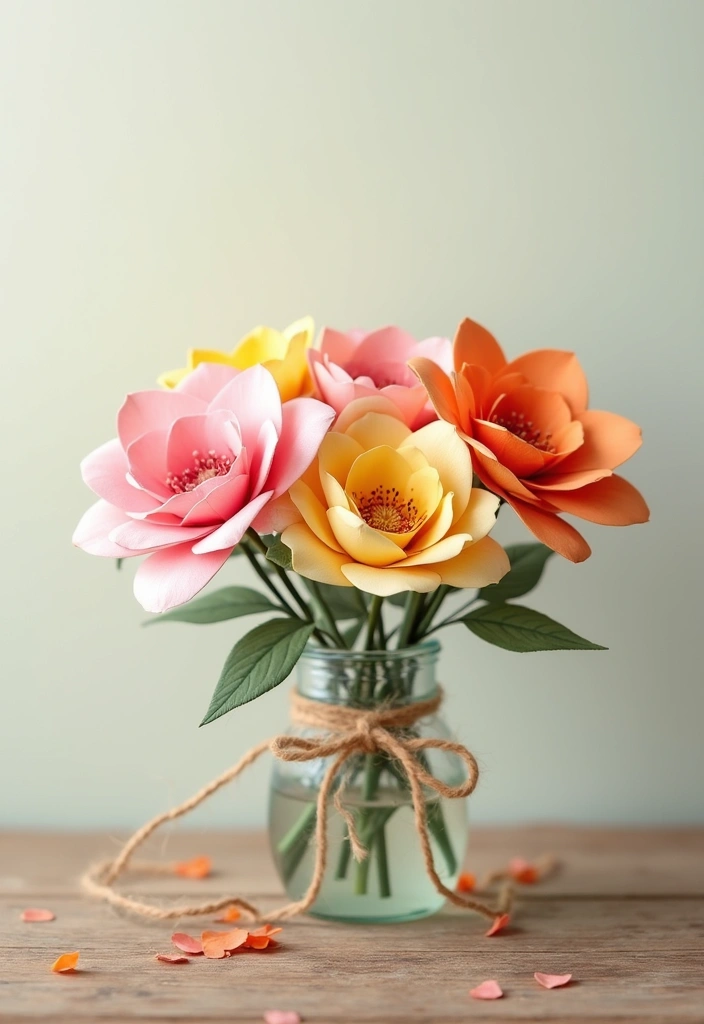
8. Paper Flower Bouquets

You want a bouquet that lasts. A paper flower bouquet fits. It stays bright, sits on your shelf, and never needs water. You can pick colors that match your room or the person you’re gifting.
Here is why this works: it gives you a personal touch and a keepsake you can enjoy for years.
What you need
– colored paper in different shades
– scissors and glue
– floral wire and tape
– a thin wooden dowel for stems
– ribbon or twine
– optional leaves, feathers, or tiny beads
How to make it
– Create a mix of flower shapes. Try roses, daisies, and open blooms. Use different petal cuts to add variety.
– Build the stems. Tape wires together for a sturdy base. Add a wooden dowel for extra length.
– Assemble the bouquet. Vary the heights. Place taller blooms in the center and shorter ones around the edge.
– Finish with a wrap. Tie the stems with ribbon. Leave room to fluff the bouquet.
Extra flair
– Add small leaves, feathers, or tiny jewel beads. A little shine makes it feel real.
– Put the bouquet in a vase or wrap it in paper for gifting.
Tips
– Store out of direct sunlight to keep colors bright.
– Use simple glue sticks for quick fixes.
Next steps: choose a color theme, then swap shapes to fit your taste.
Recommended Products

Complete Commemorative Craft Set: Celebrate Mother's Day and the graduate with our all-in-one DIY floral kit. Includes 28 premium flower cards, 28 kraft papers, 112 structural supports, 130 adhesive dots, and a 75.5ft gold ribbon. Perfect for creating professional-looking, personalized bouquets that capture lasting memories.

Thoughtful Mothers Day Handmade Gift Create a sweet and meaningful bouquet with this Mothers Day flower bouquet craft kit, perfect as a thank you gift for mom, grandma, wife, teacher, or someone special who loves handmade floral gifts.

9. Festive Paper Flower Garland
Want a festive boost for a party or home? A paper flower garland adds color and charm for little cost. You can tailor it for birthdays, weddings, or everyday décor. Start by making a few flowers, then string them on twine for a bright banner.
Materials
– Use colored paper in many colors.
– Cut sturdy cardstock for larger blooms.
– Gather scissors for clean cuts.
– Have glue or glue dots to hold petals.
– Keep twine or ribbon for the string.
– A hole punch or a thin needle makes threading easy.
– Add leaves or small accents if you like.
Steps
1. Cut flowers in two or three sizes. Use circles or petal cuts.
2. Layer petals to form blossoms and glue the center.
3. Add a leaf behind each flower for a natural touch.
4. Punch two holes near the center or poke a small slit to thread the string.
5. Thread flowers on twine, space evenly, and adjust as you go.
6. Hang across a wall, above a table, or by a doorway.
Tips
– Mix colors and sizes for a lively look.
– Let glue dry before you hang the garland.
– For a quick version, skip leaves and just string circles.
Display ideas
Place the garland above a mantel for a warm touch. Drape it along a staircase to guide the eye.
@media(max-width:480px){
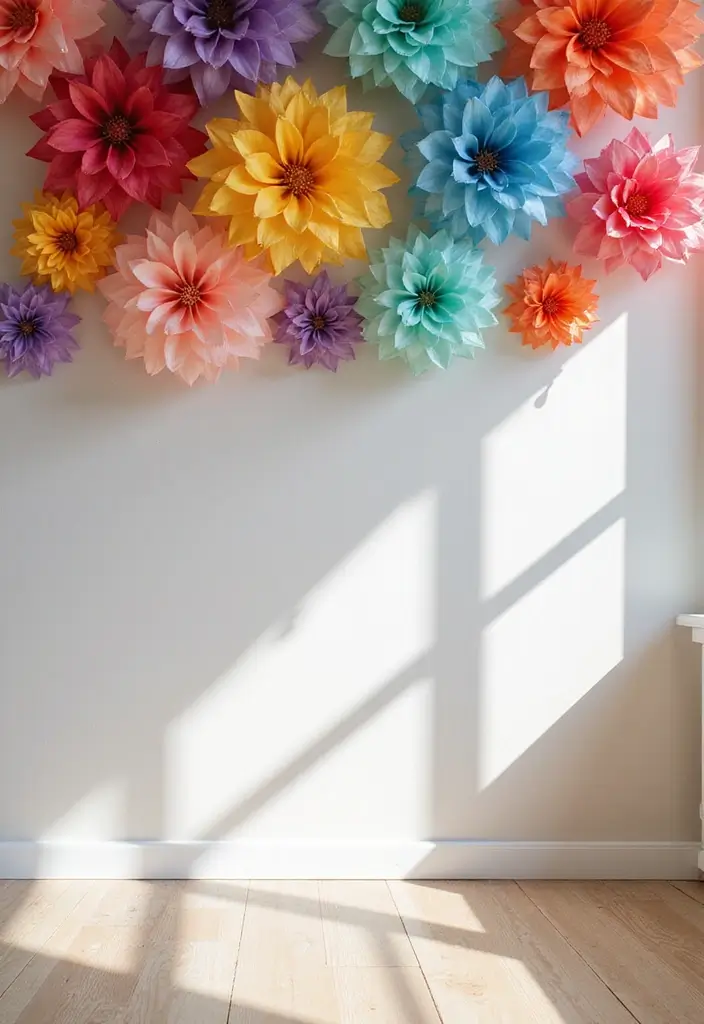
10. Paper Flower Wall Art

Looking for wall decor that shows your hands-on skill without taking forever? Paper flower wall art fits. You build a lively cluster of blooms on a canvas and hang it where everyone sees it.
Here is why it works: paper is light and easy to shape.
What you’ll need
– colored craft paper or cardstock
– scissors and a shaping tool (a blunt pencil works)
– hot glue or craft glue
– a canvas
– string for hanging
– foam sheets for 3D depth
– a pattern for layout
Next steps
– Make several flowers in different sizes. Cut petals with rounded edges.
– Curl the petal edges with a gentle pinch to add life.
– Glue petals in layers to form full blossoms.
– Lay out the flowers on the board first. This lets you refine the layout before you glue.
Here is how to elevate the piece
– Add 3D depth by lifting some flowers with tiny dots of glue or foam under the heads.
– Use a pattern like a loose spiral or a bouquet.
– Mix textures. Try glossy paper with matte, or add fabric petals for a soft touch.
This wall art can spark chats. It grows with your skill, and you can update it later.
@media(max-width:480px){
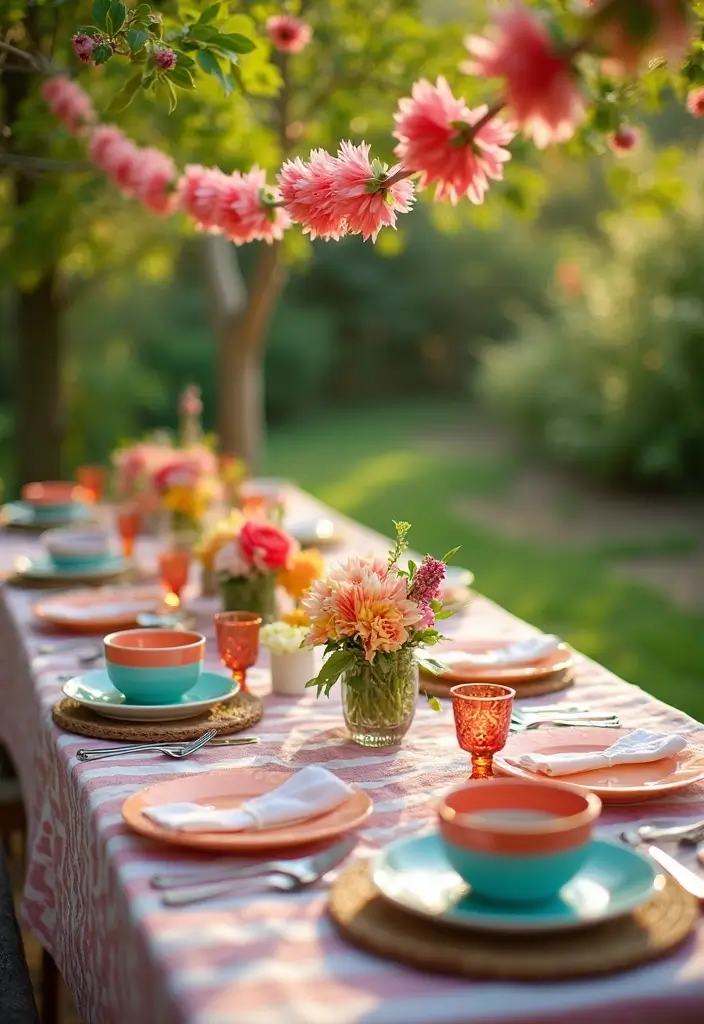
11. Paper Flower Centerpieces
Need a centerpiece that fits any table. A paper flower centerpiece does the job with a few simple steps.
Here is why this works: it uses easy shapes, lasts all night, and lets you switch colors quickly.
– What you’ll need
Colored craft paper or cardstock
Floral foam, a small vase or mason jar
Glue and scissors
Thin floral wire (optional)
Burlap, lace, or ribbon for the base
A few seasonal touches, like pinecones or fruit slices
– Build a few blooms
Cut petals in a few sizes. Layer them with a dab of glue to form cups. Push a small stem or wire into the back so the flowers sit up.
– Arrange for depth
Place tall blooms toward the center and shorter ones around the edge. Vary colors too for a lively look. Tuck a few sprigs of greenery between blossoms.
– Finish the base
Wrap the vase or jar with burlap or lace. Tie a ribbon to hide the foam and add texture.
– Seasonal twists
In winter add a pinecone or a small cinnamon stick. In summer tuck in a slice of fruit or a sprig of berries for color.
– Care and tips
Keep the arrangement dry and out of direct heat. Reposition as guests talk so it stays fresh.
This centerpiece brings warmth to your table and invites conversation.
@media(max-width:480px){
12. Mini Paper Flower Bouquets
Mini Paper Flower Bouquets
You want a quick, pretty gift or tiny décor that warms a room. These mini paper bouquets fit that need. They take just a few minutes and use scraps you already have. You can make several at once and share a smile.
Here is what you need:
– scrap paper in colors you like
– scissors
– thin green paper for stems or a pipe cleaner
– twine or a simple ribbon
– a small card for a note
Let’s break it down.
What to do:
– Cut small flower shapes from your scraps. Vary sizes for depth.
– Glue petals around a tiny center. Let the edge curl a bit for life.
– Attach each bloom to a stem. If you use pipe cleaners, bend the top to make a blossom.
– Bundle 6 to 12 blooms. Tie with twine, then wrap the stems with decorative paper.
Finish with a bit of charm:
– Add a short tag or card with a name or message.
– Tie on a ribbon bow or a few tiny glitter specks if you like.
Why this works:
– It is affordable, eco-friendly, and easy to gift. These mini bouquets brighten desks, shelves, and small corners.
Next steps:
– Mix colors and flower types for variety.
– Try different wrap papers to match a room.
– Share this craft as a small, thoughtful present.
13. Paper Flower Magnets
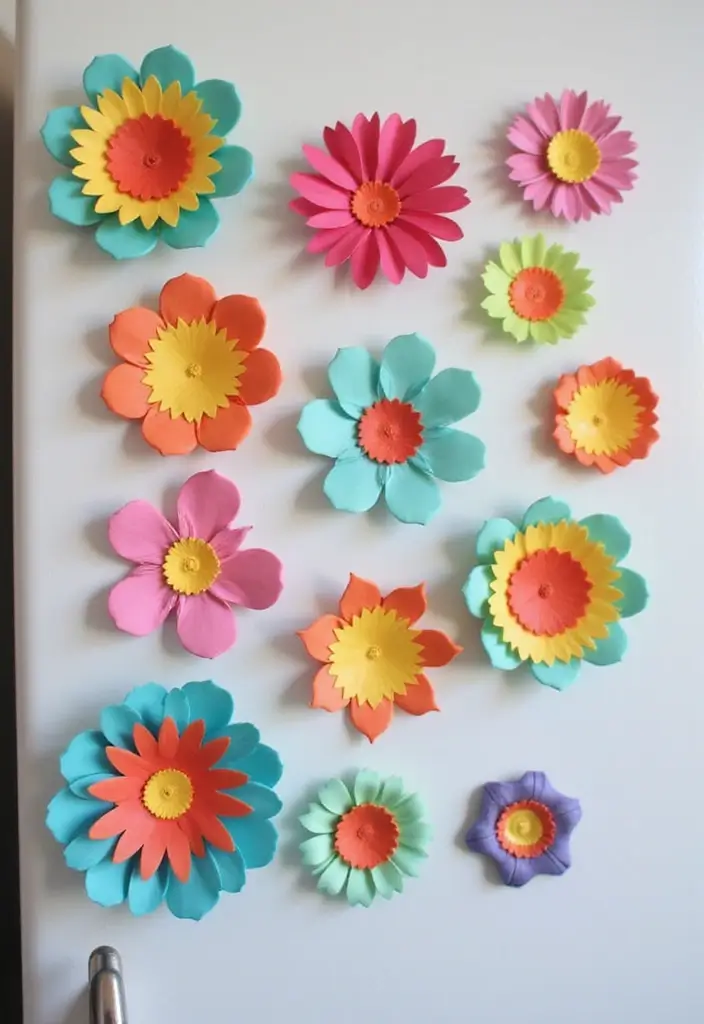
You’re looking to brighten your fridge with a personal touch. Paper flower magnets are a simple, affordable fix. They bring color and a little charm to any kitchen or workspace.
What you need
– colorful craft paper
– small magnets or magnetic discs
– a glue gun or strong craft glue
– scissors and a pencil
– optional beads, glitter, or a tiny center button
How to make
– Cut small paper shapes to form petals. Start with circles and trim into petals for different looks.
– Curl the edges with your fingers to give depth. A soft bend makes each flower look real.
– Glue the petals together in a layered bloom. Press firmly until the glue dries.
– Attach a magnet to the back with glue. Let it set before you use it.
Ways to style
– Create a bouquet with several magnets in matching colors.
– Mix bright colors for a springy vibe on your fridge.
– Try different flower shapes like daisies, rosettes, and peonies for variety.
Finishing touches
– Add a bead or button in the center for a finished look.
– Seal with a light coat of clear glue or Mod Podge. This adds a subtle shine and helps hold petals flat.
Tips for success
– Use hot glue for a stronger hold, especially on busy surfaces.
– Let each layer dry fully before adding the next part.
Where to use
– Fridges, whiteboards, lockers, or metal desks. These magnets stay useful while looking cheerful.
14. Paper Flower Mobile
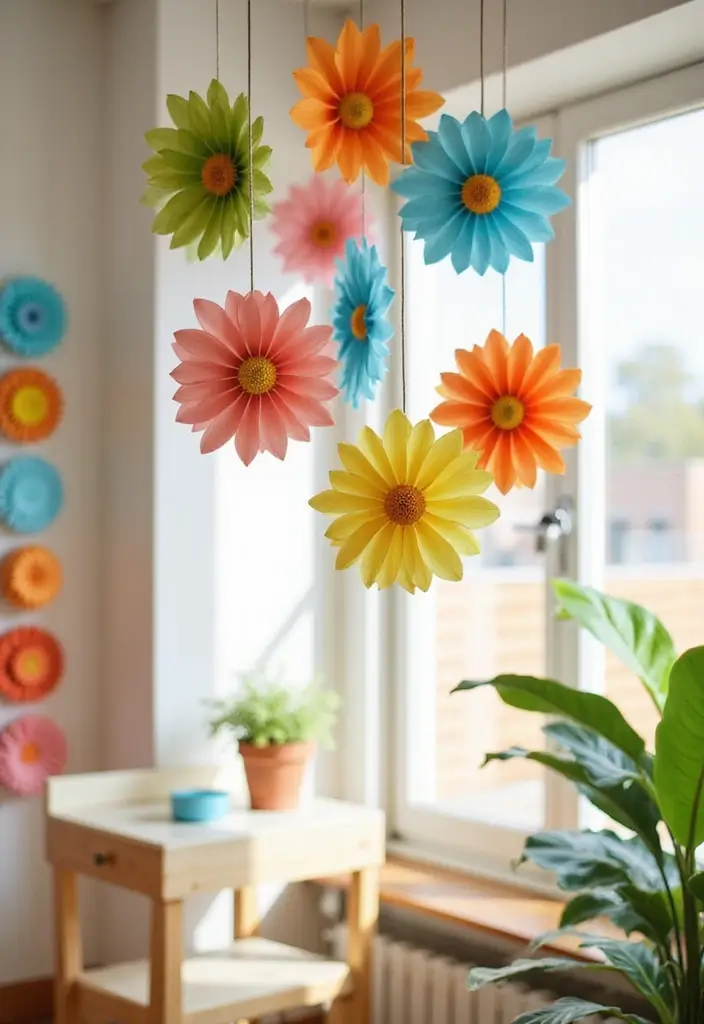
If you want a soft, kid friendly decor piece in a room, a paper flower mobile is a smart pick. It gently sways with the air and can match any theme or color.
What you’ll need
– Colored craft paper in a few tones
– A lightweight hoop or a small branch
– Clear fishing line or thin thread
– Scissors, glue, and a pencil
– A ceiling hook and tape for a safe hang
– A few small accents like mini butterflies or stars (optional)
Here’s a simple plan:
1. Pick a color palette and cut several flowers from paper in different sizes.
2. Glue tiny centers to each bloom and stack petals to add depth.
3. Tie a short length of line to the top of each flower, then to the hoop.
4. Create three to five strings at different heights to form a balanced mobile.
5. Hang the hoop from a ceiling hook and adjust lengths until it floats nicely.
Make it your own
– Vary the sizes of flowers for visual depth
– Add small shapes like butterflies or stars for whimsy
– Group similar tones to create a soft color block
– Move the hoop higher or lower for a different look
Next steps: test the balance with a gentle breeze, keep the lines neat, and place it where sunlight makes the colors shift softly.
15. Paper Flower Bookmarks
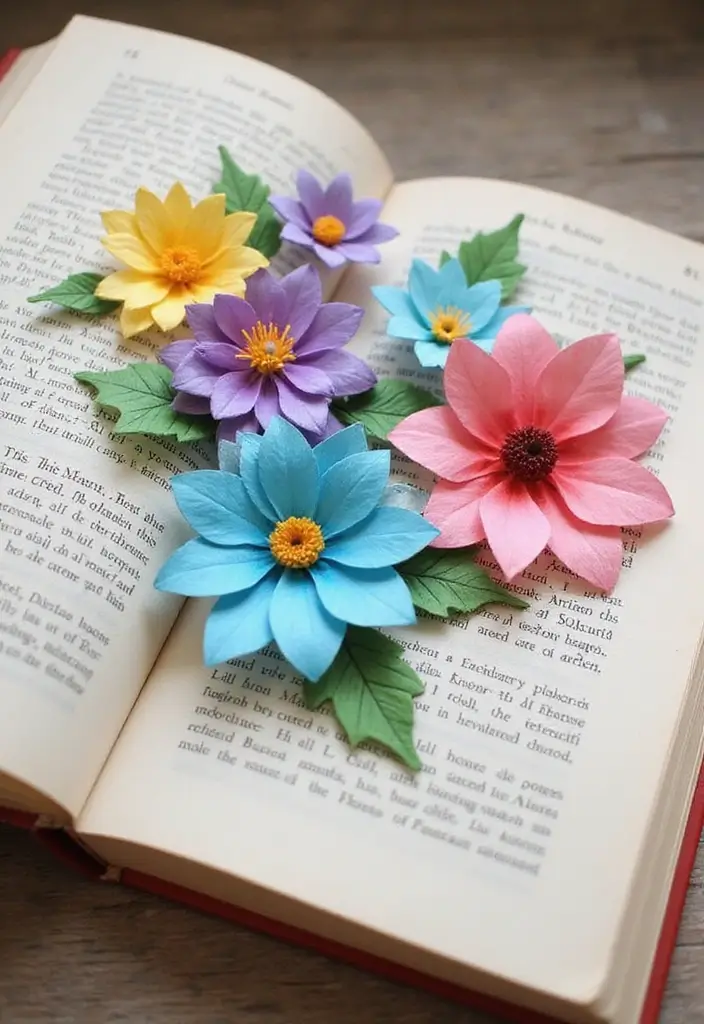
You love to read. You want a neat gift that fits a book. A paper flower bookmark does both. It adds charm to your pages and helps you find your place fast.
Here is why it works: simple shapes, cheap supplies, quick to finish. You can make a small set in one afternoon.
What you need
– Thick paper or cardstock
– A longer paper strip for the bookmark base
– Scissors and glue
– Optional markers, paints, or colored tape
– A laminator or clear contact sheets (to last longer)
How to make it
– Cut a flower shape from the thick paper
– Glue the flower to the top end of the long strip so the bloom stands up
– Let glue dry, then press flat inside the book for use
Decoration ideas
– Color blooms to match the season
– Add a thin stem or a leaf with a marker
– Write a name or initials for a personal touch
Care and gifting tips
– Laminate the bookmarks for extra wear
– Make a small set as a gift for friends or family
– Tie a tiny ribbon to the base for a finished look
Next steps
– Try a batch for a reading group
– Pack a few in a card for a quick gift
– Share photos of your blooms to spark ideas
These bookmarks brighten reading time and can turn a plain page into a tiny garden.
16. Paper Flower Headbands
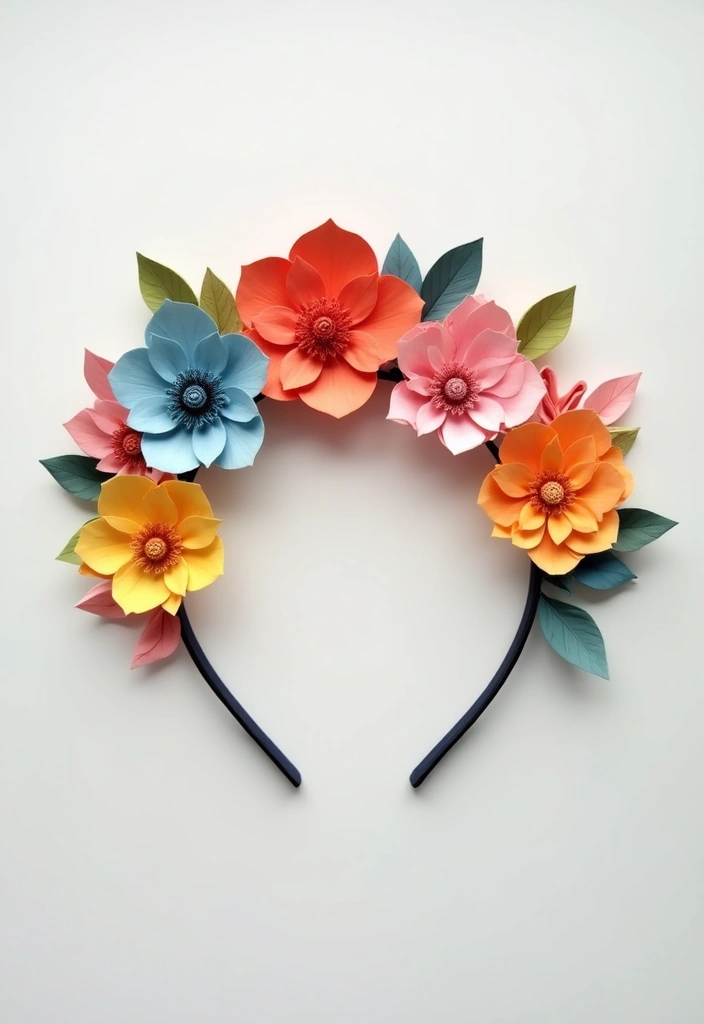
You want a headband that is fun to wear and shows your craft. A paper flower headband fits that need. It’s light, comfy, and easy to build for festivals, parties, or a stylish everyday look.
Materials you’ll need
– Lightweight elastic headband
– Hot glue and a glue gun
– Paper or tissue flowers in your color lane
– Green paper leaves and tiny beads or pearls (optional)
– Scissors
Steps to wear-ready blooms
– Plan your layout. Place blooms on the band to see how they sit.
– Glue from the center out. Press each flower for a few seconds.
– Add leaves behind the blossoms for depth.
– Let the glue dry, then check that nothing sticks to your hair.
Tips for comfort and style
– Keep flowers light; thin paper feels better on the head.
– Mix sizes and shapes for a garden look.
– Try a bold color block or soft gradient to match your outfit.
– Secure the ends with extra glue or a small ribbon bow.
Style ideas and care
– A row of tiny blooms gives a cute boho vibe; one large bloom draws the eye.
– Store flat in a box to keep the band straight.
– Pair with other crafts for a matching gift.
Next steps: experiment with one more color to boost the glow.
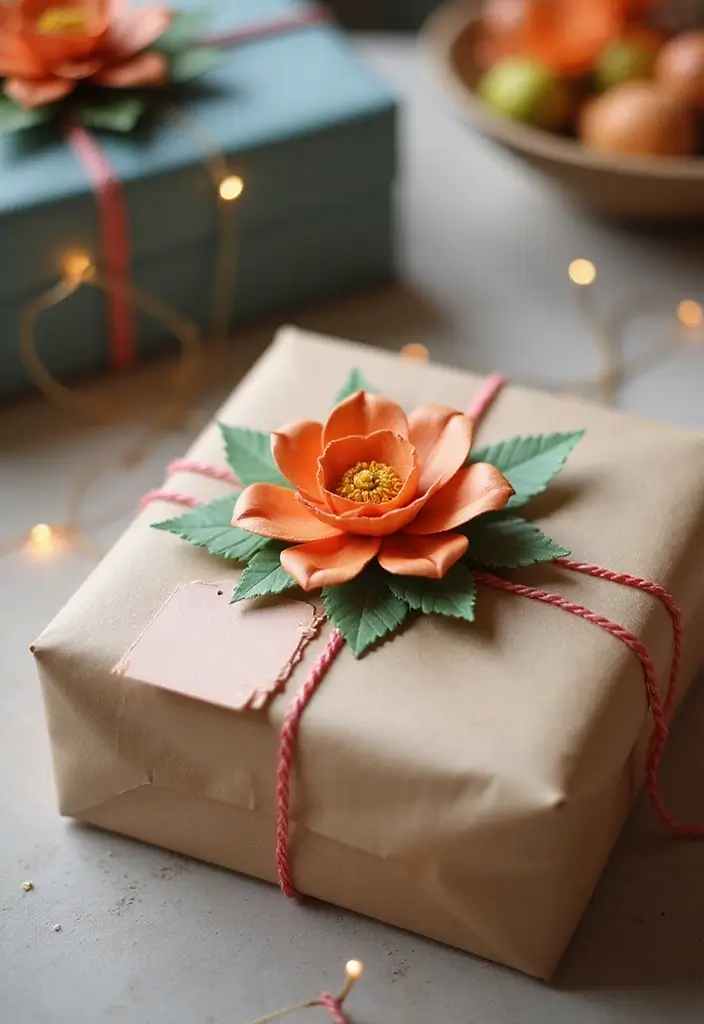
17. Paper Flower Gift Wrap
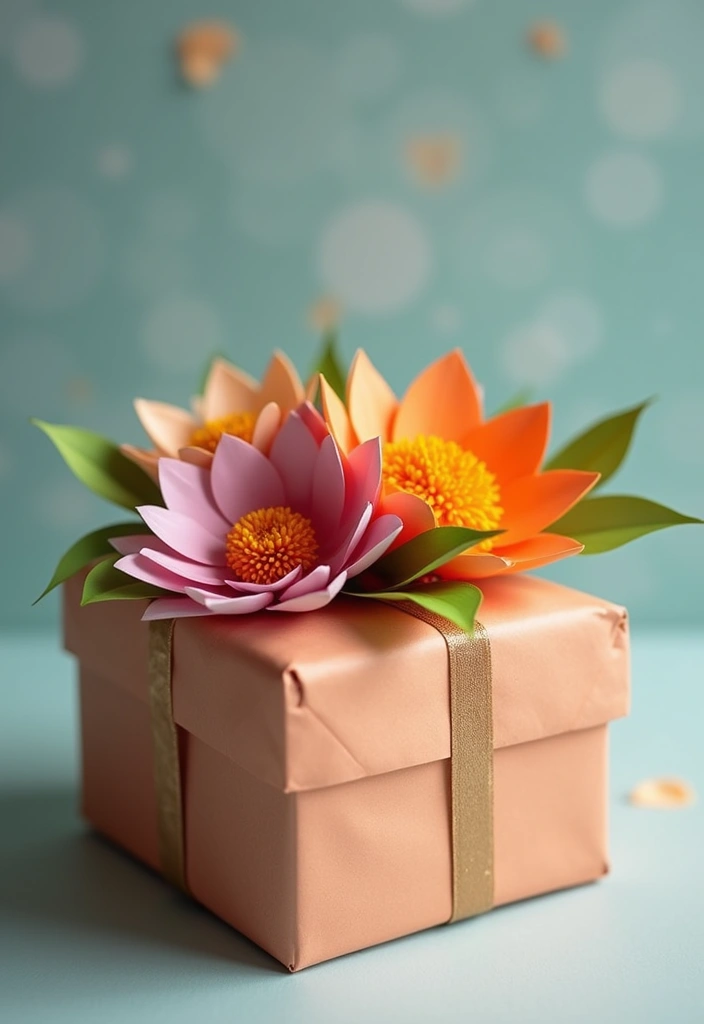
Is your gift wrap looking plain? Try paper flower gift wrap. It adds color and a handmade touch.
Best of all, this wrap stays flat for mailing and travels well. It folds into a card-friendly shape when you press gently.
What you need:
– Plain wrap paper or kraft paper
– Paper scraps for petals
– Scissors and glue or tape
– Ribbon or twine
How to wrap:
1) Start with a tidy base. Fold edges cleanly.
2) Make a simple flower. Cut petals, stack, glue center.
3) Attach the flower to the wrap with glue or tape.
4) Add a ribbon and tuck a small bloom along the string.
Personalize:
– Pick colors the recipient loves.
– Use one large flower for a bold look or a few small ones for whimsy.
Tips:
– Large blossoms stand out.
– Tiny blooms along the ribbon add charm.
– Match the color theme to the season or the person.
Common questions:
– Will this make a mess? Not if you glue lightly and avoid heavy stems.
– How many flowers? A clear focal bloom plus two small ones often works best.
Next steps:
Practice with a test wrap, then use this style for birthdays and holidays.
Keep a few ready-made flower pieces to speed up future wraps. Or mix in leaves for extra texture.
@media(max-width:480px){
18. Tissue Paper Flowers
You want fast decor that looks great and won not cost a fortune. Tissue paper flowers can do that. They are light, bright, and simple to build. They lift any room or party space.
Materials
– Tissue paper sheets in colors you love
– Scissors
– Pipe cleaners or string
– Tape or glue
How to make them
1) Stack 6 to 8 sheets. More sheets make a fuller bloom.
2) Fold the stack like an accordion. Each fold should be about 1 inch.
3) Cut a rounded edge at both ends. A curved edge gives a soft look.
4) Fold the stack in the middle and tie it with a pipe cleaner or string.
5) Separate the layers one by one. Push each layer slightly to create petals.
6) Fluff the bloom until it feels full. You can hang it from the ceiling or mount it on a stick.
Here is why this works: tissue paper is light and easy to bend. You can make many sizes from tiny 3-inch flowers to 8-inch decor.
Where to use
– Hang from the ceiling for a floating effect
– Create a wall or photo backdrop
– Add color to a mantel or table centerpiece
– Build a garland by linking several blooms
Tips for great results
– Use contrasting colors for a strong look
– Mix sizes to add depth
– Keep some loose petals for a natural spread
Care and storage
Store flat in a box. They stay ready for your next party or room refresh.
Tissue paper flowers are a friendly, practical craft. Easy to make, easy to use, and easy to store. Give them a try and watch your space bloom.
Recommended Products

Package Included: 24 pieces large colorful tissue paper flowers in 2 different size will be sent to you, with diverse colors of light purple, light green, light blue, light pink, light orange and light yellow, the diverse color and the enough quantity will satisfy your need in decoration and make your activity full of interesting and bustling atmosphere

Package include :10 pcs flower,7 inch*5pcs and 9inch*5pcs.Colour in pink, light blue,hot pink,orange and light purple.Big size is suit for decorating a large area

Package Include:You will receive 5 mixed blue crepe paper artificial flowers (1×12" deep blue, 1×12" blue, 2×10" light blue, 1×10" white) + 10 glue dots, and the quantity is plentiful enough to meet your requirements.
19. Paper Flower Place Cards
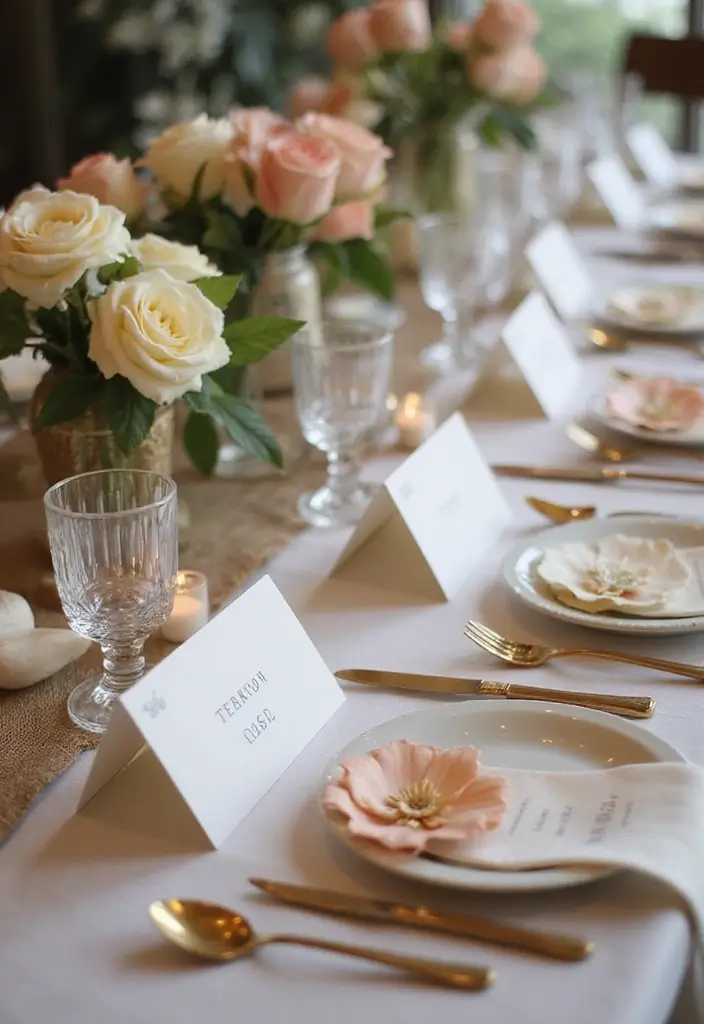
You want a warm welcome at your table. Paper flower place cards add that touch with simple beauty. Make small flower shapes from colored cardstock and write each guest’s name in the center. Attach them to a tiny stand, or set them on the table.
Here is why they work: they look nice, they show care, and they stay neat from start to finish. To boost their effect, pick colors that match your theme. Try several flower types for variety, like daisies, ranunculus, or layered blossoms. Add a short message or quote under the name.
To do it well, keep steps simple:
– Materials: colored cardstock, scissors, glue or tape, a fine pen, small stands or toothpicks.
– Steps: cut petals, form a flower, write the name, attach a stand or clip, place on the table.
– Tips: use sturdy paper, vary petal sizes, add a leaf cutout for contrast, and check height so guests can see the menu.
Next steps: make extras for backup or for decorating the buffet. Store flat sheets in a box to reuse later. These cards blend style with function and fit any event.
20. Paper Flower Lanterns
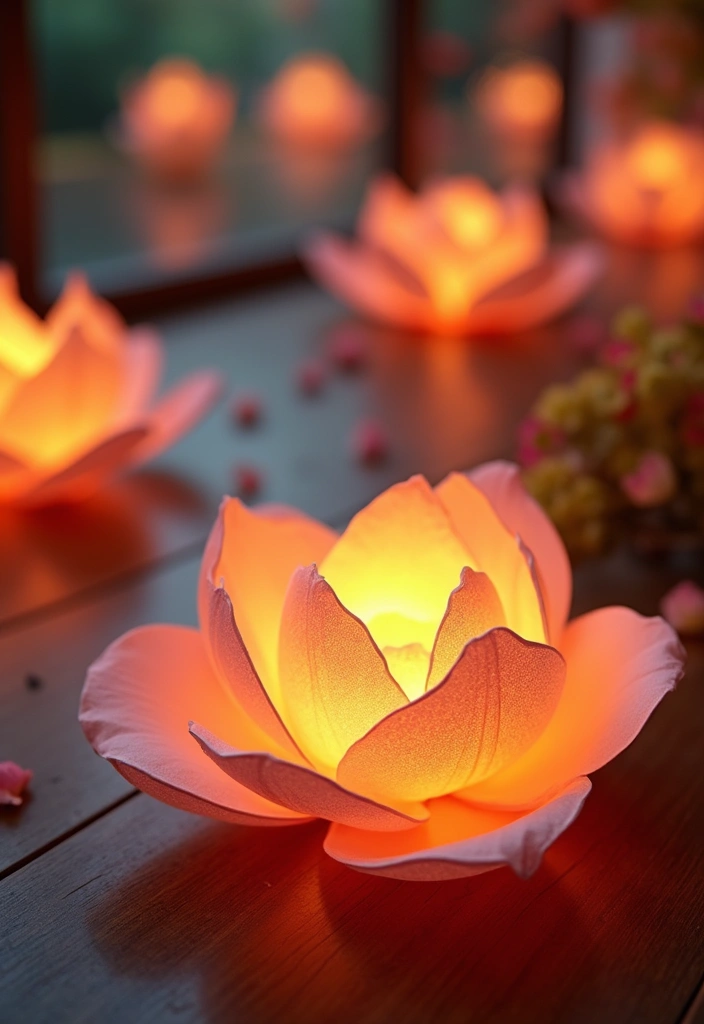
You want a soft glow, not loud lamps. Paper flower lanterns give you that warm, inviting feel. This DIY lets you light a room with color and charm.
Here is why it works: LED lights stay cool, and the petals catch the glow for a dreamy look. You can switch colors to fit a party, a quiet evening, or a holiday mood.
– Gather lightweight paper, a short paper tube or rolled cylinder base, white glue or glue stick, scissors, and a small LED tea light or battery-powered LED.
– Cut flower shapes from the paper. Vary petal shapes for a fuller bloom.
– Make petals and curl the edges a little to add depth.
– Attach petals around the cylinder base with glue. Build up layers for a lively bloom.
– Slip a battery-powered LED inside. Position it so light shines through the petals.
– Secure the lantern so the light stays in place. Hang it where it can catch a breeze or be seen from multiple angles.
Ideas for crafting:
– Use two or more colors to create a soft color wash.
– Hang lanterns in a doorway, above a table, or along a hallway for a festive look.
– Create a row of smaller lanterns for a blooming wall effect.
Tips and safety:
– LEDs keep things cool and safe for paper.
– Keep the design light; don’t overstuff the tube.
– If the paper gets wrinkled, gently smooth it with clean hands.
Next steps:
– Start with a simple single lantern, then add more petals and color when you feel ready.
– Try different sizes and arrange a small garden of paper flower lanterns for your space.
@media(max-width:480px){
Recommended Products

Non-blinking. Color Temperature: 3000K (Warm White).
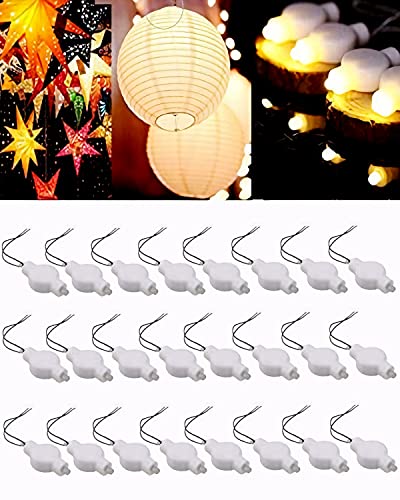
LONG RUNNING TIME & BRIGHTNESS :We have a design copyright.These battery operated paper lantern lights stay lit for 36 hours(2 x CR2032 batteries are included).Equipped with lamp beads for high luminance,these little lights act like big lights,throwing off a powerful wide light

DEMENSIONS & INSTALL:LED Light Chain 10 piece Led bulbs total Length 88.6in/2.25m; 10 pieces Red Sakura (Cherry) Flowers Paper Lantern Diameter 3in/7.5cm;DIY products,you and your kids need to assemble the lanterns by yourself,it is really easy to assemble them although;Light weight,take them to anywhere you want;
21. Paper Flower Tree
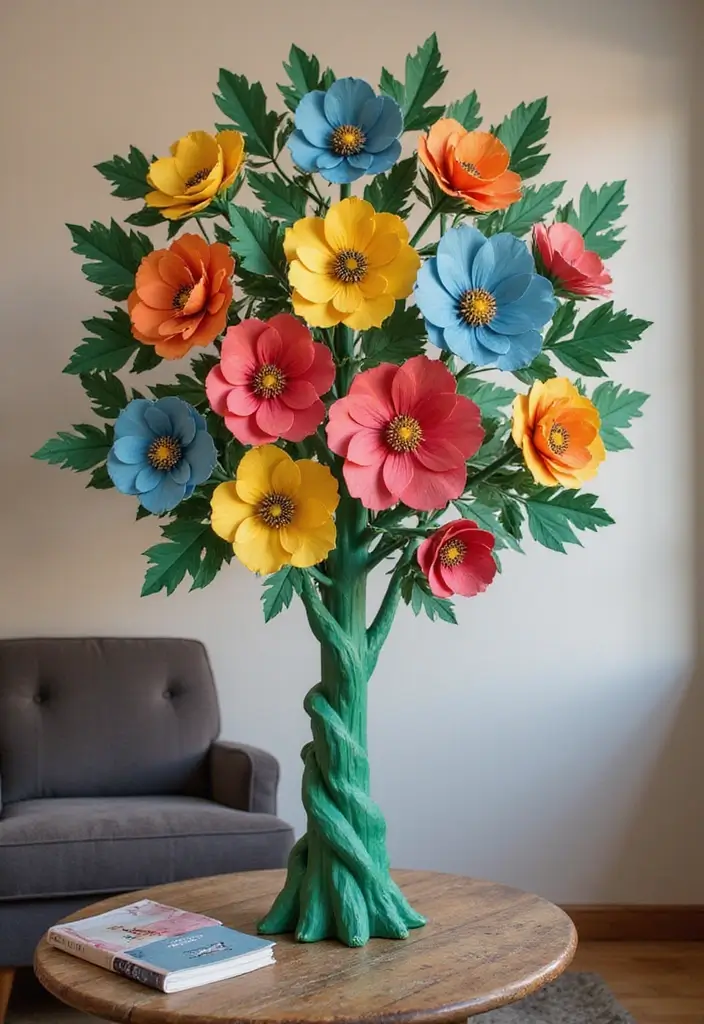
If you want a bright, lasting centerpiece, try a paper flower tree. It uses a cardboard trunk and colorful paper blooms. You control the colors, the sizes, and how full the tree looks.
What you need
– A sturdy base for stability
– Cardboard or a paper tube for the trunk
– Colored paper in several hues
– Scissors, glue, and tape
– Floral wire or pipe cleaners for stems
– Optional: small felt leaves or plastic butterflies
How to build it
– Cut or roll the trunk and glue it to the base. Let it dry fully.
– Make flowers in different sizes. Use simple circles and petal shapes for variety.
– Attach flowers to wire stems. Thread or glue the stems into the trunk.
– Place blooms at different heights. Cluster a group near the top for a full look.
– Add leaves or a few butterflies to finish the whimsy.
Quick tips
– Use a light background color to let blooms pop.
– Layer colors from pale to bold for depth.
– Keep some flowers loose so you can rearrange later.
– Place the tree where people gather to maximize impact.
This craft is friendly for beginners and kids. It takes a little time, but the result is cheerful and adds a personal touch to any room. You can customize easily.
@media(max-width:480px){
22. Paper Flower Coasters
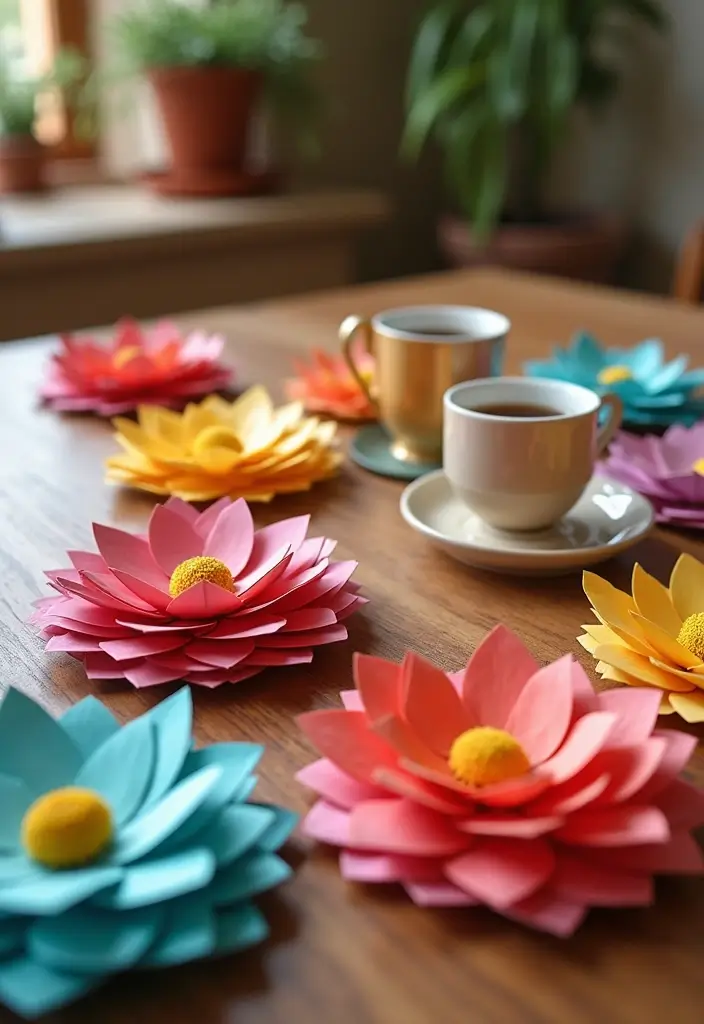
Are you looking for a simple way to guard your tabletops and add a touch of charm? Paper flower coasters do it. They blend art with function.
What you’ll need
– sturdy cardstock in your chosen colors
– scissors or a craft knife
– glue or double-sided tape
– a laminator or clear sealant
– a cork backing or felt pads
How to make them
1) Cut five petal shapes per coaster from cardstock.
2) Layer petals into a flower, glue at the center.
3) Add a small circle to the back for a neat finish.
4) Laminate or seal the top to stand up to moisture.
5) Glue on a cork backing for grip and protection.
Tips to shine
– Pick colors that match your room.
– Personalize with initials or a tiny design in the center.
– Use a thin coat of sealant to keep the look smooth.
Why this matters
– These coasters guard tables from heat and rings.
– They’re easy to gift to friends or set on your own coffee table.
– They add a soft, handmade touch to any space.
Care
– Wipe with a damp cloth. Let dry.
Styling ideas
– If you want a cafe vibe, go with muted tones. For a playful space, choose bright petals.
Next steps
Ready to craft? Cut, glue, seal, and enjoy.
@media(max-width:480px){
23. Paper Flower Treat Boxes
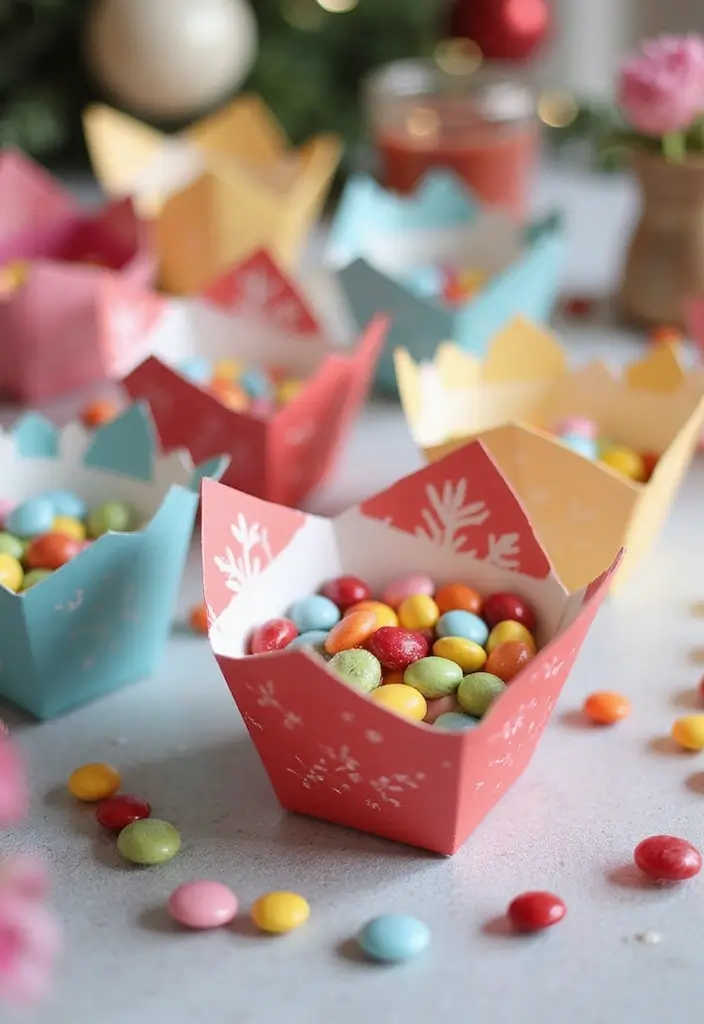
Paper Flower Treat Boxes
You want a gift that feels special. A small box with a flower on top does that. These treat boxes hold candies or tiny gifts. They fit parties, showers, or holidays. Here is how you make them.
What you’ll need
– Cardstock in your chosen colors
– Scissors and a ruler or scoring tool
– Glue or double‑sided tape
– A few paper flowers and leaves
– Clear cellophane bags
– Ribbon or twine
– Name tags or short messages
How to build the box
– Cut a square of cardstock. Score the edges for clean folds.
– Fold and glue the sides to form a sturdy box. Cut a slightly larger square for a lid.
– Press the edges so the box sits flat and neat.
Decorate with flowers
– Glue a flower on the lid or on the front.
– Add leaves for a garden look. Stack two tiny flowers for depth if you like.
Personal touches
– Write a name or short note on a tag.
– Tie a ribbon around the box to finish it.
Finish
– Slip the box into a clear bag for a polished feel.
– Fill with candies or a small gift. Seal and tie the ribbon.
Next steps: pick a color theme, test one box, then make a few for your event.
@media(max-width:480px){
24. Paper Flower Crown
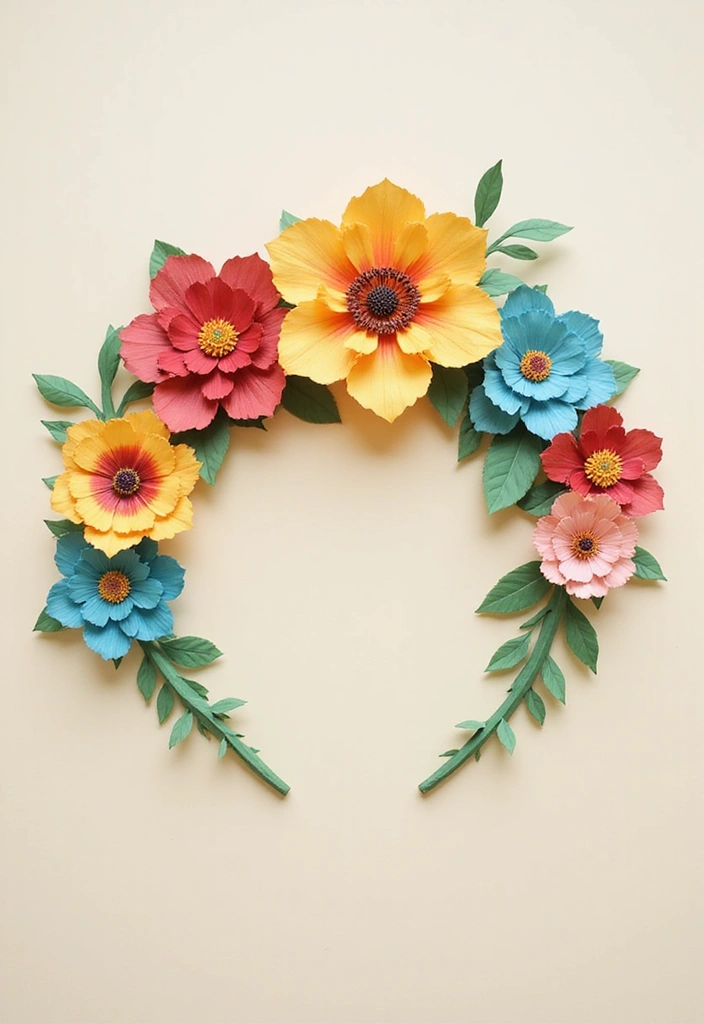
Want a crown that brings a smile at festivals, parties, or simple days at home? A paper flower crown is light, comfy, and easy to tailor to your style. It’s quick, fun, and budget friendly. You can finish it in an afternoon.
Materials and prep
– Lightweight paper, like tissue or copy paper, plus a thin strip of sturdy card for the band.
– A headband or a long strip that fits around your head.
– Glue or clear tape, scissors, and a little floral wire if you want extra hold.
– A small palette of colors, plus optional leaves for greenery.
Flower ideas
– Cut petals in two or three sizes for depth and motion.
– Create a few simple blossoms and one or two bold focal blooms.
Step-by-step
– Plan blooms along the band, leaving gaps for leaves and air.
– Glue petals in place, then tuck greens around the edges.
– Let glue dry fully, try on, and trim the band if needed.
Style and wear tips
– Wrap the band with ribbon for a soft finish and comfort.
– Choose colors that match your outfit or event vibe.
– Try a mini crown for friends or a big crown for photos.
This crown turns a look into a small moment of magic.
Next steps: experiment with color blends, sizes, and wear tests.
@media(max-width:480px){
25. Paper Flower Scrapbook Embellishments

You want scrapbooks that feel personal and alive. Paper flower embellishments can do that. Make blooms in different sizes and colors to match each memory. Cut out petals, stack them, and stick them on your pages. The result is a page that looks cared for and warm.
Here is why they work
– Layering flowers creates a soft 3D feel you can touch when you flip through.
– Matching colors to each memory makes the theme clear at a glance.
– Add ribbons or stickers for small, extra details that brighten the scene.
Quick how-to
– Gather craft paper, cardstock, glue, scissors, and a few foam dots for lift.
– Cut simple flower shapes, then snip tiny slits for petal tips. Curl edges with a pencil to bend them naturally.
– Glue a small center bead or circle to finish the bloom.
– Place several blooms on a page, then press them with foam dots if you want more depth.
Tips for success
– Keep a small stash of neutral greens and pinks for many pages.
– Choose one memory color as the anchor, then add a contrasting shade for variety.
These embellishments turn your scrapbook into a personal and pretty keepsake.
26. Paper Flower Art Frames

You want a frame that feels personal and pretty. A simple frame can look alive with paper flowers. You can make a set of flowers in colors that match the art or photos inside.
Why this works
Soft paper petals catch light and add texture. The project is affordable and easy to finish in an afternoon. It gives you a unique piece you can swap with new colors later.
Here is how to do it, step by step. Next, you’ll see how simple tools and good planning make a big impact.
Materials
– Colored paper in a few tones
– Scissors and a pencil
– Glue or a hot glue gun
– A plain wooden or metal frame
– Optional leaves and small buds
– Tape or a light backing for arranging
Steps
1) Plan your colors. Pick two or three shades that match the room or the artwork. Then choose a frame with a simple edge.
2) Cut petals in three sizes. Curl the edges slightly to give them life.
3) Build flowers by layering petals. Glue each layer as you go.
4) Arrange flowers on the frame first, then add leaves for balance.
5) Glue the pieces down. Let them dry before you hang it.
This frame design is flexible. You can add more flowers later or swap out colors as trends change. When you’re done, place your favorite photo or art inside. Your frame will glow with a handmade touch and your memories.
27. Paper Flower Christmas Ornaments
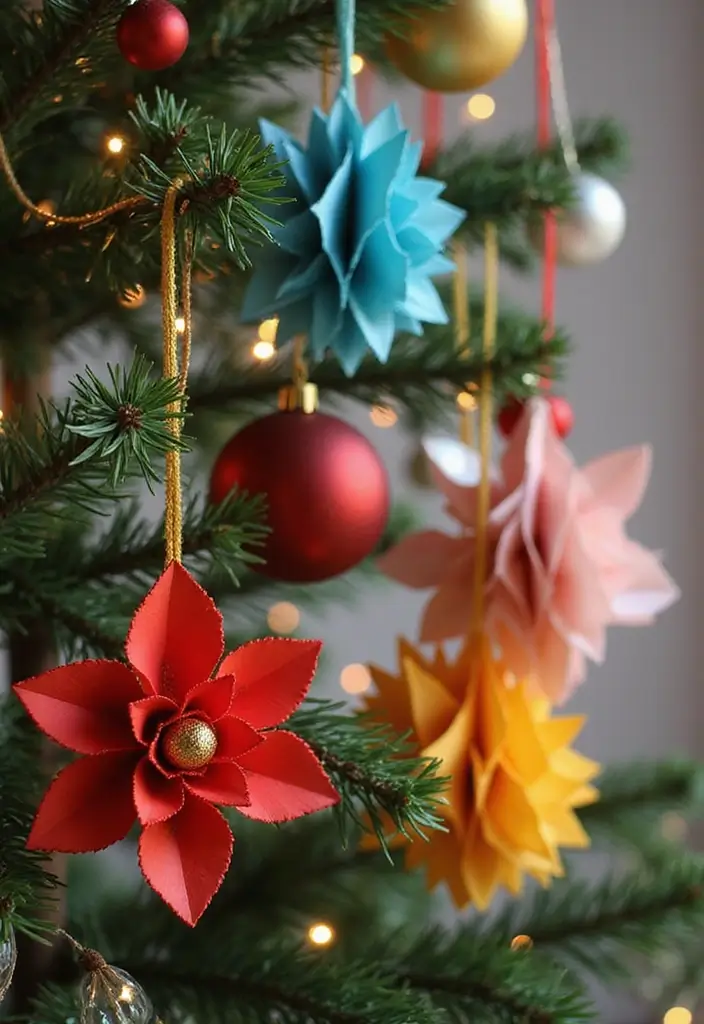
You want festive decor that feels personal and not pricey. Paper flower Christmas ornaments give color, texture, and charm to your tree or mantel. They’re fun to make and catch the light in pretty ways. Here is a simple, practical plan you can follow.
Materials
– Colored paper (construction, scrapbook, or tissue)
– Scissors and glue or tape
– Thin string, thread, or twine
– A hole punch or a needle to make a small hole
– Optional: glitter, beads, markers, or paint
– Optional: a small bead or pom for the center
– Optional: floral wire or toothpicks to shape petals
Steps
– Cut several flower shapes in different sizes.
– Layer petals and glue them, curling edges for depth.
– Attach a small center piece, then punch a hole at the top.
– Thread a string and tie a knot. Hang with care.
Design ideas
– Try poinsettia colors (red petals with a yellow center) or white blooms with gold edges.
– Use metallic papers to catch the light.
– Mix shapes like daisies, roses, and stars for a lush look.
Hang and store
– Hang on the tree, garland, or wreath.
– Add a dab of glitter for sparkle.
– Store flat in a box with tissue to keep petals from bending.
These paper flower ornaments add a personal touch to your holiday decor. They’re easy, creative, and you can finish a batch in a weekend.
28. Paper Flower Gift Tags
Want a simple way to make gifts feel warmer? Paper flower gift tags add a personal touch that plain tags can’t match. They work well with DIY gift tags and card stock tags, and you can make them fast.
Here is why these tags shine. They add color, charm, and a tiny handmade detail. The flowers draw the eye. A handwritten note makes the card feel sincere.
Materials
– Cardstock or thick craft paper for the tag
– Small paper flowers or cutouts
– Hole punch and string, twine, or ribbon
– Glue or double-sided tape
– Pen for a short message
Crafting steps
1. Cut a tag from sturdy cardstock.
2. Pick a small paper flower or two.
3. Glue the flowers to the tag.
4. Write a short, friendly note.
5. Thread the string through a hole and attach the tag to your gift.
Tips for big impact
– Use colors that contrast with the tag to make the flowers pop.
– Layer one large flower with a couple of tiny ones for depth.
– Add a tiny leaf from green paper for a natural touch.
– Keep the handwriting neat; it sells the personal feel.
Practical notes
– Choose a tag size that fits your gift wrap.
– Let glue dry fully so the tag stays flat.
– Store extra tags flat in a folder for quick gifts later.
Next steps: make a batch, then tag your next present with care.
29. Paper Flower Phone Case
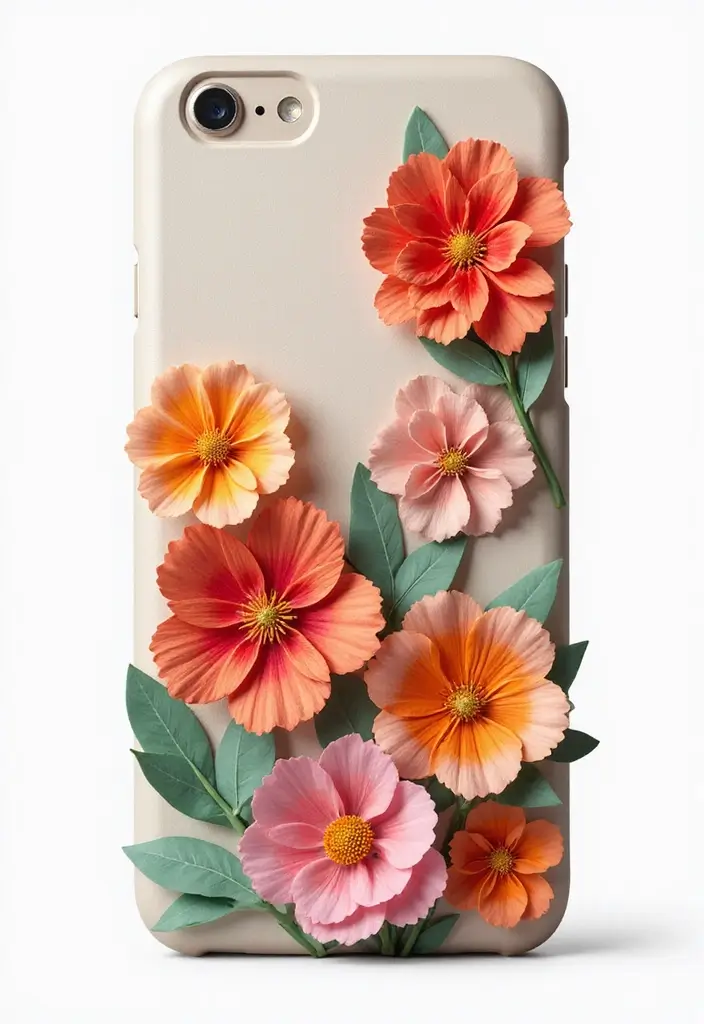
Want a phone case that shows your style and lasts through daily use? A paper flower phone case can do that. Start with a clear case so the blooms stand out.
This project fits any phone and any budget. You can make it bold or subtle to match your mood.
– Use a clear phone case as your base.
– Gather supplies: colored paper, small scissors, a glue applicator, waterproof adhesive, and optional faux flowers.
– Plan your layout by arranging paper blooms on the case first, then save the design with a quick photo.
– Layer a few petals to create depth, and use tweezers to place them exactly where you want.
– Glue with tiny dabs and a pair of tweezers to place petals precisely.
– Try different flower shapes and color mixes for bold or soft looks.
– For longevity, use waterproof adhesive and seal with a clear spray after it dries.
– Add small green leaves cut from paper to frame the flowers.
– Finish with a light, clear spray to help keep colors bright.
– Share your finished look with friends to swap ideas.
This project blends art with daily use. It lets you protect your phone while showing your love for flowers.
Next steps.
@media (max-width: 600px) {
.visual-quiz-iframe { min-height: 995px !important; height: 1100px !important; }
}
30. Paper Flower Wall Decor
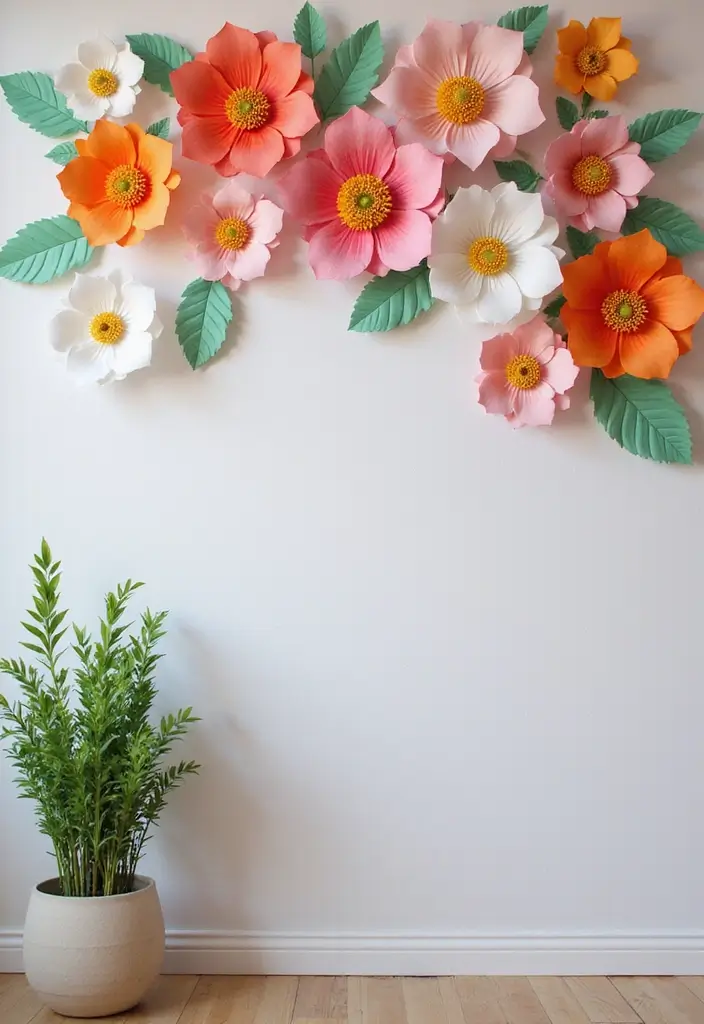
A blank wall feels cold. You want color, texture, and a touch of you. Paper flower wall decor gives you that, fast. Create a small garden of blooms in colors that fit your room. It’s easy, and the look lasts.
What you need
-Colored craft paper or tissue sheets
-Scissors and glue
-Foam tape or removable mounting putty
-Thin floral wire (optional)
-Hot glue gun (optional)
-Ruler, pencil
-A large sheet of cardboard to plan first
Here is why this works. Paper flowers stay flat but can still feel alive. You can pick shades from your sofa, rug, or art piece. The project scales from a few blooms to a full wall bouquet.
Let’s break it down
– Pick a style. Mix simple daisies with fuller blooms. Use different sizes for depth.
– Make blooms. Clip petals, curl edges, and glue them into circular centers. A double layer adds fullness.
– Plan your layout. Lay blooms on cardboard first. Try a symmetrical grid or a loose, organic cluster.
– Mount with care. Trace your pattern on the wall with removable tape. Add foam tape to some flowers to lift them slightly off the wall.
– Finish with texture. Tuck a few flowers behind others or add a couple of leaves for glow.
Next steps. Hang your wall art and step back. You’ll see a warm focal point that reflects your style and brightens the space.
@media(max-width:480px){
Conclusion
Creating DIY paper flower crafts is a wonderful way to express your creativity while being eco-friendly. From elegant bouquets to whimsical decor, these projects can brighten any space and bring joy to your life. Experiment with different colors, shapes, and styles to truly make these crafts your own, and share your creations with friends and family for added inspiration. Whether you’re seasoned in crafting or just beginning, these ideas are designed to spark your imagination and make crafting fun!
Note: We aim to provide accurate product links, but some may occasionally expire or become unavailable. If this happens, please search directly on Amazon for the product or a suitable alternative.
This post contains Amazon affiliate links, meaning I may earn a small commission if you purchase through my links, at no extra cost to you.
Related Topics
diy paper flowers
eco-friendly crafts
paper flower tutorials
easy paper crafts
homemade decorations
spring crafts
budget-friendly decor
whimsical designs
quick crafts
wedding decorations
vintage style
creative gifting