I put this post together because I crave simple, cozy crafts that lift a room without a big mess. Paper angels have a soft, heavenly look that fits every season. They cost little and you can finish them in one sitting.
If you love budget decor, crafts with kids, or quick gifts, this one is for you. You’ll find ideas that are easy to pull off on a weekend. No fancy tools needed, just paper, scissors, glue, and a little patience.
Here are 29 ideas that are simple and charming. They are easy to customize, and they stay lightweight enough to hang anywhere. You’ll see options that range from tiny hanging angels to larger table toppers.
Here is why this works. Start with a few sheets of sturdy paper or recycled cards. Fold and cut to make wings, halos, and bodies. Glue works, or you can use tape for clean edges.
These angels fit many spaces. Hang them from a branch, string them along a mantel, or tuck them into a gift bag for flair. You can swap colors to match your decor and season.
Next steps are easy. Gather some color paper, scissors, glue sticks, and a marker. Pick a style, try a quick one in under an hour, then move to a more detailed version. You will get a heavenly touch that feels personal and warm.
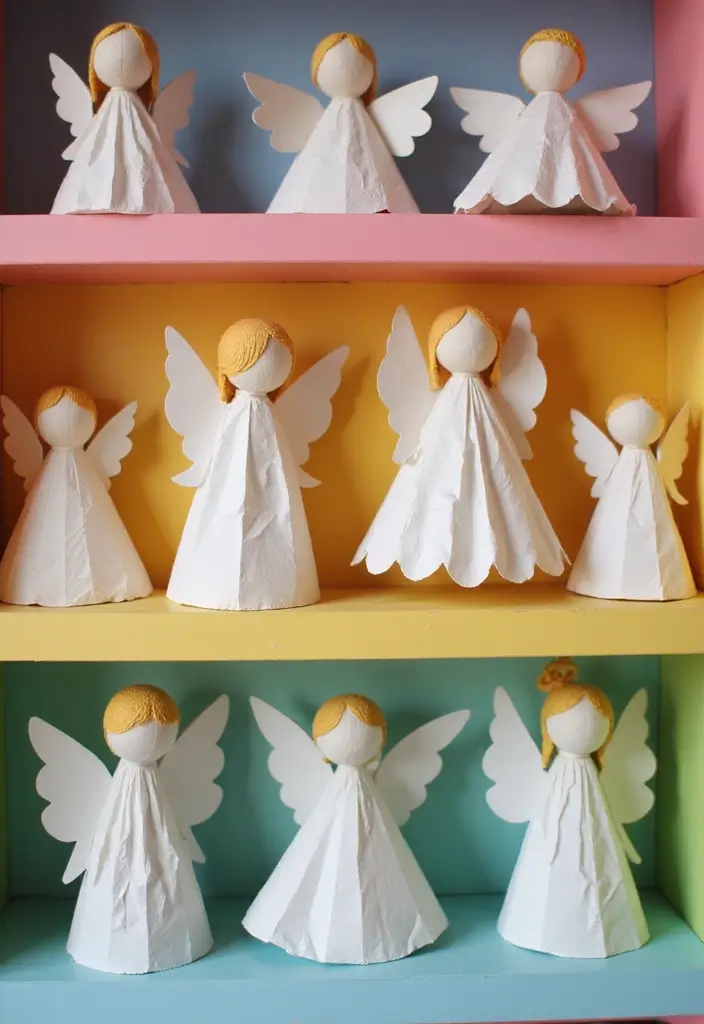
1. Classic Folded Paper Angels

Looking for a quick, charming craft to brighten your space? Classic folded paper angels fit the bill. They’re simple, affordable, and fun to make with kids or on your own. These paper angels follow quick folds that anyone can learn and look great as tree decorations, place cards, or tiny desk toppers.
What you need
– A square sheet of paper (any color or pattern)
– A pair of scissors
– A pencil or marker for a face
– A bit of string if you want to hang them
Fun comes from color choice. Try a striped paper for quick wings.
Steps
1. Start with a square sheet of paper and hold it like a diamond.
2. Fold it in half diagonally to make a right triangle.
3. Fold the triangle again, bringing the corners together to form a smaller triangle.
4. Cut a gentle half circle near the top edge for the head.
5. Unfold carefully to reveal the angel shape.
This fold gives the chest and wings a gentle point.
Decoration ideas
– Add a tiny face with a marker.
– Glue on glitter, lace, or a halo from foil.
– Tie a length of thread to hang on a tree.
– Clip on a tiny paper halo.
– Let them dry before you hang.
Next steps. Grab your paper and start folding.
Recommended Products

【Package Contents】You will get 24 pages 6 × 6 inches/15× 15cm of decoupage paper in assorted colors. 12 different Pattern Styles, 2 pieces of each pattern.

EASY TO USE: No Expertise required because you get No wrinkles, no Bubbles, no Fading, no tearing when working. Our Decorative papers are slightly thicker than napkins and offer benefits that are difficult to achieve with napkins
2. Glittery Angel Ornaments

You want a little sparkle on your Christmas tree. Glittery angel ornaments light up a room and are easy to make. Follow these simple steps to add shine with a handmade touch.
Materials:
– Cardstock in colors you love
– Clear-drying craft glue
– Glitter in your theme colors
– String or thin ribbon for hanging
– Scissors, pencil, and a small tray
Here is how to make them:
1) Cut an angel shape from cardstock. You can draw a simple figure or use a printable pattern. Give the wings a separate piece for a layered look.
2) Glue the wings to the back of the body. Sprinkle glitter on the wings first, then press lightly to help it stick.
3) Add a second color or a fine dusting of glitter on the body for contrast. Shake off the loose glitter onto the tray.
4) Let the ornament dry fully. If you want extra sparkle, add a second glitter layer once the first dries.
5) Attach a hanging loop at the top. Clip a small halo from gold paper or a bead for a finishing touch.
6) Seal lightly with a clear spray sealer if you like. This helps glitter stay put and keeps your tree neat.
Now you have a shimmering, kid-friendly decor piece you can customize with many color combos.
Recommended Products

Package includes------ You will receive 16 pieces of angel wings ornaments, the size is about 12. 5x7x0.1 cm, mini wings are the best choice for Christmas DIY decoration crafts

Features: 1. They are vibrant in color, shiny, Glittery on one side, and plain on the other side; they do paint well if you want to add sparkle; 2. The embossed vinyl is only on the side, with the other side being plain yellow. 3. Made of fabric, they are easily pliable and bendable and can easily be cut.
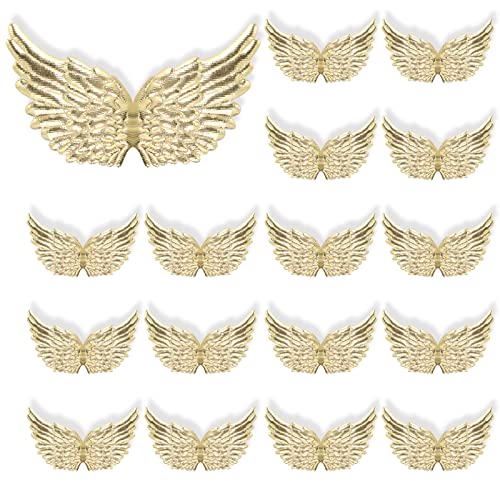
Package includes------ You will receive 16 pieces of angel wings ornaments, the size is about 12. 5x7x0.1 cm, mini wings are the best choice for Christmas DIY decoration crafts
3. Paper Plate Angels

Want a quick, kid-friendly craft that doubles as festive decor? Paper plate angels are a sweet, simple project you can finish in one sitting. They’re great for classrooms, families, or a cozy craft night.
What you need
– Paper plates
– Markers or paints
– Yarn or fabric for hair
– Glue
– Scissors
– Pipe cleaner for halos
– Optional: glitter glue for a little shine
How to make a paper plate angel
Here is how you do it. Start with two plates: one for the body and a smaller one for the head. Color the body plate in a soft or bright shade. Let it dry a moment. Draw a friendly face on the head plate. Glue on yarn or fabric to make hair. Attach the head to the body with a dab of glue. Bend a pipe cleaner into a gentle halo and glue it on top. Cut small wings from extra paper and glue them to the back of the body. If you like, add a spark of glitter glue for a twinkle.
Ways to display
These angels shine as decor or gifts. Hang them from a string or yarn line. Set one on a shelf, mantel, or windowsill. Give a cutie to a friend for a cheerful surprise.
Tips for best results
Let glue dry before moving. Use bright colors so the angels pop. Keep shapes simple so little hands can join in. Have fun and save scraps for next time.
Next steps: Gather supplies and start your first angel today.
Recommended Products
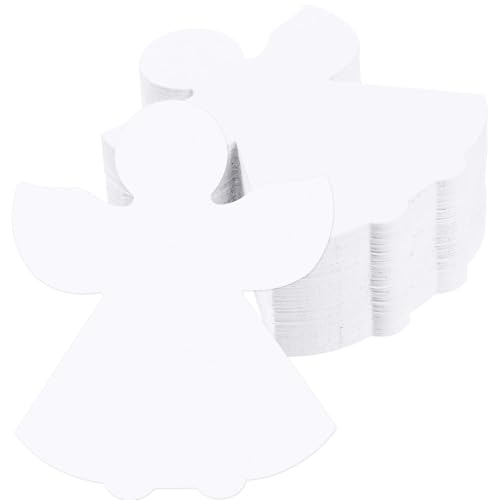
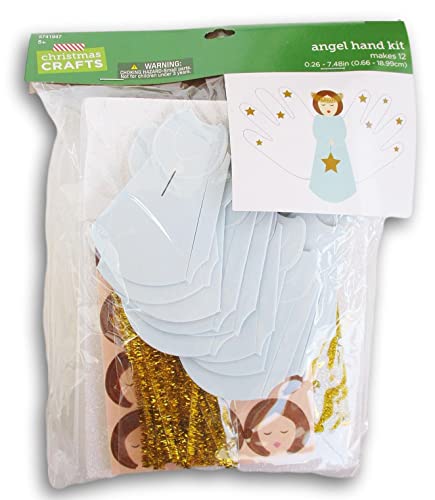
Angel Paper Cutouts: you will receive 200 pieces of white Christmas angel cutouts, enough quantity and unique angel shapes can meet your various decorating needs in daily life or festivals, you also can share them with your friends and family.

✔️【What You Can Get】: You will receive 360 pieces of paper angel cutouts in 12 different colors, 30 pieces of each color, each angel cut out measures approx.9x10 cm/3.5x3.9 inches, proper size and sufficient quantity can meet your different needs of decoration or DIY crafts projects, you also can share them with your friends and family.

Complete Package: the package includes 48 pieces of wooden angel decorations, and 24 colorful markers, offering you enough accessories to create eye catching designs to impress your friends and family
4. Origami Angels

If you love folding paper, origami angels can brighten your space. They are easy to learn and add a soft, handmade touch to any room. With a little practice, you can create a small flock to decorate your table, shelf, or cards.
What you need
– A square sheet of paper. Any color or size works.
– A flat table or desk.
– A bit of patience for clean folds.
How to make one origami angel
1. Fold the paper diagonally to form a triangle.
2. Fold the triangle down to make a smaller triangle.
3. Gently pull out the wings with extra folds and smooth the edges.
With practice, you can make many angels in different colors and sizes. Line them up on a holiday table, hang them from a string, or tuck one into a place setting.
Tips for great results
– Use bright paper for a festive look, or soft pastel for a gentle vibe.
– Start with a larger square if you are new, then try smaller sheets as you gain skill.
– Press each crease firmly so the angel holds its shape.
What to do next
– Display ideas: a small angel display on a tray, or a garland made from several angels.
– Save scraps for tiny ornaments or cards.
Now you can make a little heaven from one sheet.
Recommended Products
![Amazing Origami Kit: Traditional Japanese Folding Papers and Projects [144 Origami Papers with Book, 17 Projects]](https://m.media-amazon.com/images/I/51uEuHVJ-PL._SL500_.jpg)


Package include: Our origami kit includes 220 sheets of colored origami papers, 1 step-by-step guide manual, making it easy for beginners to learn and create beautiful origami creations.
5. Angel Bookmarks

If you love reading and want a tiny craft that lasts, these angel bookmarks are for you. They’re practical and pretty, a little touch of heaven to start every chapter.
What you’ll need
– Cardstock or thick paper
– Scissors
– Markers or color pencils
– A hole punch
– Ribbon
Here is why these basics work. Cardstock keeps the bookmark sturdy. Simple markers let you add bright, kid-friendly angels. The hole punch holds ribbon so the bookmark stays put in your book.
How to make
1) Cut a rectangular piece of cardstock, about 3 by 6 inches.
2) Draw a small angel design. A halo, wings, and a friendly face read well at this size.
3) Color carefully. Use soft pastels or bright accents—whatever fits your book collection.
4) Punch a hole at the top edge.
5) Thread a ribbon through the hole and tie a neat knot or tiny bow. Trim the ends.
Next steps: slip the bookmark into your favorite novel or notebook. The angel will peek over the page and remind you of good reads.
Tips to customize: choose patterned paper, add glitter highlights, or attach a tiny paper star for extra charm. You can make a set in different colors to match your shelves.
These bookmarks give you a quick, rewarding project with a clear payoff: a handmade keepsake that makes reading feel even more special.
6. Paper Angel Wreaths

Want a warm, welcoming front door that feels handmade? A paper angel wreath can give you that soft, friendly look. Here is why this DIY is a smart pick for busy crafters. It uses simple shapes. You can finish it in a day.
What you’ll need
– Foam or cardboard wreath base
– Colored paper for angels
– Glue and scissors
– Ribbons and small decorative elements like berries or pine cones
How to build it
Cut several angels from the colored paper. Glue them around the base, spacing them evenly. Vary the sizes to add depth. Let the glue dry before you add more angels. Tie a ribbon or glue on a bow for the finishing touch. Personalize with seasonal pieces like berries, pine cones, or winter leaves.
Play with colors and texture. Choose metallic or pastel paper to match your door. Add a tiny bell or a bow made from twine for a rustic touch. If you want extra sparkle, tuck a small LED light behind the angels.
Display and care
Hang the wreath on your front door with a sturdy ribbon. Place it where it won’t fade in bright sun. Store it flat when the season ends so the angels stay crisp. Consider swapping in different colors for a fresh look next year.
7. Angel Shadow Boxes

Angel shadow boxes pull a gentle scene into real life. The 3D layers add depth and charm to any room.
– What you’ll need
– A deep frame or shadow box
– Background paper or fabric
– Angel cutouts or simple shapes
– Stars, clouds, and small decorative bits
– Glue, scissors, a craft knife, and foam dots for lift
– Optional string lights or glitter for a soft glow
Here is the plan.
– Start with the background. Add color or a small sky pattern.
– Glue the background to the back of the box.
– Place your angels in the scene. Set some on foam dots to raise them a bit.
– Scatter stars or clouds around. Layer them to create depth.
– Find a focal spot. Put your main angel there and add smaller details around.
– Display ideas
– Use it as a table centerpiece for a calm vibe.
– Hang it on a wall to brighten a hallway or bedroom.
– Add tiny LED lights inside for a gentle glow at night.
Next steps: trim any extra glue, let it dry, and hang or place your shadow box where you can enjoy the heaven you made. With care, it becomes a memorable keepsake and a warm touch in your space.
8. Angel Gift Tags
You want a small, heartfelt touch on gifts. Angel gift tags fit the bill. They’re quick to make and easy to customize. Here’s how to craft your own.
Materials you need:
– Use cardstock or thick paper.
– Cut with scissors for clean edges.
– String or ribbon to tie the tag on.
– Markers, colored pencils, or gel pens for color.
– Optional: a hole punch to make neat holes.
Let’s break it down.
– Cut tag shapes from the cardstock. Start with a simple oval or rectangle with rounded corners. You can also try a tiny angel silhouette for variety.
– Draw a simple angel. A small circle for the head, a curved line for a halo, and two soft wings do the job. Keep lines light so you can color over them.
– Color the scene. Use pastel tones for a gentle look or bright colors for a playful mood. Add a touch of gold or silver for a little shine.
– Make a hole at the top. A small hole helps you thread the string neatly.
– Attach the string and jot a note on the back. A short birthday wish or “From [Your Name]” makes it personal.
Tips for great tags:
– Try different color schemes to match each gift.
– Keep the back clean but add a tiny signature or date.
– If you’re short on time, use a simple angel stamp and write a quick message.
These angel gift tags bring warmth to any present and show you care.
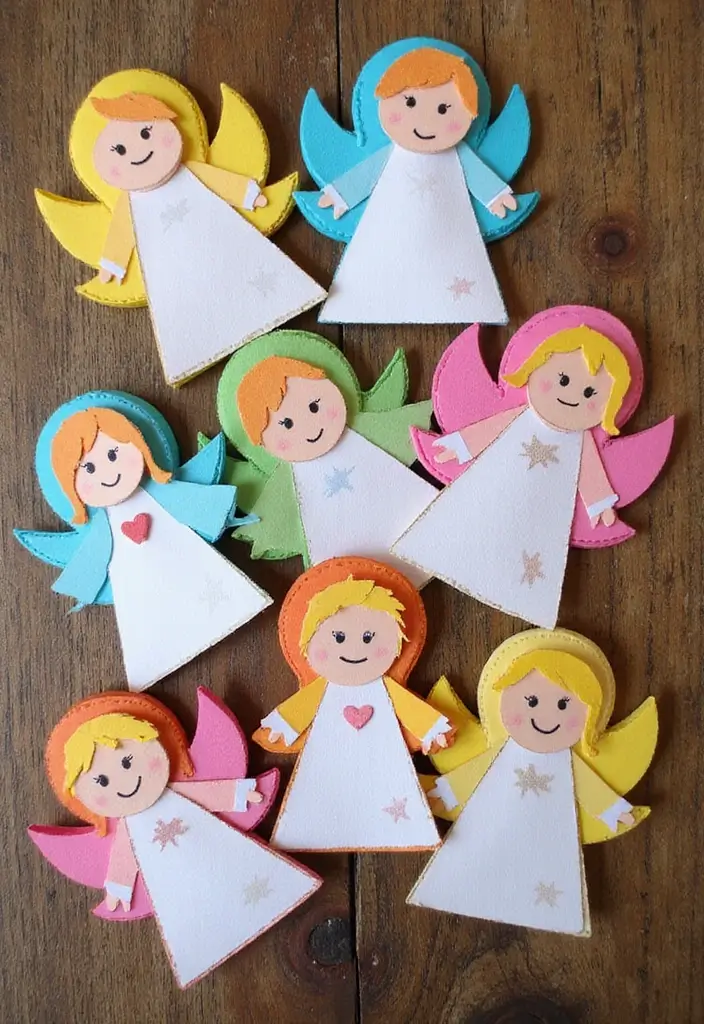
9. Paper Angel Puppets

Turn a small craft into a tiny theater
You want a quick activity that sparks imagination. Paper angel puppets do that. They’re easy to make and fun to play with.
You’ll need
– Paper or cardstock
– Popsicle sticks
– Glue and scissors
– Markers or colored pens
Make the angels
Cut out simple angel shapes. Glue the top of each figure to a popsicle stick. Press gently and wait a moment for the glue to set.
Decorate
Draw faces, robes, and wings with markers. Add color to make each puppet unique. A tiny bit of glitter is fine if you like, but keep it simple so kids finish fast.
Play ideas
Use the puppet like a handle and move it to act out a short scene. Try a kindness story or a holiday helper tale. This boosts storytelling and helps kids practice talking.
Tips for success
– Choose sturdy paper so the puppets last
– Let kids pick colors to boost ownership
– Keep scissors and glue where kids can’t reach them alone
– Store finished puppets in a box for quick setup next time
10. Angel Mobile

Are you after a warm, kid friendly decor idea? A paper angel mobile can bring calm and charm to a child’s room.
Here is why it works: gentle shapes flutter with even a small breeze, catching light from a window.
Materials
– Lightweight paper or cardstock
– Clear string or fishing line
– An embroidery hoop or small wooden ring
Steps
– Cut out several angel shapes in different sizes.
– Attach each angel to a length of string.
– Tie the other end of each string to the hoop at different heights.
– Space the charms so some hang low and others sit higher.
– Check that knots are tight and you have a balanced spread.
Customization
Personalize it to fit your space. Use pastel colors or your child’s favorite hues. Draw simple wings or tiny halos with markers or light paint. You can even use glitter or washi tape for accents. Keep the pieces light so the mobile moves softly.
Safety and Care
Next steps: hang the mobile in a bright corner above a crib or play area. Use a sturdy ceiling hook and make sure the strings are out of reach of little fingers. Dust gently with a soft cloth to keep it looking fresh.
11. Stenciled Angel Posters

Stenciled Angel Posters
If you want quick, cozy art that can brighten any room, this is a great pick. It’s affordable, simple, and fun for all ages. You get a finished, temple of calm you can hang right away.
Here is what you need:
– Poster board or canvas for a sturdy base
– Angel stencils in your favorite shapes and sizes
– Paints or spray paint in colors you love
Here is how to do it:
– Position the stencil on your background and tape it in place so it won’t shift.
– Dab paint over the stencil with a sponge or brush. Keep strokes light for clean edges.
– Let the design dry completely before you move the stencil or add more details.
Next steps to make it yours:
– Frame the poster for a polished look or hang it as is for a casual vibe.
– Try color contrasts like white angels on a soft blue or charcoal silhouettes on cream for a modern touch.
– Add a small caption or quote beneath the image to personalize the piece.
– Repeat with different angel shapes and hang a trio for a gallery wall effect.
Tips you can use today:
– If you don’t have spray paint, a foam roller works well and helps avoid drips.
– Keep extra stencils handy for quick, matching posters in other rooms.
– Clean your stencils after use so they last longer.
12. Paper Angel Lanterns

Here is why you should try paper angel lanterns. They glow softly and make rooms feel warm without loud lights. They work well for evening gatherings and holiday nights.
Let’s break it down. Materials
– Colored paper
– LED tealight candles
– Glue and scissors
Next, cut out angel shapes from colored paper. Keep the feet flat so the lantern sits steady. Fold or roll a strip of paper to form a cylinder. Glue the edges to make a simple lantern frame. If you want, add a handle with a strip of extra paper.
Place an LED tealight inside the lantern. When you switch it on, the glow spreads through the paper and creates a gentle halo. It looks especially pretty in a dark room.
Safety matters. The LED tealight keeps kids safe and you won’t worry about real flames.
To get different looks, try:
– Soft pastels for a calm vibe
– A single color with a white halo cutout
– Two layers of paper to make the light glow more
Next steps: hang the lanterns from a string or set them on tables as cabin lights. Store them flat when you’re done so they last.
You can line them up for a festive effect.
13. Angel-themed Scrapbook Pages
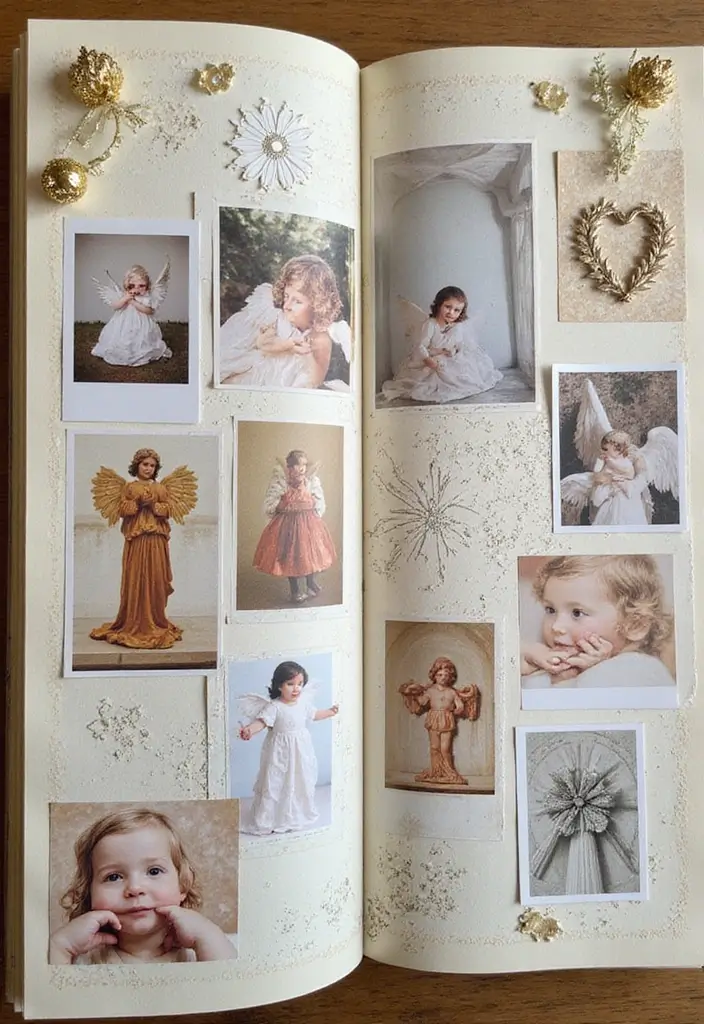
You want scrapbook pages that capture memories with angel charm. These angel-themed pages are simple and meaningful.
What you need
– A scrapbook or notebook
– Colored paper in soft tones
– Photos from holidays or moments
– Angel stickers, stamps, or hand-drawn wings
– Glue, scissors, markers, and a pencil
Design ideas
Start with one memory per page. Anchor the photo. Add wings, halos, or small angels around it. Use a pale border in gold or white. Leave space so the page stays calm. Add a short caption that tells the moment.
Steps to follow
– Pick a photo that shows the moment
– Choose two colors that match
– Cut colored paper to frame the photo
– Add a title and a caption below
– Decorate with stickers or a simple angel drawing
Ways to vary the look
– Mix flat pieces with gentle textures like ribbon
– Try a fold-out page for a longer memory
– Use a writing prompt about the moment
Why it helps
– It keeps memories warm
– It shows love through small art
– It is easy to add new pages later
Next steps: start one page this weekend and see where it takes you.
As you add pages, keep the rhythm simple. Let your own voice shine in captions.
A small page can become a beloved keepsake.
14. 3D Paper Angels
Want a display that pops? 3D paper angels add depth and charm to any room. They stand on shelves, spark in centerpieces, and catch the eye from across the room.
– Materials: Cardstock in colors you love, scissors, glue or double-sided tape, and a few decorative items like ribbons, sequins, glitter, or washi tape.
Make two identical angel shapes. On each shape, score a center crease from head to toe. Fold along the line so the piece forms a shallow 3D figure. Glue the two shapes back to back, wings facing out, to form a standing angel. Cut a small base from leftover cardstock and glue the bottom edge to it, so your angel can stand firmly. Let the glue dry before you decorate.
Time to add style. Draw a simple face with a fine pen, or keep it plain for a minimalist look. Create a halo from a tiny circle of metallic paper and glue it above the head. Tie a ribbon around the neck as a scarf, or add a string of sequins for a gentle sparkle. You can even paint tiny stars on the dress.
Display ideas: group a few on a mantel shelf, line them down a table centerpiece, or hang one on a window using a slender thread. These 3D angels work with any color scheme and fit many occasions.
Here is why this works: the extra depth makes them feel crafted and special. Next steps: grab your supplies and start the design.
Recommended Products

MEANINGFUL 3-D HOLIDAY ANGEL CRAFT – Follow the simple steps to make a 3-Dimensional Paper Angel Ornament that can stand on a table or can be punched and hung for decoration on a tree (string not included). These sturdy paper angels are great on their own, and fun to decorate with your favorite pens and embellishments.

What You Get: you will receive large number of plastic angel wings for crafts, which are sufficient for you to apply for Halloween DIY hair accessories, saving your time purchasing multiple times, and be good props for valentines day party,Christmas party ,Halloween party
Foam Fun Craft Kit!
15. Angel Table Centerpieces

Want a table that feels heavenly without breaking the budget? A paper angel centerpiece can set a warm mood for any holiday meal. It’s simple, personal, and easy to make with everyday supplies. Let’s break it down so you can create a charming focal point in minutes.
What you need
– Cardstock or sturdy paper
– A vase or decorative bowl
– Filler like moss, dried beans, or faux greenery
– Scissors and glue or tape
– Optional: markers for subtle details
– Optional: a small halo made from gold paper
– Optional: a battery powered LED tea light for a safe glow
How to make
1) Plan your angels. Pick a simple silhouette and think about how many you want. Short ones in front, taller ones behind add depth.
2) Cut and shape. Cut the body and wings from cardstock. Fold or bend the back edge so each angel can stand up or tilt slightly.
3) Add tiny details. Draw faces or halos with a marker. Glue on a halo or small embellishments if you like.
4) Assemble the centerpiece. Place filler in the vase. Tuck the angels among the filler and angle them so they look like they are gathered at the table.
5) Light it safely. If you use lights, choose LED options only. Arrange them so they don’t heat the paper.
Styling ideas
– Use white, cream, or gold papers for a soft, classic look.
– Mix heights for a dynamic scene.
– Add a few sprigs of greenery around the base to echo the season.
Care and storage
– Gently flatten pieces before storing. Keep all parts in a labeled box so you can reuse them next year.
– Store in a dry place to avoid warping.
Next steps: tailor colors to your table theme and swap in seasonal patterns to refresh the look year after year.
16. Angel-Themed Party Invitations

– Planning a party and want a warm welcome? Angel-themed invitations can set the mood before guests arrive.
– You get invites that feel personal and sweet.
– Materials
– Choose cardstock in soft tones.
– Have envelopes ready for mailing.
– Use colored pens to decorate.
– Gather scissors and glue or tape for shaping.
– Optional extras include a ribbon, stickers, or a tiny feather for texture.
– DIY steps
1) Cut a simple shape from the cardstock for your card.
2) Add an angel motif with wings and a halo.
3) Write the event details clearly. Include who, what, when, and where.
4) Check the layout and make sure the text is easy to read.
5) Let the ink dry, then seal the envelopes.
– Design ideas
– Keep it soft with white and pastel blues or pinks.
– Use a clean font and a tiny halo doodle.
– Add a light touch of texture with a ribbon or a sticker wing.
– Practical tips
– Pre-write guest names on envelopes to save time.
– Include a simple RSVP line.
– Why this works
– The cards feel thoughtful and invite curiosity about your party.
– Quick FAQ
– Mailing timing: Mail them two to three weeks before the date.
– Extra invites: Plan a few extra invites in case of last minute guests.
– Next steps: Grab your supplies and start with one sample invite.
17. Angel Cookie Decorations
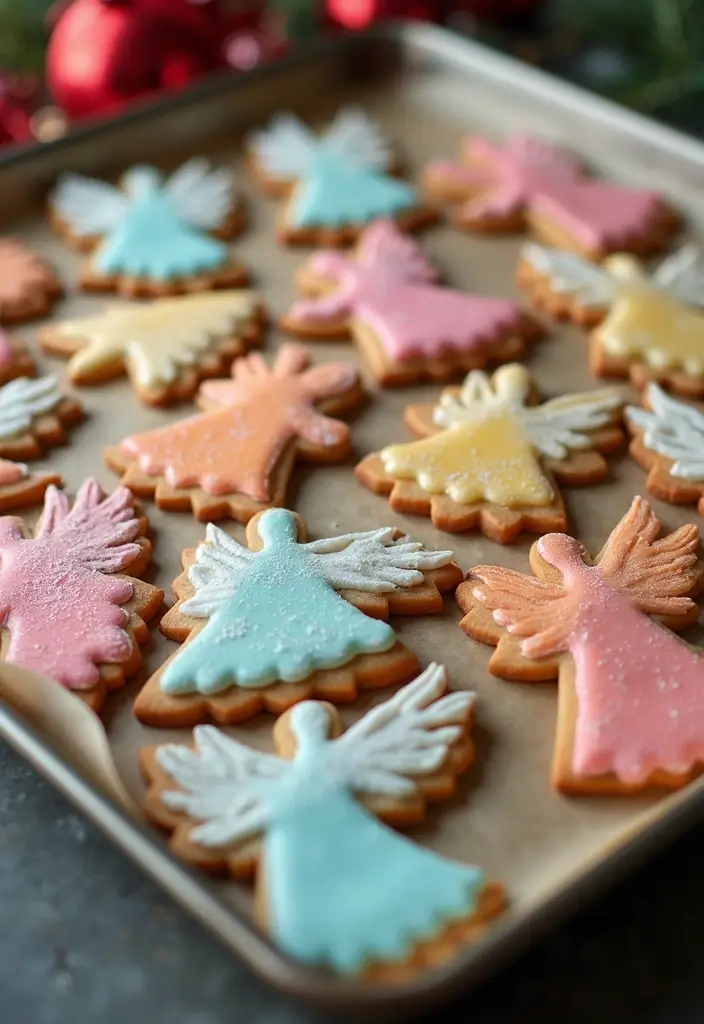
You want angel cookie decorations that are cute and tasty. You can get a heavenly look with simple steps. Use this plain, doable plan to bake and decorate with confidence. You can adapt colors to fit any theme. This plan keeps steps clear and quick.
– What you need. Gather sugar cookie dough, angel cutters, white royal icing, a second color, piping bags with small tips, edible glitter, tiny pearls or gold sugar halos, and parchment paper.
– Shape and bake. Roll the dough evenly, cut angel shapes, and bake until the edges are pale. Let cookies cool completely before decorating. Choose a pale color for the icing to keep the look soft.
– Outline and fill. Use stiff icing to outline each angel. Pipe a thin border, then flood the center with a smooth, lighter icing.
– Details and halo. Draw gentle wings with curved lines. Add a tiny eye and a halo using gold sugar or a yellow ring.
– Color and sparkle. Keep colors soft, ivory, white, pale pink. Dust with glitter for glow and add tiny pearls for charm. This works for spring and baby showers too.
– Pack, display, and tips. Set cookies on a tray for a party, or wrap in clear bags with a ribbon for gifts. Chill icing between steps and avoid humidity. If you bake a big batch, freeze the baked cookies and decorate later. Let them set overnight for best shine. Store leftovers in an airtight tin.
18. DIY Paper Angel Gifts

Need a simple gift that feels warm and personal. DIY paper angel gifts fit that need. They’re easy to make and kind to your budget.
What you need
– Cardstock in colors you like
– Scissors
– Markers or pens
– Small gift items (candies, notes)
– Optional string or tape for attaching
How to make them
1) Sketch a simple angel on the card stock.
2) Cut out the angel with steady hands.
3) Decorate. Color the dress, add a halo, or pattern.
4) Attach a small gift to the back. Tape or glue works.
5) Add a string or ribbon to hang it.
Tips to shine
– Use two tones.
– Halo in gold.
– Write a short note on back.
Where to share
– Slip a few onto neighbors’ doorsteps for a warm hello.
– Present them to teachers or classmates as a thanks.
– Put them in family stockings or gift bags.
Next steps
– Set up a small crafting station. Keep colors, scissors, and gifts within reach.
– Make a batch. Cut many angels, color them, and attach gifts in one go.
With a calm pace, you can finish a batch in an afternoon and share joy with many people.
Keep extras for neighbors who drop by.
These little angels bring joy where you drop them.
They stay neat in a pocket, bag, or on the tree.
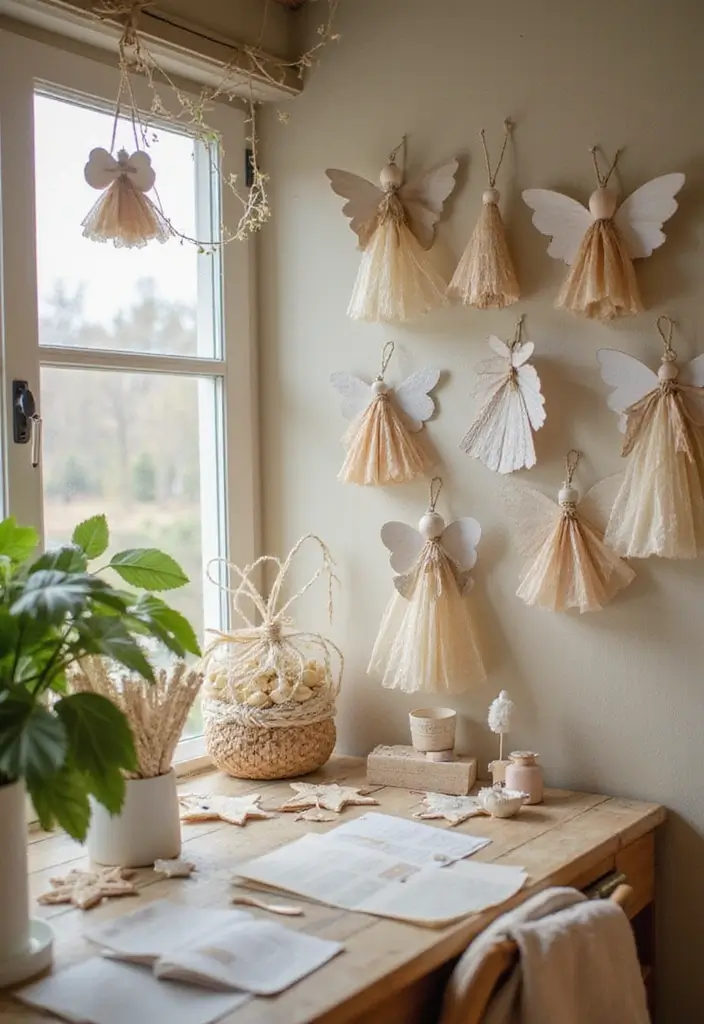
19. Angel Wall Hangings
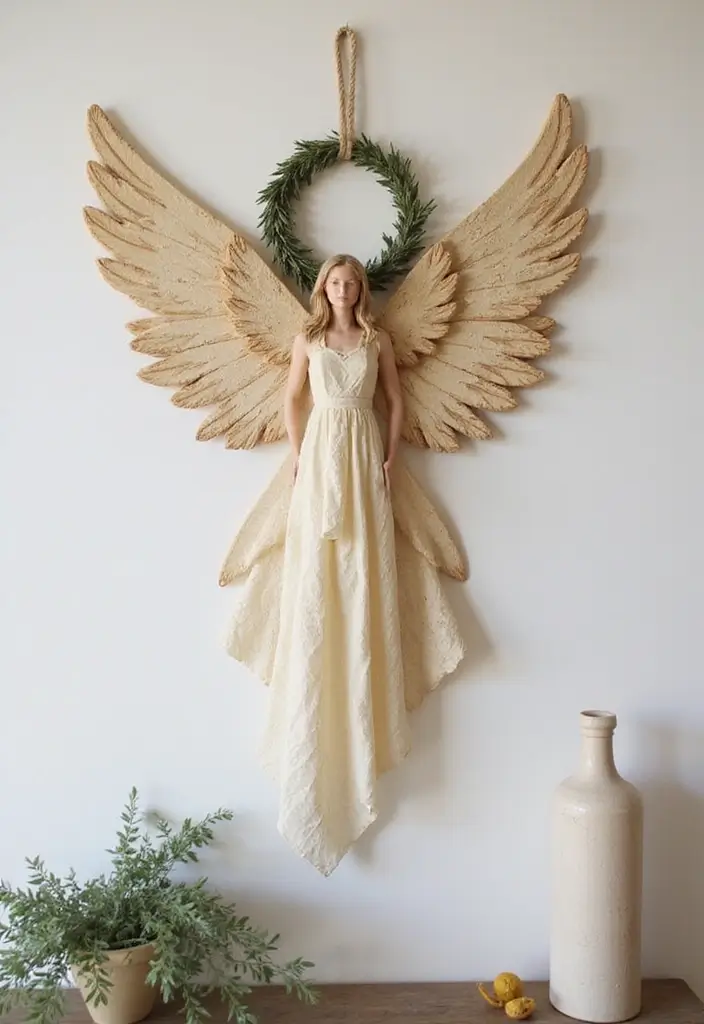
Want a warm, handmade touch on your walls? Angel wall hangings are a simple project that brightens any room and invites calm.
– What you’ll need: sturdy cardstock, string, wooden dowels or small hoops, scissors, glue or tape. Optional: beads, dried flowers, pine needles for a rustic vibe.
– Make the angels: cut easy angel shapes from cardstock. A template helps keep the bodies even. Cut a body and two wings, then poke small holes at the top of the head and at each wing edge.
– Put them together: thread string through the holes. Tie to a dowel or hoop. Space several angels apart so they hang freely and look like a tiny choir.
– Add details: slide on beads for halos, or glue on tiny buttons for eyes. Tie on a sprig of dried lavender or a bit of pine for a natural touch.
– Display tips: group three to five on a wall, or hang them in a row across a doorway. Use a light wall so the paper stays bright and cheerful.
These steps take little time but give you cheerful wall art that echoes hope and love. Hang them where sunlight lands for a glow.
20. Mini Paper Angel Gift Boxes

Need a tiny, heartfelt gift for friends, teachers, or teammates? Mini paper angel gift boxes fit the bill. They’re easy to make and hold a sweet surprise like candy, a note, or a small trinket.
What you’ll need
– Sturdy paper or cardstock
– Scissors
– Glue
– Optional: markers, stickers, a ribbon
Here’s how to make them
1) Cut a small square of cardstock. Fold along the edges to form a tiny box with a lid.
2) Glue the sides so it stays strong.
3) Create a simple angel on the outside. Draw a halo and tiny wings, or glue a white paper cutout.
4) Decorate the box. Color it softly, add a touch of glitter, or wrap a pale ribbon around the lid.
5) Fill it with goodies. A candy, a short note, or a tiny charm fits nicely.
6) Close the lid. If you like, tie a string to keep it secure.
Here is why this works. This idea is small, affordable, and quick.
Next steps: Make a few at once, store the blanks flat, and fill them as you need. Use these mini paper angel gift boxes for holidays, birthdays, or just small acts of kindness.
21. Paper Angel Window Clings

Here is why this works: want a quick way to brighten your windows? Paper angel clings do the job. They add a warm, festive feel without a big mess. You can finish them in minutes and reuse them year after year. Here is why they fit busy homes.
What you’ll need
– Transparent plastic sheets
– Colored markers
– Scissors
– A damp cloth or a light spray bottle of water
Steps
1. Draw simple angel shapes on the plastic.
2. Cut them out with scissors.
3. Color faces, gowns, and halos with markers.
4. Lightly wet the window, press the cling on, and smooth out any bubbles.
Storage and care
To remove, peel gently. Store flat in a folder or sleeve so they stay crisp for next season.
Tips and ideas
Try glow markers for a soft shine. Use different sizes to make a tiny choir on one pane. Layer several clings for a village scene that feels cozy.
Display ideas
Cluster a group of angels along a large pane to greet guests. Try soft pastels for a calm winter look on kitchen windows. Line a row above a porch window for a friendly, festive feel.
These paper angel window clings work on clean glass and lift off without a mess. They’re perfect for quick holiday decor on any window.
22. Sun Catcher Angels

If you want a glow that moves with the day, try sun catcher angels. They catch sunlight and send tiny color into your room.
Here is why this craft works. It uses easy materials and creates a glassy look without a big price tag.
What you will need
– Transparent plastic sheets or wax paper
– Colored markers or tissue paper
– Scissors
– String or ribbon
Steps to make your angel
1) Draw or cut a simple angel shape. Keep the design clear so thin parts stay strong.
2) Color the wings and gown with bold tones, so light shows through well.
3) If you want more glow, layer tissue paper on the clear sheet.
4) Cut out the shape and punch a small hole for hanging.
5) Tie on a string and hang in a sunny window.
Next steps: watch the sun move the colors as it climbs.
You can switch designs with the season.
Kids can help color.
Tips for more light: place them in direct sun, hang along a curtain rail, or group a few.
Safety note: small pieces can be sharp for kids, and sheets bend in heat.
Store finished angels in a dry, safe spot.
Store extra sheets for future crafts.
Reuse old shapes for quick, new looks today.
Keep a few spare sheets for rainy days.
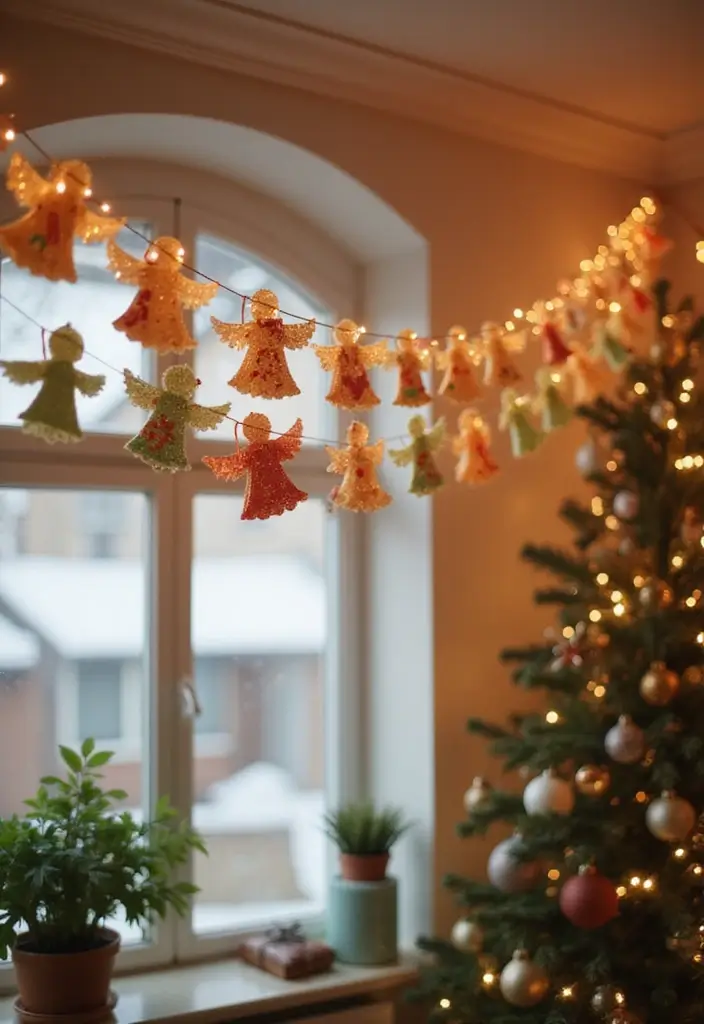
23. Angel Paper Chains
Looking for a bright, easy way to decorate for a holiday or party? Angel paper chains pair charm with simplicity. They cost little, are quick to make, and kids can join in. You get a long, flowing garland that feels festive without heavy work.
Here is why this craft works: linked angels move a bit when you walk by, and it brings soft color to any room.
Materials
– Colored paper or cardstock
– Scissors
– Glue or tape
– Optional: string, hole punch, or a little glitter for sparkle
Steps
1) Draw simple angel shapes on your paper.
2) Cut out the shapes.
3) Poke or cut a small slot at the top of each angel so you can link them.
4) Link them with glue, tape, or a thin string to form a chain.
Display ideas
– Drape the garland over a doorway, along a wall, or around the tree.
– Create shorter strands for place settings or a mini runner on the table.
Tips
– Use two colors for a two-tone chain.
– Vary sizes for a playful look.
– Store flat to keep the links from sticking.
Next steps: grab scraps and start crafting. Your angels will light up the room. They store easily for future seasons.
24. Angel Photo Frames
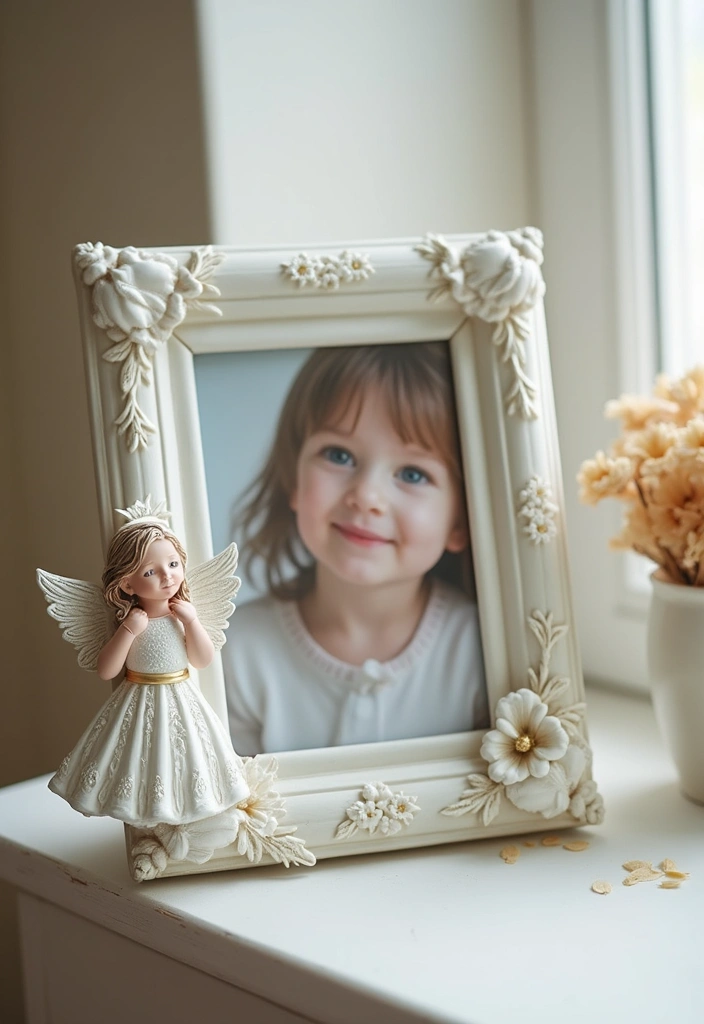
You want a simple way to show a picture with a soft, heavenly feel. You can turn plain frames into angel frames that shine. This quick project adds a personal touch to any room and fits small photos ideas, too.
What you need
– Plain photo frames
– Angel cutouts from paper or cardstock
– Clear craft glue
– Scissors and ruler
– Optional: markers, stickers, ribbon, a thin border paper, or a favorite photo
Step-by-step
– Start with clean frames. Wipe away dust so glue sticks well.
– Lay out your angel cutouts around the edges to plan the look.
– Glue the cutouts in place. Press gently and hold a moment so they stick.
– Let the glue dry fully before moving the frame.
– Slip in your photo. Choose a size that fits the frame snugly.
– If you want, add a small ribbon or stand on the back for display.
Tips for a polished finish
– Use glue dots for a neat edge without messy drips.
– Pick colors that match your room to keep the frame cohesive.
– Add a thin border with a maker or marker to frame the angels cleanly.
Why this works
It’s inexpensive and easy. You get a cute, custom look in minutes. The result feels personal and special, perfect for daily joy or gifting.
Gift ideas
These angel photo frames make thoughtful presents for friends and family. Swap in a shared memory to create a keepsake they’ll love.
25. Hand-painted Angel Cards

You want a gift that speaks from the heart. Hand-painted angel cards give that warm, personal touch.
What you’ll need
– Blank cards or sturdy cardstock
– Watercolors or acrylic paints
– Small brushes and a cup of water
– Pencil and eraser
– Optional: soft pastels, a white gel pen, or a fine liner for details
How to make them
– 1) Lightly sketch a simple angel on the card front.
– 2) Keep the shapes big and friendly.
– 3) Paint with soft colors and let the first wash dry.
– 4) Add gentle shading and a simple halo.
– 5) Leave the inside blank for your message.
Ways to use them
– Send to family and friends as a real, handmade note
– Use as place settings at your next holiday table
– Gift a set with a handwritten note tucked inside
Tips for best results
– Practice on scrap paper before your card
– Use light washes for a soft angel look
– Let each layer dry to avoid smudges
– Sign with a short name and date for a keepsake feel
Your handmade angel cards bring smiles and warm moments.
26. Quilled Paper Angels
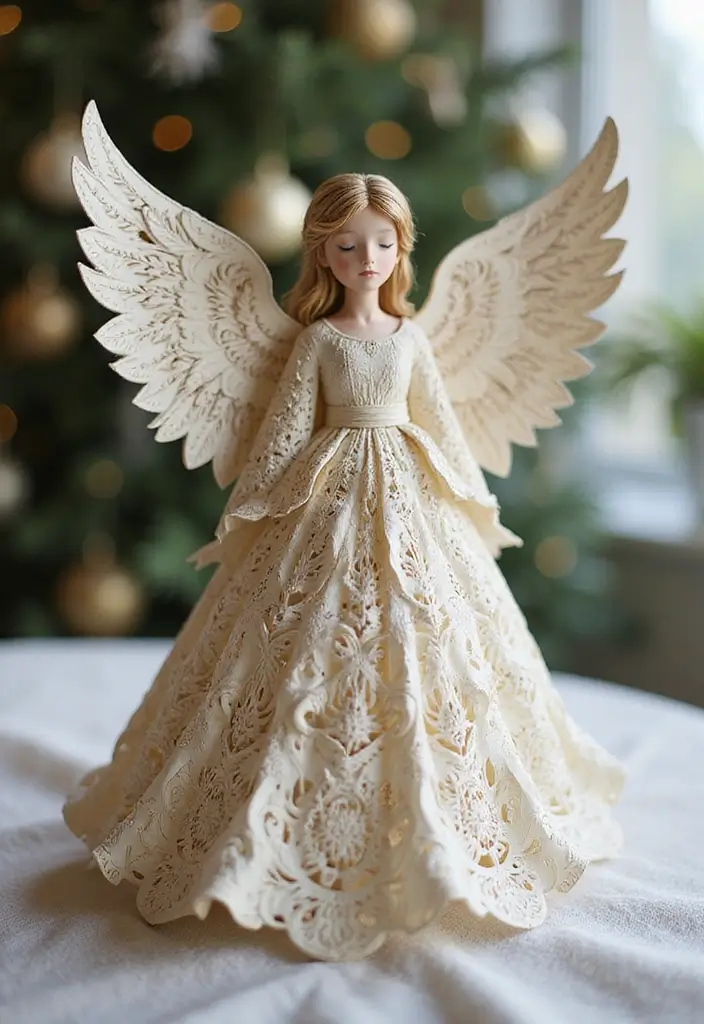
Want a soft, airy angel on your craft table? Quilled paper angels give you a delicate look with simple steps. Quilling uses thin paper strips you roll and shape into tight circles, spirals, and teardrops. The final piece feels light and welcoming, perfect for gifts or home decor.
Here is what you need to start:
– Quilling paper strips
– A quilling tool
– Glue
– Tweezers (helpful)
– Scissors (optional)
Here is how you do it:
1) Head. Roll a tight circle from a short strip and glue the end to keep it tight.
2) Body. Roll a longer strip and shape it into a slim oval or marquise to be the torso.
3) Wings. Make two large teardrops or marquise shapes for the wings.
4) Halo. Coil a tiny ring or small circle for the halo and set it aside.
5) Assembly. Glue the head to the body. Attach the wings behind the torso. Place the halo on top. Hold with tweezers until the glue starts to set.
6) Finish. Let the angel dry fully before you move it.
Display ideas and uses:
– Frame the angel for a sunny little wall accent.
– Turn it into a delicate Christmas ornament.
– Create a small group for a garland or mobile.
Tips and quick variations:
– Use pastel papers for a soft look.
– Mix glossy and matte strips for shine and depth.
– Add tiny eyes with a fine pen or dot of ink for character.
Next steps: start with one simple angel, then try color mixes or mini versions for a festive touch.
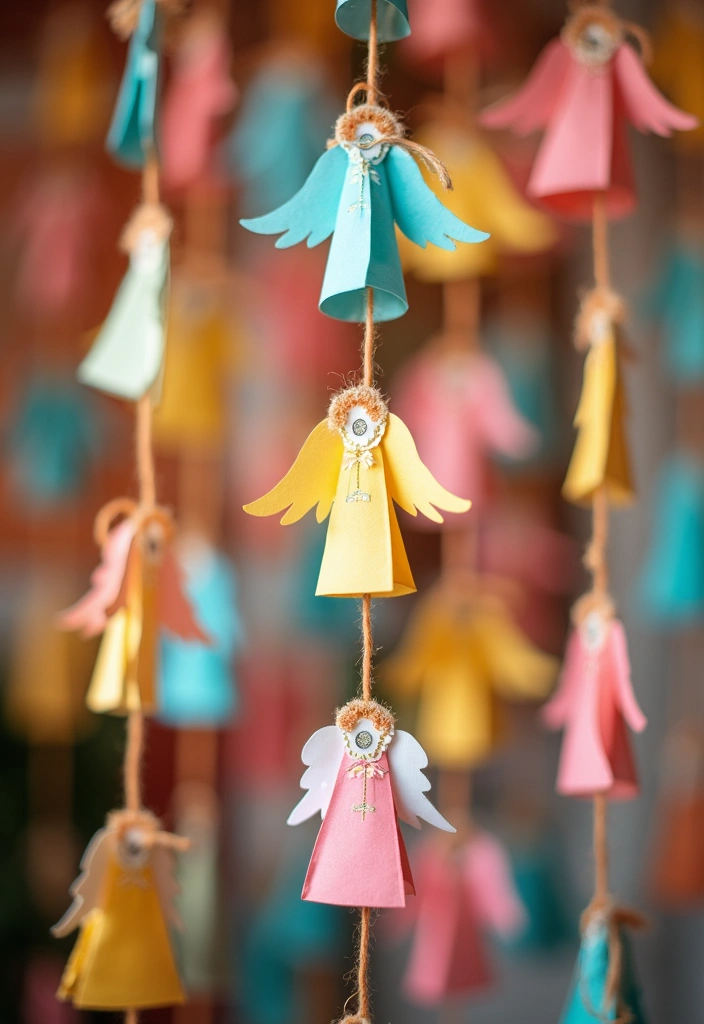
27. Paper Angel Garlands
You want a quick, cozy touch for any room. A paper angel garland fits the bill. It works for birthdays, holidays, or a simple, feel-good project.
Here is why it’s popular: the shapes are easy, colors can be changed, and you can make a long string or a short banner in minutes.
What you need
– Paper or cardstock in colors you love
– String, twine, or ribbon
– Scissors
– Glue or tape
– Optional: markers, glue sticks, or stickers
Steps
1) Cut out a dozen small angel shapes from your paper. Keep a simple body and wings for fast shaping.
2) Decorate each angel. Add eyes, a tiny mouth, and a halo if you like. A splash of color makes them pop.
3) Space them along the string. Clip or knot at even distances, about 3 to 4 inches apart.
4) Hang your garland. Drape it over a mantle, frame a doorway, or loop it on a wall for a soft, festive line.
Make it yours
– Try white or metallic paper for a winter look.
– Mix light colors with pastels for a birthday vibe.
– Use different sizes for movement and depth.
Care and display
– Stretch the string gently to remove kinks after use.
– Store flat in a folder or between sheets of paper so it stays crisp and ready to hang again.
28. Angel Jewelry Holders
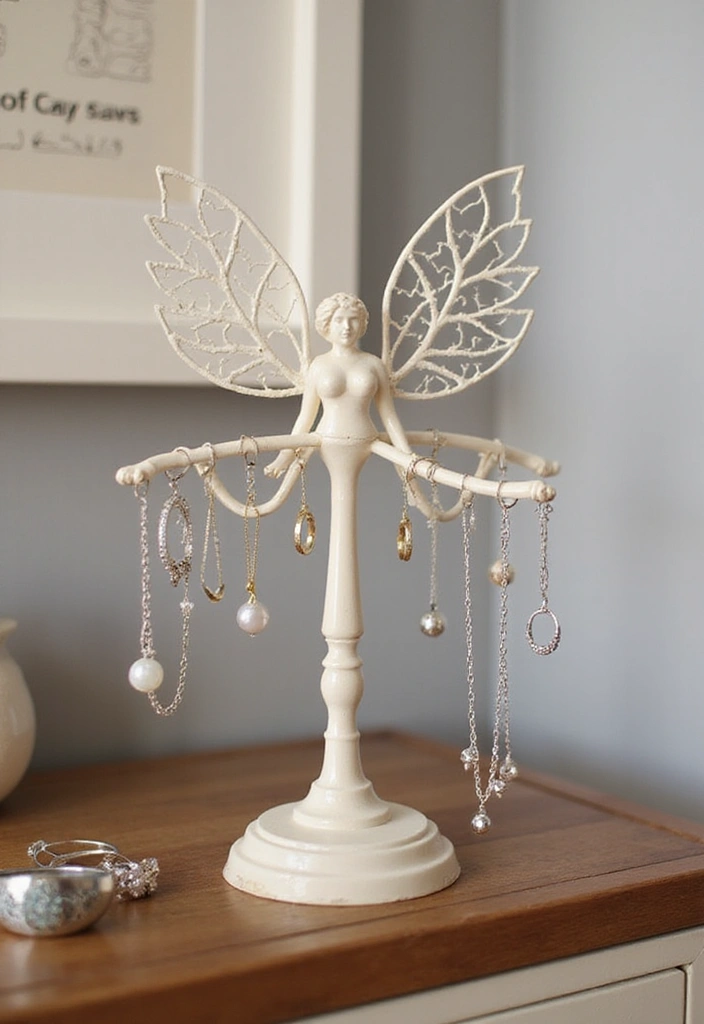
Need a neat, pretty way to store small jewelry? You can make an angel jewelry holder. It sits on your dresser and keeps earrings and rings in place. It is easy to make and a nice gift. Here is why you should try it.
What you need
– Cardboard or thick paper
– Decorative paper to cover the angel
– Scissors and glue
– Pencil and ruler
– Optional: paint, markers, or stickers for color
– Optional: tiny hook or button to hold rings
How to make it
1) Draw a simple angel shape on cardboard and cut it out.
2) Cut a small base so the figure can stand steady.
3) Cover both pieces with decorative paper. Glue smoothly and trim edges.
4) Create jewelry spots on the base. Make tiny slits for earring posts or glue on a small bead for a ring stand.
Decorate
Add color with paint or stickers. Let everything dry before use.
Use and care
Place the holder on a dresser. Slide earrings into the slits. Put rings on the base or ring stand. Keep it away from water.
Tips
– Pick colors that fit your room.
– Use light glue so the paper stays flat.
– Make a pair of angels as a mini set.
Give it a try this weekend. You can share your angel with a friend and start a small craft circle.
29. Angel Memory Jars

Memory jars give your memories a tiny home. They hold notes, wishes, and moments you want to treasure. If you want a simple, heartfelt craft, try Angel Memory Jars.
– Materials:
– Clean jars with lids
– Colored craft paper
– Scissors and glue
– Twine or ribbon
– Optional angel cutouts or stamps
– How to make:
1) Cut angel shapes from colored paper. Keep designs simple with small wings and a halo.
2) Write a short memory or wish on each note. Fold or roll it so it fits the jar.
3) Place a few notes inside. Add one angel on the inside of the lid so it shows when you open the jar.
4) Close the jar. Wrap the neck with twine or ribbon. Tie a neat bow, add a tag if you like.
5) Decorate the outside. You can glue a paper angel to the front or doodle a friendly design with markers.
– Uses:
– Give as a warm gift to someone you care about
– Use as home decor on a shelf or coffee table
– Start a memory ritual by adding notes weekly
– Tips:
– Pick colors that match a room
– Keep extra notes ready for quick additions
– Label jars by year or theme for easy sorting
Your jar grows with each memory you make.
Conclusion
Crafting paper angels offers a myriad of possibilities to enhance your home decor while fostering creativity.
From decorations to functional pieces, these ideas not only add a heavenly touch to your space but also create lasting memories.
Explore these DIY projects with family and friends to spread joy and cheer this season!
Note: We aim to provide accurate product links, but some may occasionally expire or become unavailable. If this happens, please search directly on Amazon for the product or a suitable alternative.
This post contains Amazon affiliate links, meaning I may earn a small commission if you purchase through my links, at no extra cost to you.
Related Topics